You are using an out of date browser. It may not display this or other websites correctly.
You should upgrade or use an alternative browser.
You should upgrade or use an alternative browser.
1976 Superior 54XL Restoration Log
- Thread starter Jean-Marc Dugas
- Start date
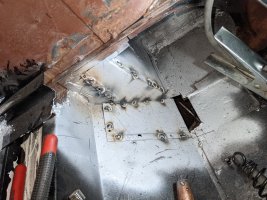
It takes a little practice and the spot you're looking to repair is not a good one to get a torch into. If you could access it from the outside it might be a lot easier.
Jean-Marc Dugas
PCS Member
The outside is harder to get to because this is in line with the frame. I applied seam sealer to both sides today and will give it the garden hose test in a few days to test it.It takes a little practice and the spot you're looking to repair is not a good one to get a torch into. If you could access it from the outside it might be a lot easier.
Jean-Marc Dugas
PCS Member
Flooring plywood cut and primed. I applied 2 coats of wood filler on the outside to make sure that there are no gaps and crevices that will show through the flooring material.
Note to anyone doing this. Spend the extra money to get smooth plywood. Do not purchase standard plywood. The extra money for the wood filler and the time it takes to do it correctly is not worth it and ends up costing more.
I am taking a break for the weekend, but the next steps are to apply a second coat of primer, decide if I am bolting the plywood down and apply the flooring material, and then cut the door out or cut the door out first and then bolt the plywood and glue the flooring material.
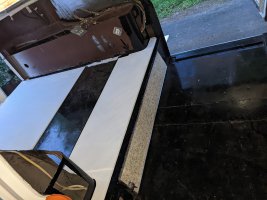
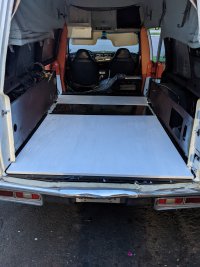
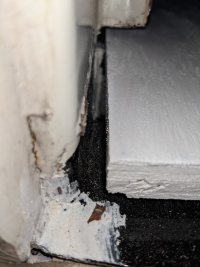
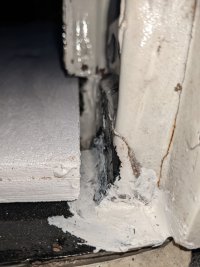
This is probably why the rear U channel had so much rust. The gap between the edge of the plywood and the door frame is quite large. I guess I will be buying a few more tubes of seam sealer......
Note to anyone doing this. Spend the extra money to get smooth plywood. Do not purchase standard plywood. The extra money for the wood filler and the time it takes to do it correctly is not worth it and ends up costing more.
I am taking a break for the weekend, but the next steps are to apply a second coat of primer, decide if I am bolting the plywood down and apply the flooring material, and then cut the door out or cut the door out first and then bolt the plywood and glue the flooring material.


This is probably why the rear U channel had so much rust. The gap between the edge of the plywood and the door frame is quite large. I guess I will be buying a few more tubes of seam sealer......


The floor in my 1969 Miller-Meteor was screwed down with flat head self-drilling screws that lay flat with the plywood. I don't know if Ed sourced them or just reused what was original to the car when he replaced the plywood. I had a local linoleum installer glue down the linoleum, and it came out perfect. Once it was completed, you couldn't see the seams in the material. He did the floor well cover with a separate piece of linoleum and matched the pattern perfectly to the floor.
Tim Prieur
PCS Member
Looking great J-M! As I have said, if Superior had you working for them in the day, none of these issues would have occurred. 
Bill Leverett
PCS Member/Paramedic Supervisor
Looking better each and every time. Thanks for sharing JM.
The air gap on the sides is way inside the trim line. The question is was it a solid steel floor under the wood or is it open like the Pontiac you did. The normal way to lay the flooring material is to cut all openings using the old for a pattern. Then once the subfloor is down fill the seams. A step the plant didn't do and let it dry. Then cover it with a sheet of tracing paper. Taping all seams. Trim it to the shape of the floor and cut out all openings. Roll the flooring out on a flat surface pattern up, to relax when this is going on. Then lay the paper on the flooring. You can shift it around to get the pattern centered if you want or best use. You have covered the wood with glue and it setting up while you're doing this. Then cut out your flooring. Mark your hatches as to orientation. A piece of tape works best to mark on. By now your glue is set up. You have your cutout in a safe place and you are ready to lay the flooring on the wood. Here is where your buddies come into play. And the air gap on either side. You have to cut your flooring to an exact match to the subfloor to understand how you want to line it up before you get it into the car. Pick a 90 deg angle. Rear door left-side, hatch, foot well anyone that you can work with easily and touch it down there first getting your corner and working both ways along the sides till you can see your straight. Then across the floor. Meantime your partner is holding the far side up off the glue as you crawl in and work your way to them. Others have different ways but this one has worked well for me. The key is to have your cut-out pattern run in line with the floor when you are done. Is surprising how big a gap you have to allow for the trim and the swing to get it to open smoothly. Trying to put the flooring on first and then cut out blind leaves you small margins for errors. This way if you are off just a bit you can trim it easily knowing your pattern will run true.
Jean-Marc Dugas
PCS Member
I found these today. I may have to cut the end once they are in place, but it is otherwise close enough.The floor in my 1969 Miller-Meteor was screwed down with flat head self-drilling screws that lay flat with the plywood. I don't know if Ed sourced them or just reused what was original to the car when he replaced the plywood.
The original screw is on the right.
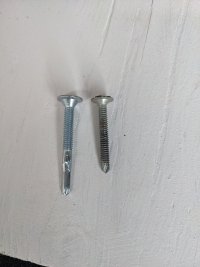
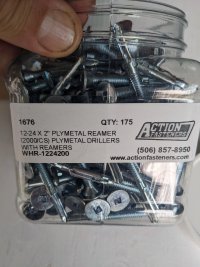
didn't they offer any that were shorter? You could probably get along with one that is 1" or 1 1/2".
Cabinet screws. Now if you lay the old on the new. You can mark the holes and put them in the original spots. That sometimes even works. A few #2-point screwdrivers will slide in and help keep the flooring from creeping around on you as you go. That's what those cheap harbor fright ones are for. Alignment pins.
Jean-Marc Dugas
PCS Member
That is what they had in stock.didn't they offer any that were shorter? You could probably get along with one that is 1" or 1 1/2".
Jean-Marc Dugas
PCS Member
Tonight I tested how waterproof the underneath of the car is.
I purchased a cheap sprinkler and used it to spray water under the car. I moved it in six location under the car and then into the rear wheel well.
The short video is off that sprinkler in operation from the outside of the car.
I purchased a cheap sprinkler and used it to spray water under the car. I moved it in six location under the car and then into the rear wheel well.
The short video is off that sprinkler in operation from the outside of the car.
Jean-Marc Dugas
PCS Member
This is kind of a long and boring video, however, these are my notes from the water test mentioned above. Videos and photos are your friend because you cannot remember everything.
The good news is that the patch I made last week is not letting any water in.
The noise you hear in the background that sounds like a steam locomotive is the noise of the water coming out of the water sprinkler.
The bad news, well I guess this is kind of expected, there are quite a few spots where water is coming in.
We'll have to look at these one by one and figure out the best solution. This is a pain but needs to be done.
Well the good news is it not coming threw were you fixed. I like to use the paint-able water base extra grade sealer. A pick tool like a cotter key puller will pull off the dried-out loose factory stuff. Then when you put it back with a toss brush and a cup of water you can paint it into all those small places rather than just lay it on top. But think about an acid dunk. And opening up all those seams. I don't know how you could find them all to replace all of it.
Jean-Marc Dugas
PCS Member
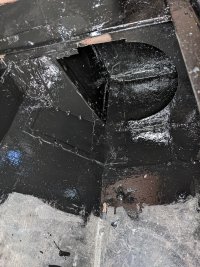
As I dig into the quarter panels it becomes more and more obvious that these cars were built by putting a whole bunch of sheet metal together, some of them tack welded, some of them glued together with seam sealer.
Jean-Marc Dugas
PCS Member
Jean-Marc Dugas
PCS Member
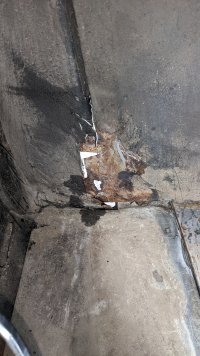
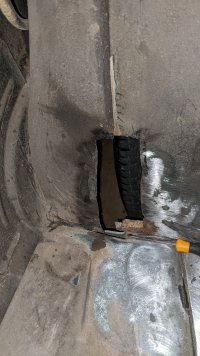
On the passenger side there was a patch already in place, but from the result of the water test it was letting water in.
There was no way I could do anything with the patch so I decided to take it off.
This was a good decision. The folks that placed the patch did not remove the rust underneath. This would have rusted out in no time.
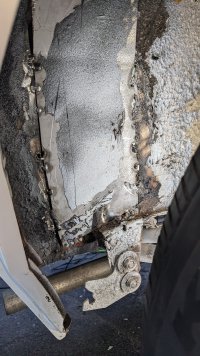
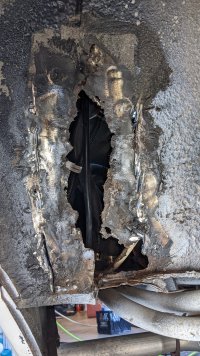
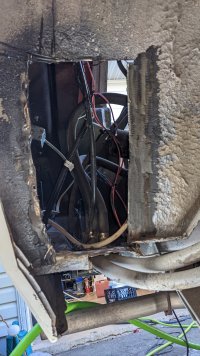
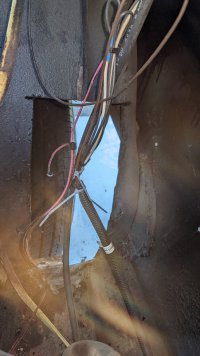
The complicating factor here is that the rear bracket for the fender skirt was on the passenger side parch that I removed. Will have to figure that out when I get there.
There was no way I could do anything with the patch so I decided to take it off.
This was a good decision. The folks that placed the patch did not remove the rust underneath. This would have rusted out in no time.


The complicating factor here is that the rear bracket for the fender skirt was on the passenger side parch that I removed. Will have to figure that out when I get there.
Tim Prieur
PCS Member
What is interesting to me is these are prior to my ownership, so pre 2008. Bruce B., or earlier. With the dry mid west/prairie climate, they probably did not rot out quickly.
As we say in New England, rust never sleeps, it just seeps into every nook and cranny. The way that you are doing this is the correct way, and well-done remediation of rust will last the life of the car as long as you don't subject it to salt ever again.


