Looks like all you need on that door is to move. The upper hinge forward a hair. But check the bushings they may be warn out.
You are using an out of date browser. It may not display this or other websites correctly.
You should upgrade or use an alternative browser.
You should upgrade or use an alternative browser.
1976 Superior 54XL Restoration Log
- Thread starter Jean-Marc Dugas
- Start date
Jean-Marc Dugas
PCS Member
Jean-Marc Dugas
PCS Member
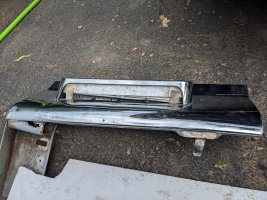
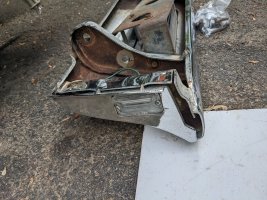
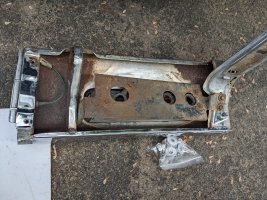
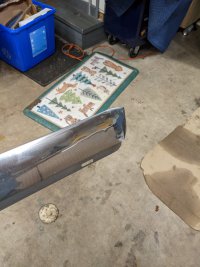
Some more trim work was done yesterday evening. This is the long piece of trim that goes over the rocker panel on the passenger side.
Same as its sister trim on the driver side, there is a lot of what looks like corrosion to the front of the trim. I used a hand drill brush wheel to clean it up, but I was not able to remove it all. I will treat it with rust converter and apply a coat of paint to protect the metal. This uneven surface made it harder to get a smooth finish on the other side because as careful as I was when hammering the dents out of it, the roughness of the backside was acting as a negative for the good side. The metal in front of the corroded area was also noticeably thinner than the metal behind the corroded area, so I had to be a little extra careful not to make it worse.
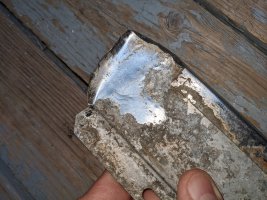
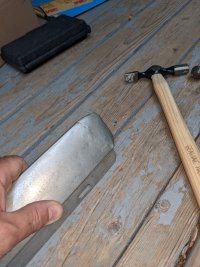
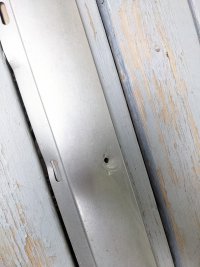
The two areas of interest for this job were a crease across the front end of the trim and depression where the trim is screwed in the quarter panel.

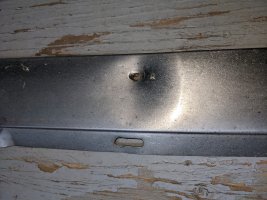
I hammered these two areas out using a small hammer, a small anvil, and some blocks of wood. The result was not perfect, but better than when I started.
Then it was a couple of hours of sanding to make everything shiny again.
I hope to have time to install it on the car this weekend.
Same as its sister trim on the driver side, there is a lot of what looks like corrosion to the front of the trim. I used a hand drill brush wheel to clean it up, but I was not able to remove it all. I will treat it with rust converter and apply a coat of paint to protect the metal. This uneven surface made it harder to get a smooth finish on the other side because as careful as I was when hammering the dents out of it, the roughness of the backside was acting as a negative for the good side. The metal in front of the corroded area was also noticeably thinner than the metal behind the corroded area, so I had to be a little extra careful not to make it worse.

The two areas of interest for this job were a crease across the front end of the trim and depression where the trim is screwed in the quarter panel.


I hammered these two areas out using a small hammer, a small anvil, and some blocks of wood. The result was not perfect, but better than when I started.


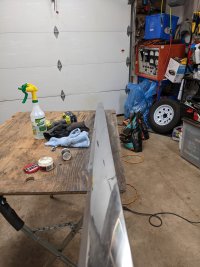
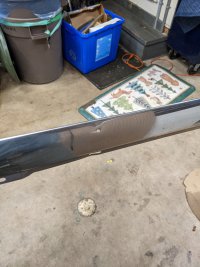
Then it was a couple of hours of sanding to make everything shiny again.


I hope to have time to install it on the car this weekend.
Jean-Marc Dugas
PCS Member
Jean-Marc Dugas
PCS Member
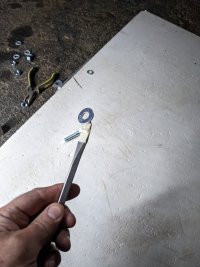
I am sure that if you know what you are doing this is not a 6-hour job!!!!! The number of "You can not get there from here" bolts to secure the end pieces is just incredible. Anyhow, the main thing is that the bumper is now all back in place and all the lights are working.


I had to improvise a little to get the nuts and the bolts together, but nothing a magnet, tape, and lots of bad words can not fix!
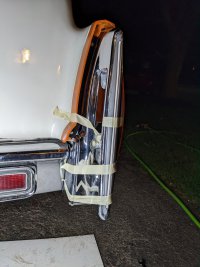
Now that I have tail lights and rear signal lights, if the weather is nice tomorrow, we are heading out for a test run.


I had to improvise a little to get the nuts and the bolts together, but nothing a magnet, tape, and lots of bad words can not fix!


Now that I have tail lights and rear signal lights, if the weather is nice tomorrow, we are heading out for a test run.


Tim Prieur
PCS Member
I hear you. From personal experience, when I replaced that bumper, it was a real jigsaw puzzle to put back together, with multiple pieces that had to be balanced just so, to line it all up. I say if you did it in six hours, well done!
Jean-Marc Dugas
PCS Member
Jigsaw is a good word to describe the bumper!I hear you. From personal experience, when I replaced that bumper, it was a real jigsaw puzzle to put back together, with multiple pieces that had to be balanced just so, to line it all up. I say if you did it in six hours, well done!
Takes me a full afternoon. Getting it off and striped down isn't much better.
Jean-Marc Dugas
PCS Member
I think the next time I will loosely bolt all of the pieces together first, and then install it all on the car. I'll report back on my experience when I do.
It isn't going to be any easier, and you will wind up taking it off to tighten everything and reinstalling it. The bumper ends are the most difficult part. I just finished doing this with my 1978, but I didn't have the advantage of taking it apart first. I got it back from the shop in parts.I think the next time I will loosely bolt all of the pieces together first, and then install it all on the car. I'll report back on my experience when I do.
Jean-Marc Dugas
PCS Member
Friday evening
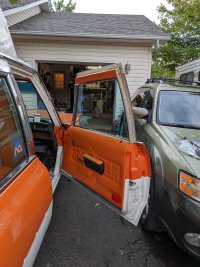
Job #1 - Passenger side door.
The only thing left is to install the door weatherstripping. That will wait until a little later.
Job #2 - Lettering
It will probably look better when the trim is back on and the curtains are in place. I find that the design of the 54XL is not conducive to a great visual appeal with the lettering on the passenger side. This will do, for now. I may change it later.


Job #3 - Belt trim
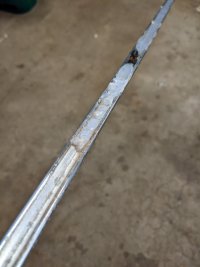
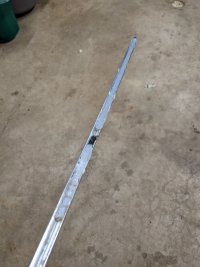
I still have not done much with the belt trim on the passenger side. The issues I had on the driver's side turned me off this darn belt trim! Anyhow, one of the issues with the passenger side belt trim is that at some point someone figured that it would be a good idea to use some sort of glue to hold it in place instead of trim clips. Even though I can appreciate the urge to get away with the clips, that was not such a good idea. I used my Dremel, a small pair of pliers, and a couple of pointy things to remove the glue. Not to self and others, when applying pressure with a pointy thing tool, do not have fingers in its potential path if it slips......


Job #1 - Passenger side door.
The only thing left is to install the door weatherstripping. That will wait until a little later.

Job #2 - Lettering
It will probably look better when the trim is back on and the curtains are in place. I find that the design of the 54XL is not conducive to a great visual appeal with the lettering on the passenger side. This will do, for now. I may change it later.


Job #3 - Belt trim
I still have not done much with the belt trim on the passenger side. The issues I had on the driver's side turned me off this darn belt trim! Anyhow, one of the issues with the passenger side belt trim is that at some point someone figured that it would be a good idea to use some sort of glue to hold it in place instead of trim clips. Even though I can appreciate the urge to get away with the clips, that was not such a good idea. I used my Dremel, a small pair of pliers, and a couple of pointy things to remove the glue. Not to self and others, when applying pressure with a pointy thing tool, do not have fingers in its potential path if it slips......


Jean-Marc Dugas
PCS Member
Saturday was the day I started to work on replacing the rubberized pyramid flooring material from the cab area and the aisle in the patient compartment.
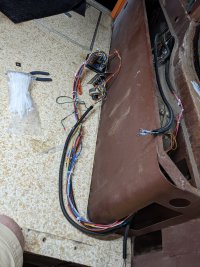
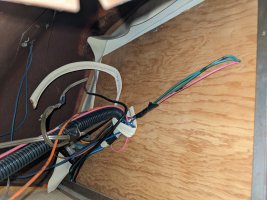
The first thing on the list to do was to remove the passenger side attendant seat. I removed all of the screws I could find, and removed part of the headliner in the cab area exposing a few more screws and some wiring for the AC blower motor, but overall an easy job.
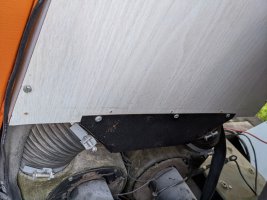
Easy until the seat was not budging. It took me a while to figure it out, but the problem was that the top of the seat was stuck against the roof rib just above it.
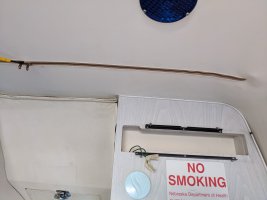
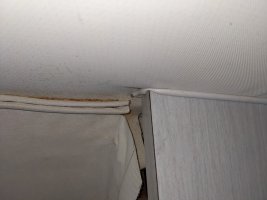
It took me a little while to find a solution, but with a little help from a jack I bought last year to lift the garden shed et voila! The attendant seat was out!
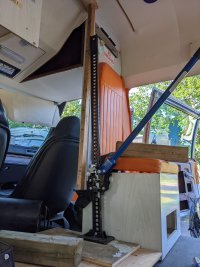
No damage was done and I was ready to start working on the floor.


The first thing on the list to do was to remove the passenger side attendant seat. I removed all of the screws I could find, and removed part of the headliner in the cab area exposing a few more screws and some wiring for the AC blower motor, but overall an easy job.


Easy until the seat was not budging. It took me a while to figure it out, but the problem was that the top of the seat was stuck against the roof rib just above it.


It took me a little while to find a solution, but with a little help from a jack I bought last year to lift the garden shed et voila! The attendant seat was out!

No damage was done and I was ready to start working on the floor.


Jean-Marc Dugas
PCS Member
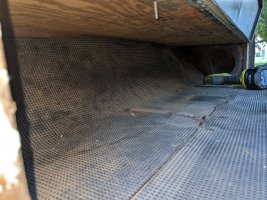
I cleaned the interior of the car, placed all of the tools and tidbits that were everywhere away, and started on the rubberized pyramid flooring, material. I will keep all of the pieces to be used as templates for the new material.
I first removed the material out of the M cylinder cabinet.
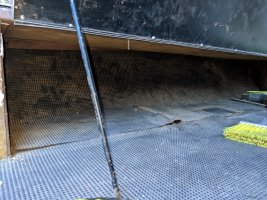
Next, I labeled each piece and removed the material from the isle.
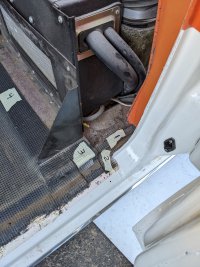
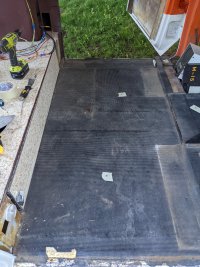
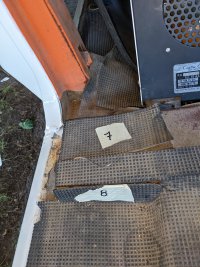
With the material remove it is easy to see where water is coming in. At first glance, it seems that there is only surface rust. I'll look more closely tomorrow.
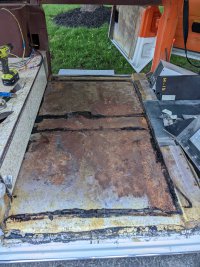
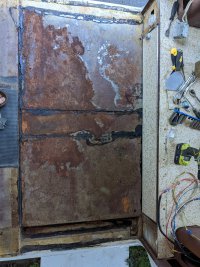


I first removed the material out of the M cylinder cabinet.


Next, I labeled each piece and removed the material from the isle.


With the material remove it is easy to see where water is coming in. At first glance, it seems that there is only surface rust. I'll look more closely tomorrow.


Jean-Marc Dugas
PCS Member
All of the flooring material has been removed from the cab area and from the isle in the patient care area.
Jean-Marc Dugas
PCS Member
Jean-Marc Dugas
PCS Member
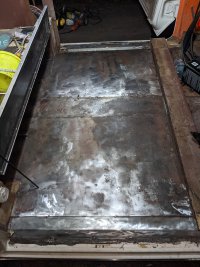
While cleaning the surface rust and removing the old seam sealer from the isle and O2 cylinder compartment I came across a lot of rust in the far corner and as expected, a little bit of exploring revealed daylight.
It looks like the rust is relatively contained in that corner, but we will see in the next few days as I clean the are better. This will be a good area to patch so my lack of welding skills will be hidden from all.....
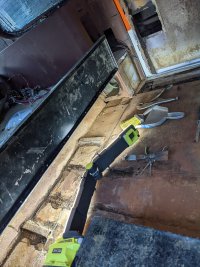
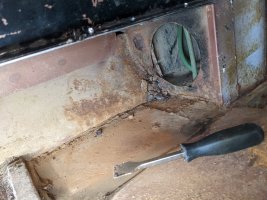
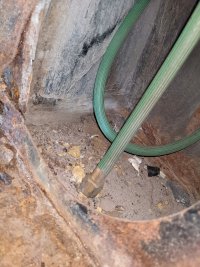
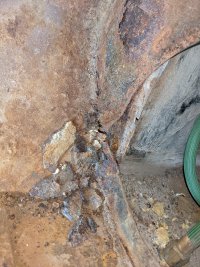
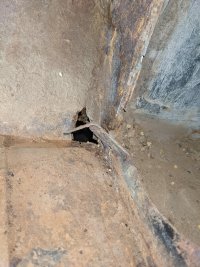
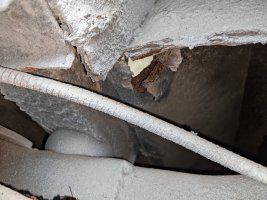
It looks like the rust is relatively contained in that corner, but we will see in the next few days as I clean the are better. This will be a good area to patch so my lack of welding skills will be hidden from all.....


When patching rusted metal, it is best to go a minimum of 50% larger than the hole after you clean it to solid metal. There are no shortcuts to repairing rust.
Jean-Marc Dugas
PCS Member
Since I got back from the 2022 meet I have been focusing my efforts on cleaning up the patient care area aisleway as well as the O2 cylinder cabinet.
The small hole I found the other day has now gotten a little larger.
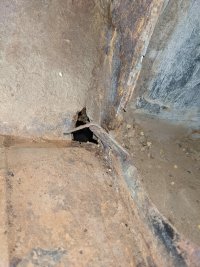
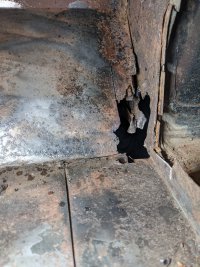
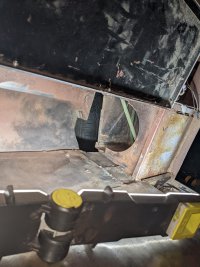
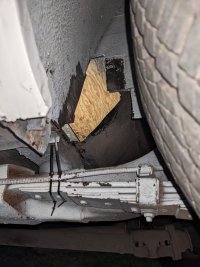
I think that part of the initial problem that caused the rust problem is the spot welding of the wheel well and maybe lack of proper seam sealer allowing for water in this area combined with the way all of the panels are put together creating a square tube under the floor in that area that will collect water, mud and in this case a critter nest.
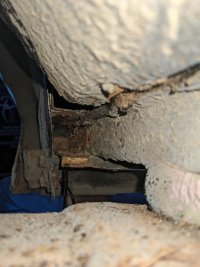
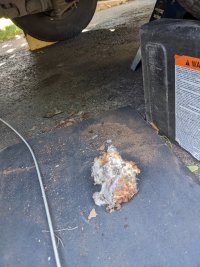
I still have to run a wire brush in that square tube and clean the area I cut out to make it ready for welding patches.
The small hole I found the other day has now gotten a little larger.


I think that part of the initial problem that caused the rust problem is the spot welding of the wheel well and maybe lack of proper seam sealer allowing for water in this area combined with the way all of the panels are put together creating a square tube under the floor in that area that will collect water, mud and in this case a critter nest.


I still have to run a wire brush in that square tube and clean the area I cut out to make it ready for welding patches.


