You'll get there ablut the time you are done.
You are using an out of date browser. It may not display this or other websites correctly.
You should upgrade or use an alternative browser.
You should upgrade or use an alternative browser.
1976 Superior 54XL Restoration Log
- Thread starter Jean-Marc Dugas
- Start date
Jean-Marc Dugas
PCS Member
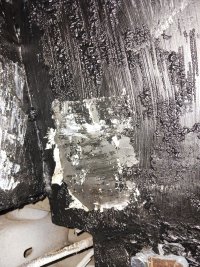
The second patch is now in place. This one was easier to weld than the first one since it was smaller and the Superior metal was in overall better shape. There was only one area that blew out while welding, but it is not a bad thing because it caused me to replace the metal in that area.
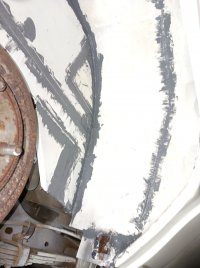
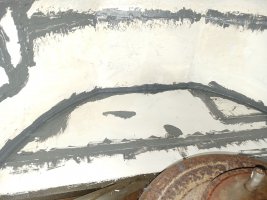
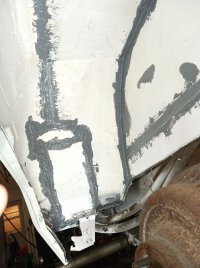
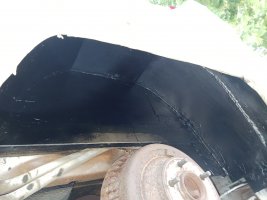
After cleaning the wheel well I used white rust paint to cover the entire wheel well. I used white for three reasons, one because it will show better any areas that I missed, It will show better where I apply the seam sealer and, I did not have enough black rust paint to do the job. The section in the picture below that has not been painted is where I will have to figure out how to reinstall the rear fender skirt bracket.
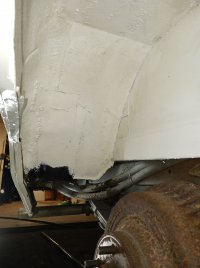
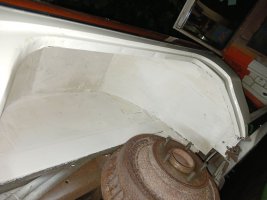
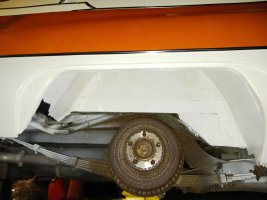
Next will be either replacing the missing rear fender skirt bracket or applying the seam sealer.

After cleaning the wheel well I used white rust paint to cover the entire wheel well. I used white for three reasons, one because it will show better any areas that I missed, It will show better where I apply the seam sealer and, I did not have enough black rust paint to do the job. The section in the picture below that has not been painted is where I will have to figure out how to reinstall the rear fender skirt bracket.


Next will be either replacing the missing rear fender skirt bracket or applying the seam sealer.
One simple way to mount the skirt holder would be a crush nut. Another way is to drill a hole in a scrap piece the weld the nut over the hole. Then drill a larger one in the spot you need them mounted. Put the nut in the big hole and weld the squair in place. You can mount the skirt to get the right place to drill the big holes the put everything togater and tack them once you are adjusted. Then weld it in place.
Jean-Marc Dugas
PCS Member
Did some more work on the rear fender skirt holder.
The plan is to weld the holder to a small angle bracket and bolt the assembly to the patch I just installed. For additional support, I will install additional support on the inside of the wheel well. Using Ed's suggestion I will use some crush nuts to hold the bracket assembly in place.
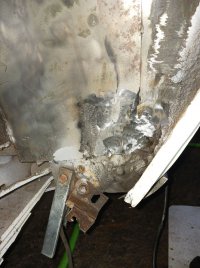
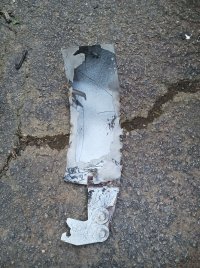
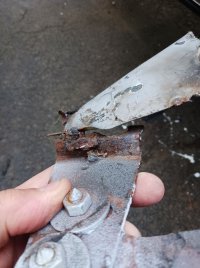
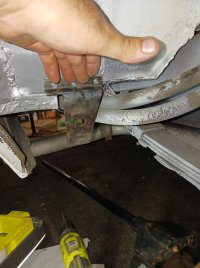
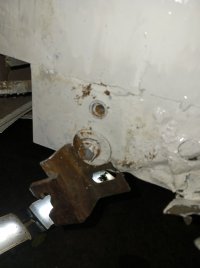
Looking at the way it was put together by the last person that did it gives me great confidence that I can probably do a better job. The following two pictures are of the bracket and the patch it was attached to.
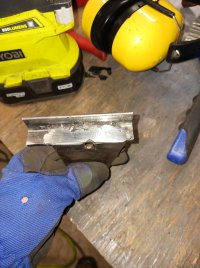
I am rather pleased with tonight's welding job.
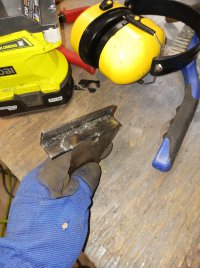
I then test fitted the assembly and primed primed the area where the assenbly will be bolted on.
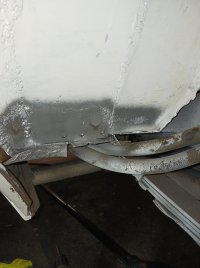
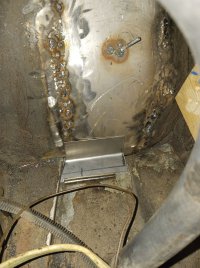
After this, I made the backing plate that will be used to provide additional support to the assembly and drilled the holes that will accept the crush nut. Finally, I primed everything so I can hopefully assemble everything without issues tomorrow.
The plan is to weld the holder to a small angle bracket and bolt the assembly to the patch I just installed. For additional support, I will install additional support on the inside of the wheel well. Using Ed's suggestion I will use some crush nuts to hold the bracket assembly in place.
Looking at the way it was put together by the last person that did it gives me great confidence that I can probably do a better job. The following two pictures are of the bracket and the patch it was attached to.


I am rather pleased with tonight's welding job.


I then test fitted the assembly and primed primed the area where the assenbly will be bolted on.


After this, I made the backing plate that will be used to provide additional support to the assembly and drilled the holes that will accept the crush nut. Finally, I primed everything so I can hopefully assemble everything without issues tomorrow.

Looking good.
Jean-Marc Dugas
PCS Member
I had to make a few adjustments to the original plan, but the rear driver-side fender skirt brackets are now back in place and the fender skirt fits almost perfectly. The rear of the fender skirt will have to be bent in a little as it sticks out about 1/4 inch.
The rear bracket is held in place by 3 bolts and supported by an L shape plate on the inside of the wheel well that is itself bolted in place. This should provide plenty of support for the bracket as well as add rigidity to the area.
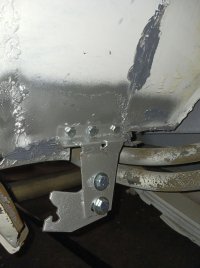
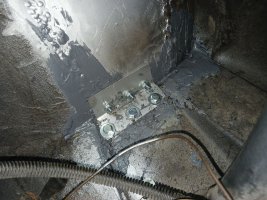
I had to remove the bolts that held the front bracket in place and replaced them with new ones. Everything is now nice and solid.
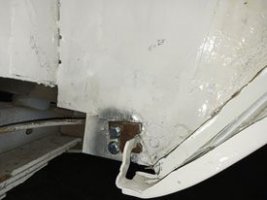
The rear bracket is held in place by 3 bolts and supported by an L shape plate on the inside of the wheel well that is itself bolted in place. This should provide plenty of support for the bracket as well as add rigidity to the area.


I had to remove the bolts that held the front bracket in place and replaced them with new ones. Everything is now nice and solid.


Jean-Marc Dugas
PCS Member
Jean-Marc Dugas
PCS Member
Jean-Marc Dugas
PCS Member
What was expected to be a quick job turned out to talk a little longer than usual.
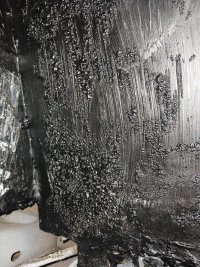
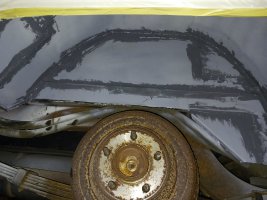
I cleaned the wheelwell with the wire wheel to remove all of the paint and seam sealer. When I was done I applied a new coat of primer and let it dry and then finally applied the seam sealer.
Will let everything dry overnight and apply a new coat of rock guard. This time instead of using a rubberized product, I will be using a tar based product.

Most paints and primers take 24-48 hours to cure, and some are known to take even longer. It is the outgassing of the chemicals that take a while to evaporate even though it appears to be dry. There is no reason to be in a hurry especially when we are headed into winter and there are no car shows to attend. On the other hand, there are some epoxy primers that require that they be top coated within 24 hours, or the top coat will not adhere properly. This is why it is so important to read and follow the manufacturer's instructions, and to use the same brand of products. Not like the old days when you could rush through the steps using many different materials from various manufacturers and never have an issue.
two products that are chemical in compatible your oil base primer can't handle a lacquer base top coat.
The oil base primer can't handle the laquair base undercoating. Funny thing is you could do it the other way around and be Ok.
Jean-Marc Dugas
PCS Member
It is all a learning experienceThe oil base primer can't handle the laquair base undercoating. Funny thing is you could do it the other way around and be Ok.
Yes it is every day. We all pay for our education one way or the other. The only way to learn is to try. Got a lot of don't do that again in my Hx.
Jean-Marc Dugas
PCS Member
Are you going to be replacing the rubber hoses as long as you are in there? Now is the time to do this before they leak.
Jean-Marc Dugas
PCS Member
It's on the list for next year as well as taking the radiator at the end of the hoses to the radiator shop to get it tested.Are you going to be replacing the rubber hoses as long as you are in there? Now is the time to do this before they leak.
Jean-Marc Dugas
PCS Member
I still have to take a good look at the heating system for the patient's compartment, but for added safety, I will also install a second shut-off valve to the lines so that I can turn off the water flow in both directions.Are you going to be replacing the rubber hoses as long as you are in there? Now is the time to do this before they leak.
It is safe to assume that the heater hoses are the originals installed by the manufacturer back in 1975. That means that they are 47 years old. While you have everything torn apart, now would be the time to do them. Two years ago I put all new heater hoses and refrigeration hoses into my 1962 Chevrolet. Every year that goes by the older we get and the slower we work. Don't put off till next year what you can do now.
Jean-Marc Dugas
PCS Member
The car is going to winter storage in mid-October, so I have to pick what will get done between now and then. Right now my main priority is to finish the wheel wells and any other areas that would let water in if I am to drive it in the rain on the way to the storage location which is about 45 minutes from here.
I will then focus on refinishing the cabinets, squad bench, etc while waiting for the car to come back in the spring so that it can finally be reassembled. Heater hoses, undercoating, replacing the lights and sirens, etc will have to wait until then. So much to do, so little time.
I will then focus on refinishing the cabinets, squad bench, etc while waiting for the car to come back in the spring so that it can finally be reassembled. Heater hoses, undercoating, replacing the lights and sirens, etc will have to wait until then. So much to do, so little time.


