1976 Superior 54XL Restoration Log

Yes, the tack welded patch relies on the sealer to keep it dry. The skirt mounts are always a problem spot.
Had they sealed both sides you might not have found it.
 
Well the good news is it not coming threw were you fixed. I like to use the paint-able water base extra grade sealer. A pick tool like a cotter key puller will pull off the dried-out loose factory stuff. Then when you put it back with a toss brush and a cup of water you can paint it into all those small places rather than just lay it on top. But think about an acid dunk. And opening up all those seams. I don't know how you could find them all to replace all of it.
Went to NAPA and got a can of brushable seam sealer. This should work better than the tubes. No seams shall remain unsealed!!
 
From what I can see the metal does not seem to have any paint or primer on it. It looks as if the undercoating was sprayed directly on the bare metal.

These holes are hard to see because of the coating that is on top of them or because they were patched with sealant sometimes in the past.

I am definitively doing things backward, all of this should have been done prior to the car going to the body shop last fall. Live and learn.....
 
Right you are on both accounts. The bodies were not primed in all the under-body and interior places. Any welded joints were metal to metal the sealed with the tar sealer under the body undercoated. What paint drifted inside the nooks and crannies was all the hard spots got. So here you are over restoring it just imagine how much longer it will last.
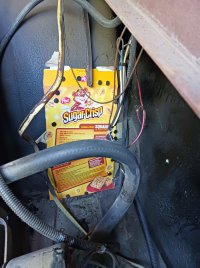
 
Right you are on both accounts. The bodies were not primed in all the under-body and interior places. Any welded joints were metal to metal the sealed with the tar sealer under the body undercoated. What paint drifted inside the nooks and crannies was all the hard spots got. So here you are over restoring it just imagine how much longer it will last.
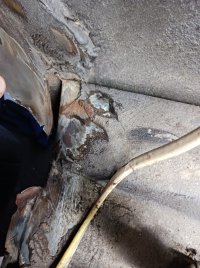
As I had my head inside the Wheelwell grinding away the tar coating (....transferring the tar from the wheel well to my head....) I was thinking about where one draws the line. I think that besides cleaning where the seams are so I can apply the new seam sealer and, obviously, where I am going to be welding, I may just brush off the rest of the area to remove any loose dirt and then leave it at that.

It will all be covered with fresh undercoating, so that should do the trick.
 
Rake it with a bent-over screwdriver. If there are any hollow places or spots that are loose they will show up. If you break threw keep raking that stop till nothing more falls off the recoat it.
 
The goal is to weld at least one patch this weekend. Welding scares the heck out of me because I do not practice enough, but I will bever learn if I do not dive into it.

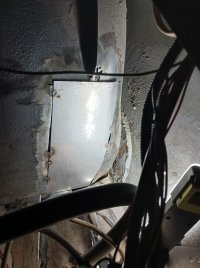
I made a pattern and cut a patch out of 18g sheet metal.


Psg Side Rear Wheelwell welding 01.jpg

While cleaning up the area around the hole, I took a huge piece of sealant creating a huge gap. I guess if it was not welded, it was sealed.....

Psg Side Rear Wheelwell welding 02.jpg

By the time I was ready to weld, it was already dark, so I just tacked a few spots and will get back to it tomorrow. I will run a thin cutting wheel on the top of the patch to create a gap, line everything up and weld it in place just like the guys on youtube......maybe.....

Psg Side Rear Wheelwell welding 03.jpg
 
If you need a lot of patch material, get an old hood from a salvage yard and cut your patches out of that. I believe that the hood material from the 1970s & 80s is 19 gauge. The heavier the material the less chance of burning through it.
 
One other good way is to make your patch bigger then your hole. Then use screws to hold it down in place. When you get it tacked in place pull the screws out and weld the holes shut. You will find a number of places on the car were they did the fill the hole in the corner trick. The one had me shaking my head was a large gap on one between the quarter and the wheel house. The stuffed cotton wads in and sealed over it.
 
You will find with the tin going down is easier the up. You don't generate as much heat and gravity helps.

One other good way is to make your patch bigger then your hole. Then use screws to hold it down in place. When you get it tacked in place pull the screws out and weld the holes shut. You will find a number of places on the car were they did the fill the hole in the corner trick. The one had me shaking my head was a large gap on one between the quarter and the wheel house. The stuffed cotton wads in and sealed over it.
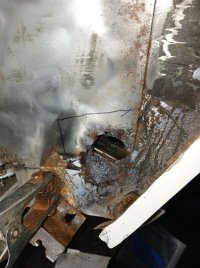
I want to butt weld the patches in the wheel wells if for nothing else, to learn how to do it. I think that the blowouts are probably caused by a combination of things such as the Superior metal being thinner because of 40 years of wear and tear, and by maybe not having both the patch and the Superior tin completely lined-up, ( ------- __________ ) so that by the time the lower tin gets to the proper temperature, the higher tin has already burned through.

Some of the blowouts were caused by having the Mig setting too hot as well. All of this is a learning experience so my nest project (whatever that will be) will be flawless.
 
Then cut your wire speed a little. And trigger the gun instead of trying to run a bead. You can get so your only on the weld itself and the puddle will get over into each piece. Tap in it with a hammer when it is still red and draw its pieces together. And help form them to shape.
 
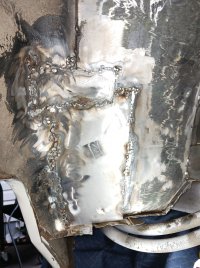
The welding on the first patch is finally done. Most of the welding was done from the inside, but there were about 4 - 4 inches I could not get to so I had to weld upside down from the outside of the wheel well. The blowout situation was better. I attribute it mostly to the Superior metal being thin due to corrosion.......not to mention that I am definitively not a welder!!!!!!

I had to add a second patch on top of the large first one to take care of the rust that you can see in the picture a few posts above.

The picture below is from just before I did the last pass with the grinder. Not pretty, but there is no light shining through the welds when placing a super bright halogen light on the other side. Once I have the wheel well painted, the seam sealer applied and a coat of rock guard, no one will be able to tell.

I still have to finish the bottom part and reinstall the fender skirt bracket. I'll get to that once I am done with the patching.

Psg Side Rear Wheelwell Patch 1 01.jpg
 
On to patch #2 located in the front of the passenger side rear wheelwell just above the fender skirt front braclet.

Psg Side Rear Wheelwell Patch 2 01.jpg

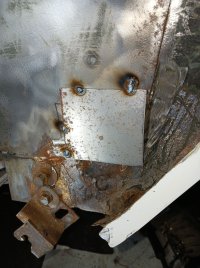
I started by cutting a patch large enough to clear all of the rusted metal and tacket it where it will be welded.


Psg Side Rear Wheelwell Patch 2 02.jpg

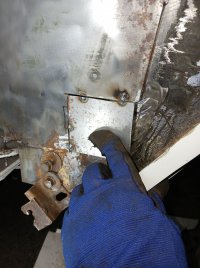
Using a thin cutting wheel, I cut around where the patch will be welded to create a small gap for butt welding in place.

Psg Side Rear Wheelwell Patch 2 03.jpg

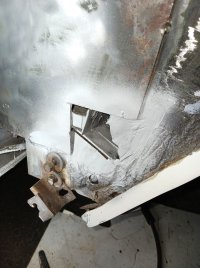
I discarded the rusted piece and cleaned the area the best I could. I sprayed the cavity with a copious amount of rust converter. Because I cannot access this section from inside of the car I will also spray anti-rust spray in the cavity tomorrow. I painted the inside of the patch and the area that will be behind the patch with weld-through primer. If the weather is nice I hope to have this patch done tomorrow.

Psg Side Rear Wheelwell Patch 2 04.jpg
 
Back
Top