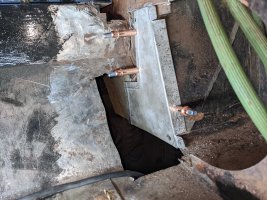
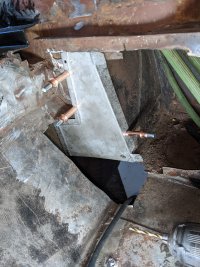
You got to love those factory splices. All the manufactures did them that way. But in truth i never found a bad one. Unlike the crimp connectors.
You are using an out of date browser. It may not display this or other websites correctly.
You should upgrade or use an alternative browser.
You should upgrade or use an alternative browser.
1976 Superior 54XL Restoration Log
- Thread starter Jean-Marc Dugas
- Start date
Jean-Marc Dugas
PCS Member
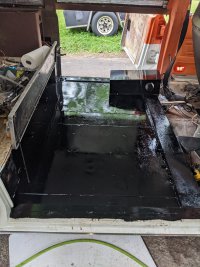
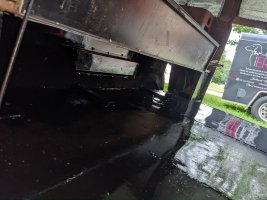
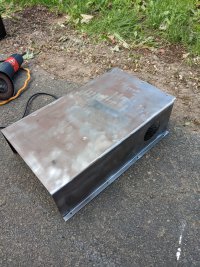
Today I got to paint the area I have been working on for the last few days. The best tool to remove the old paint, rust, and black stuff is definitively a wire wheel on an angle grinder. By far the most efficient, however, you MUST wear a mask and eye protection. The wire strands will hit you in the face and get stuck in your clothes. Eye protection is a must.
After I was done with the wire wheel, I cleaned the area with denaturalized alcohol (because that is what I had), applied rust converter, and when it was all dried, I thoroughly washed `the surface with a spray bottle of water and a few drops of soap. The surfaces were wiped down and I used air from my air compressor to make sure that no water was left in the hard-to-reach areas.
I used rust paint directly on the metal (as per the manufacturer's instruction) and then it started to rain. It is a bummer because the increased humidity meand that the paint will take longer to dry.
I did not paint the area where I will be welding the patch in the O2 cylinder compartment.
The car is now in the garage with the space heater running to cut down on the humidity. Hopefully, it will be nice and dry tomorrow so I can lay the sound deadener material over the area.


Jean-Marc Dugas
PCS Member
I finally got a small roll of Armstrong flooring material, so it is time to tackle the Corolon flooring in the patient area.
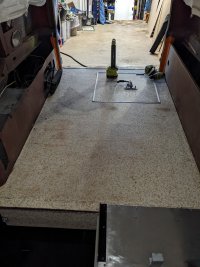
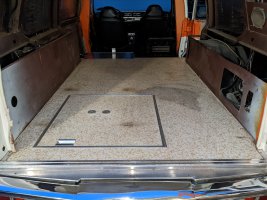
All and all, the floor was not in too bad of a shape. The only area where the plywood would need to be replaced is by the rear loading door where it got water damaged.
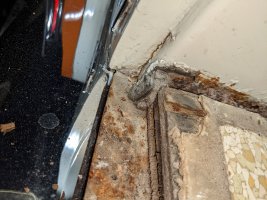
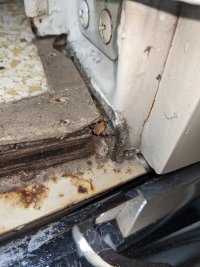
In the image above, you will note the notch in the plywood. There does not seem to be one on the other side. I think that it is there so the sheet would fit in the frame for the back door during its installation.
The storage box will definitely need attention. It will certainly be easier to work on it without the floor in place.
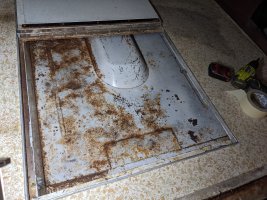
This is what the floor looks like tonight. Tomorrow I will find where the screws that hold the floor in place are hiding, and hopefully remove them without damaging the plywood if I am to reuse as much as possible.
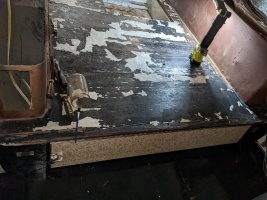
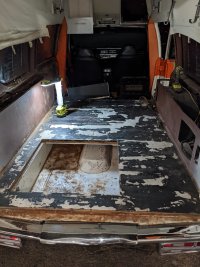


All and all, the floor was not in too bad of a shape. The only area where the plywood would need to be replaced is by the rear loading door where it got water damaged.


In the image above, you will note the notch in the plywood. There does not seem to be one on the other side. I think that it is there so the sheet would fit in the frame for the back door during its installation.
The storage box will definitely need attention. It will certainly be easier to work on it without the floor in place.


This is what the floor looks like tonight. Tomorrow I will find where the screws that hold the floor in place are hiding, and hopefully remove them without damaging the plywood if I am to reuse as much as possible.


When all is said and done it will be better then new.
Jean-Marc Dugas
PCS Member
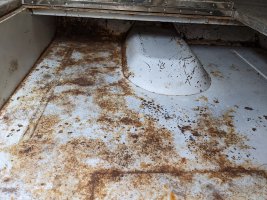
The plywood is off. I must say that I was pleasantly surprised to see that there was very little rust. The bulk of the work will be to grind off and treat the surface rust area. I will replace the larger plywood section and will probably reuse the front section.
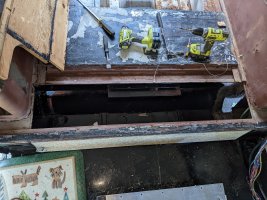
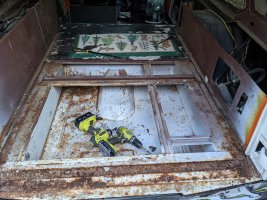
Removing the plywood will make repairing the rust hole found in the O2 Cabinet easier.
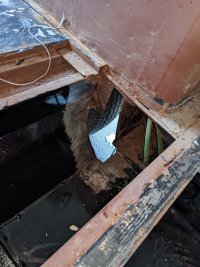
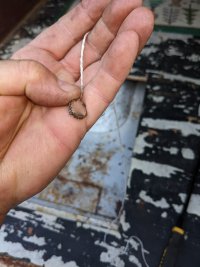
Finding the screws holding the floor in place was a little tricky, so I taped this magnet to a string and used it to locate the screws. Worked like a charm.
Now for the fun part, cleaning up the metal to get it ready for rust treatment and paint.
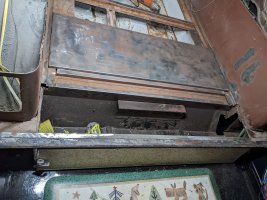


Removing the plywood will make repairing the rust hole found in the O2 Cabinet easier.

Finding the screws holding the floor in place was a little tricky, so I taped this magnet to a string and used it to locate the screws. Worked like a charm.

Now for the fun part, cleaning up the metal to get it ready for rust treatment and paint.

Jean-Marc Dugas
PCS Member
Here is a video of my sophisticated tool used to find the screws used to hold the plywood in place. many of the screws were difficult to see, unlike this one.
Jean-Marc Dugas
PCS Member
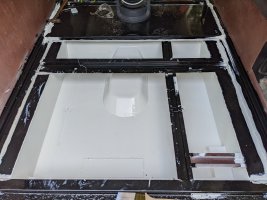
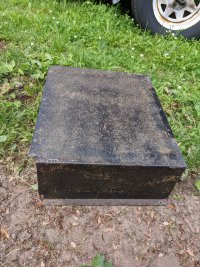
Productive weekend. Flooring infrastructure and storage box brushed, cleaned, coated with rust inhibitor, and painted with rust paint. Seam sealer was also applied to all of the seams.
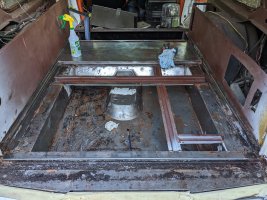
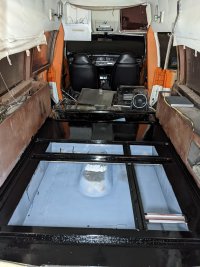
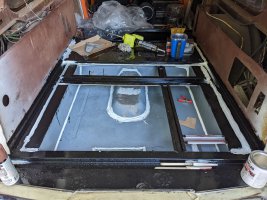
The storage box was primed and precautions were taken to protect the car from overspray. The primer is the only aerosol I used so far. Both the black and white paint have been applied with a brush.
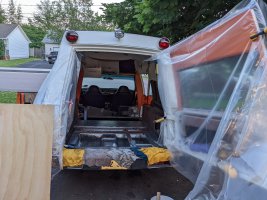
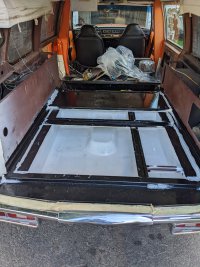
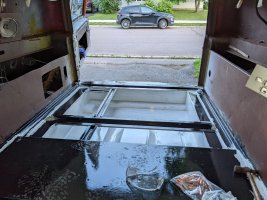


The storage box was primed and precautions were taken to protect the car from overspray. The primer is the only aerosol I used so far. Both the black and white paint have been applied with a brush.


Jean-Marc Dugas
PCS Member
Areas of interest noted.
Incomplete seam sealer at the base of this box allowed water to come into the storage box.
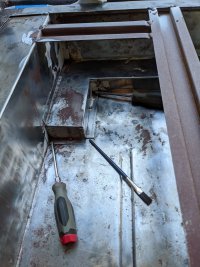
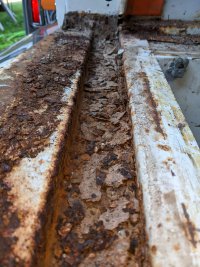
This U channel was extremely rusty. It is obvious that water has been collected in it for years. The rust actually ate through a couple of spots allowing for water to enter the storage box.
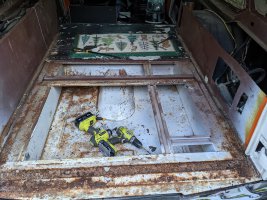
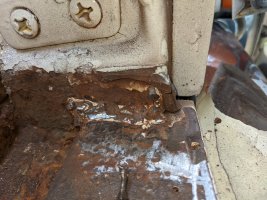
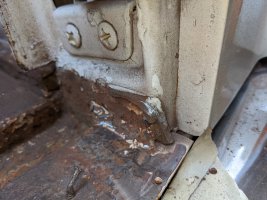
Incomplete seam sealer at the base of this box allowed water to come into the storage box.

This U channel was extremely rusty. It is obvious that water has been collected in it for years. The rust actually ate through a couple of spots allowing for water to enter the storage box.


Jean-Marc Dugas
PCS Member
You can see how they did the layer on later of spot welded pieces of tin. Then. Just covered the seams with sealer and painted over it . MM was one of the best bodies. But all it takes is one loose seam to let the water in.
Jean-Marc Dugas
PCS Member
Jean-Marc Dugas
PCS Member
Work on the parch continues. Everything seems to fit correctly so far, but this is yet another time-consuming process. Whatever product Superior used to coat the metal is a bugger to remove.
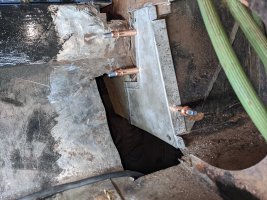
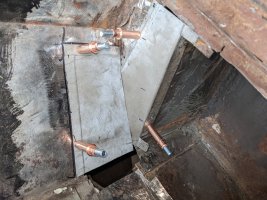
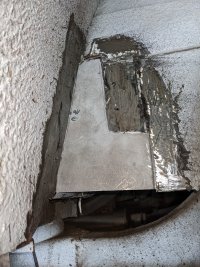
Taking pictures of the hard-to-see spots is not a bad idea. If you look at the bottom corner of the second picture, you will notice a space where the panels meet. I will have a closer look at it tomorrow to see if it should be sealed or left open.
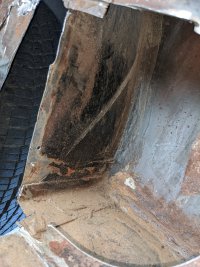
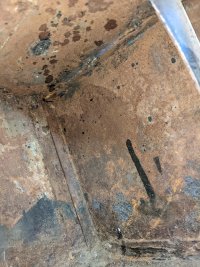


Taking pictures of the hard-to-see spots is not a bad idea. If you look at the bottom corner of the second picture, you will notice a space where the panels meet. I will have a closer look at it tomorrow to see if it should be sealed or left open.


Tim Prieur
PCS Member
Looking fantastic J-M. So good to see what you are re creating.
If only you could have had a position with Superior in 1976, none of this would have to be done now.
Please keep the updates coming.
If only you could have had a position with Superior in 1976, none of this would have to be done now.
Please keep the updates coming.
These places i like to put in with brass when you can. Drill a set of holes in the flange and fill them back in with brass. You can see the problem in this location. The slop from the tire worked in to the seam in the corner and hid under the under coating never drying. All it takes is a crack or chip in the under coating to start the process. Then ten years down the road it's finely threw. And the race is on. It's simpler to repair larger holes because you can work threw them.
Jean-Marc Dugas
PCS Member
How do you use brass?These places i like to put in with brass when you can. Drill a set of holes in the flange and fill them back in with brass. You can see the problem in this location. The slop from the tire worked in to the seam in the corner and hid under the under coating never drying. All it takes is a crack or chip in the under coating to start the process. Then ten years down the road it's finely threw. And the race is on. It's simpler to repair larger holes because you can work threw them.
Ed was referring to using a brass brazing rod and a torch to melt it. It is referred to as "brazing" as opposed to "welding".
Jean-Marc Dugas
PCS Member
I shall research thatEd was referring to using a brass brazing rod and a torch to melt it. It is referred to as "brazing" as opposed to "welding".
Last edited:


