68 Cadillac MM Combo (Restore thread)

I can't remember from tank to tank. Lets hear what others have found in their tank adventures. I do remember one tank we pulled cause nothing would come out and the entire sock was covered with a snoot like substance that effectively sealed the pickup from the fuel never did figgure out what it was. Chucked the sock. On most of my Packards cause its easy I have installed an in line filter a few inches from where the line exits the tank. The old head them off at the pass routine.
 
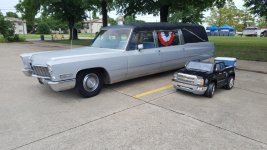
Went to the Rockets over Rhema car show yesterday. Did alot of educating about combos to curious people. Even ran into a mortician who was admiring it and talked to him for a bit. Was a fun, but exhausting day. We brought my 4 year old sons Roll-Play 2014 Silverado truck too. At times it seemed his truck was more popular than the hearse, there were swarms of kids checking it out and my son just ate up the attention. When he spotted someone checking it out he would run over and get in and start demonstrating what all the buttons do and invite them to sit with him. Was quite fun for him.

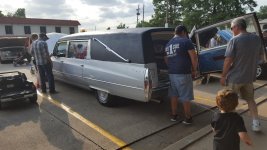
My wife got tired 30 minutes before the fireworks show was going to begin and insisted on leaving early, this turned out to be a mistake as I got out to the exit in the hearse part into the street, about to pull out and the police stopped me and told me I wasnt going anywhere and to park it.

No one was allowed to leave until after the fireworks. I had no idea, so I was forced to stay parked in an awkward spot for the next hour or so. Took an hour of stop and go traffic to leave later. Probably wont take part in the car show portion next year, simply too many people.
 

Attachments

  • 20180701_143250.jpg
    20180701_143250.jpg
    98.3 KB · Views: 207
  • 20180701_183828.jpg
    20180701_183828.jpg
    98 KB · Views: 207
Blake - Those Accent Star emblems were originally a casting made by Miller-Meteor and used for a number of years. In the Eighties, Eureka recast them and they were used on some 1985-1986 Pontiac Chieftain models.You probably won't find any of these made by Eureka but, a search of Miller-Meteors in scrap yads or of parts available from PCS members should be able to turn up a pair of these.
 
Blake - Those Accent Star emblems were originally a casting made by Miller-Meteor and used for a number of years. In the Eighties, Eureka recast them and they were used on some 1985-1986 Pontiac Chieftain models.You probably won't find any of these made by Eureka but, a search of Miller-Meteors in scrap yads or of parts available from PCS members should be able to turn up a pair of these.

Good to know, thanks
 
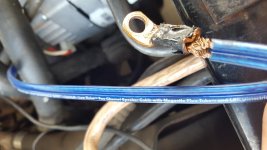
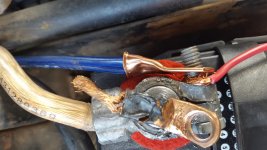
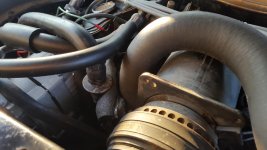
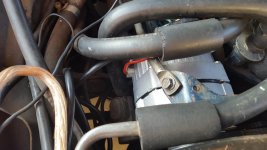
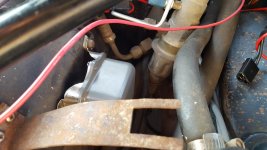
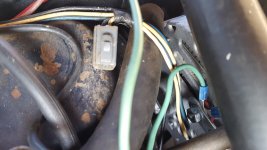
Ok so today i replaced the connector on my alternator to battery wire since it was falling out of the crimp. While doing this i noticed that my alternator is wired to my battery with...speaker wire..now im no master mechanic but im fairly certaim this cant handle the needed load.

Am i right? I finished the head replacement but im considering buying a proper cable and re-running it. Here the before and after today. Going to get a thicker cable for this. This may explain why my alternator can never quite keep up
 

Attachments

  • 20180707_163827.jpg
    20180707_163827.jpg
    93.1 KB · Views: 168
  • 20180707_164341.jpg
    20180707_164341.jpg
    99.1 KB · Views: 171
A number 12 wire is what you need. And if it is wired direct to the battery it has been changed to a internal regulated one. Remember the hardest thing is fixing all the quick fixes
Other people did. The solution is not to do things that way your self. Once you start cobbling on it you never quit.
 
Yesterday I actually went out and bought a 4 gauge battery cable for good measure. Its funny how you go out to do a "5 minute job" and it becomes an hour plus job...

So while I was removing the bolt from the back of my alternator it would not come loose, kept trying but it was turning bolt with it. Kept trying to grab onto the square end with pliers to break the seal while I turned but never had any luck. Tried spraying white lithium grease on it. No luck. Eventually it started to loosen but as it turned out I pulled the entire bolt out of the alternator.

So it seems I threaded off the internal nut on the alternator bolt. After kicking myself about this I thought about how I would prefer not to but another alternator since this one is only a few months old..also I dont want to go through the pain of changing it out again, as removing it was difficult last time, but not as hard as it was to put back in.

So I bought some JB Kwikweld and I first used it to join the bolt head to the red plastic piece that goes between the alternator and the bolt head, after that set for awhile I JB-Weld on the other end of the plastic piece and put that in the alternator. Let that set awhile, then spliced new contacts on every wire since I broke most of them in the process (they needed replacing anyway).

I let it cure overnight and started it this morning, alternator is certainly charging better, but I worry about how well that JB-Weld will hold.

I know the real fix is going to be buying yet another new alternator. The kwik weld said it was 2900LB strength, but with road and engine vibration I dont know how that will hold. I am going to drive it around the block tonight and see.

I do plan on getting a new alternator soon, because I want it done right, I really dont want the car dependent on a little bit of JB Weld. I know, its cringeworthy that I am using JB Weld on this, but it might get me through a few paydays so I can get an alternator. I also have my first meet this weekend and really do not want to miss it.
 
Splitting the case on the alternator is not that hard to do. All you need is a tooth pick to put the brushes back in place to put it back togather. There is a hole in the back of the case and it lines up with a set of holes in the brush holder. You slide the tooth pick or small wire in holder. then push the brushes in one at a time as you slid it threw the holder. Then after your back togather just pull it out to set the brushes were they belong. To get it apart is only 4 bolts. You do not need to pull the pulley to split the case and make repairs. If your going to turn it in your not out anything trying to repair it.
 
Splitting the case on the alternator is not that hard to do. All you need is a tooth pick to put the brushes back in place to put it back togather. There is a hole in the back of the case and it lines up with a set of holes in the brush holder. You slide the tooth pick or small wire in holder. then push the brushes in one at a time as you slid it threw the holder. Then after your back togather just pull it out to set the brushes were they belong. To get it apart is only 4 bolts. You do not need to pull the pulley to split the case and make repairs. If your going to turn it in your not out anything trying to repair it.

True, once I get a replacement I may give that a try. Then I will just have a spare next time
 
The stock one would have been externally regulated. Should be one wire going to the regulator and a gray clip with two wires plugged in. Check your book out. It will have pictures..
 
The stock one would have been externally regulated. Should be one wire going to the regulator and a gray clip with two wires plugged in. Check your book out. It will have pictures..

I will do that, I do have an external regulator. I have kept it like it was before since I didnt know how else it would be setup. I will check the book and see if it helps
 
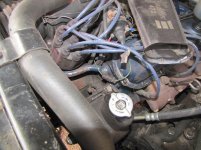
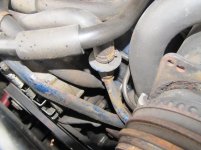
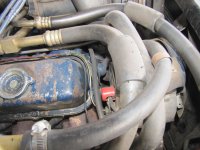
but first you will have to determinant just what someone else changed. we have see a zoomed out pictures or you engine bay yet only some up close things. here are a few pictures of the 86 I have up here for a few years. that is now down in Tx. the 68 was a smog pump engine. with the ault on the right just over the smog pump. they were wired with one hot wire going to the regulator and the tickler (hot with key on) wire with and ground in a harness clip. no other wires going to it. the charge wire would come from the regulator to the Pos terminal on the starter. then return the charge threw that cable. here a a couple of pictures I found of the factory lash up. now you need to find the numbers of your engine. it should be stamped on the front of the right head. if it matches the registration number of the car it is the original engine. if not you need to look it up to find the year of it. but your alternator should look something like this on the car.
 

Attachments

  • IMG_2849 we have a smog pump on ths car.jpg
    IMG_2849 we have a smog pump on ths car.jpg
    94.8 KB · Views: 83
  • IMG_2850 the one way valve.jpg
    IMG_2850 the one way valve.jpg
    90.7 KB · Views: 84
  • IMG_2852formed hose goign up and over the  ault..jpg
    IMG_2852formed hose goign up and over the ault..jpg
    94.1 KB · Views: 82
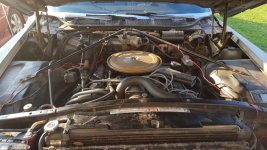
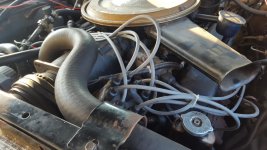
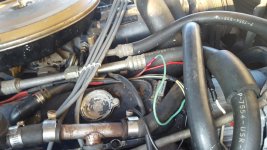
Before heading out to work this morning I took a few pictures. Several wide shots of the engine bay, some pictures with similar angles that you posted and one of the regulator and back of the alternator.

I know it was pointed out previously that the way my alternator is wired needs to be fixed as all of the contacts are all jammed on what I believe to be the batt bolt. At the time that I changed it I wasnt sure what went where so I put it how it was before. Now that I have a shop manual I am sure I can probably figure out where everything goes from there. Thing is I have no idea what any of the wires are at this point.
 

Attachments

  • 20180710_072200.jpg
    20180710_072200.jpg
    102.8 KB · Views: 72
  • 20180710_071211.jpg
    20180710_071211.jpg
    93.8 KB · Views: 72
  • 20180710_071215.jpg
    20180710_071215.jpg
    99.2 KB · Views: 72
  • 20180710_071220.jpg
    20180710_071220.jpg
    100.6 KB · Views: 73
  • 20180710_071224.jpg
    20180710_071224.jpg
    96.6 KB · Views: 73
  • 20180710_071229.jpg
    20180710_071229.jpg
    96 KB · Views: 72
  • 20180710_071238.jpg
    20180710_071238.jpg
    94.1 KB · Views: 70
Looks like a 68 engine. Just check the vin number the next time you are down there. That is a later model alternator. Not a big problem running one just the more splices you have the more trouble you get into. the more dangling plugs the more confusion sets in. The better way to wire it would be with the proper battery cable end or just down to the lug on the starter were the cable attaches. That plug by the old regulator. Did it go on the regulator?
 
Last edited:
Looks like a 68 engine. Just check the vin number the next time you are down there. That is a later model alternator. The reasion for all the splices. That three receiver plug. In the picture of the by passed regulator is the low speed resister for the blower wire harness. You should find the mate for it on the engine side of the AC box. One reasion you don't have a working blower.

Yeah that the new black plug is the one I replaced that used to be melted. Unfortunately replacing it didnt fix the blower so for now I have it unplugged since it doesnt work anyway
 
Last edited:
I wouldn't be changing anything at this point in time, since what you have installed is working. Clean up the wiring and make sure that it is the proper gauge of wire, and that the connections are clean and tight. Changing the alternator to the older type isn't going to gain you anything, other than a correct looking unit, which isn't important at this time. Should you someday decided that you are going to be doing a full restoration, that would be the time to address all these types of changes. Currently, it is more important to spend money on making the car reliable and safe to drive. Fix the wiring, and that will be one more item to check off as having been repaired properly.
The money that you save on the alternator, can go towards one day having the correct carburetor rebuilt, and reinstalled on your car.
One final thought, the reason that it was "ridiculously difficult to install the last time", is because of where it is located on the engine. With all the hoses that run above the alternator, any alternator change is going to be difficult. If your car didn't have air conditioning, it would have been a lot easier of a job. Just be happy that your car didn't have the 135 amp alternator. That one takes 2 people to change, because of the weight, and trying to shoe horn it into place. Once you have that one in place, then you have the additional wires to deal with. This is why I always recommend that you take a lot of pictures before removing any component. It will make the re-installation a lot easier when you know exactly where everything goes.
 
Back
Top