One thing at a time all in due time. I'm looking for a inside storage place my self.
You are using an out of date browser. It may not display this or other websites correctly.
You should upgrade or use an alternative browser.
You should upgrade or use an alternative browser.
1976 Superior 54XL Restoration Log
- Thread starter Jean-Marc Dugas
- Start date
Jean-Marc Dugas
PCS Member
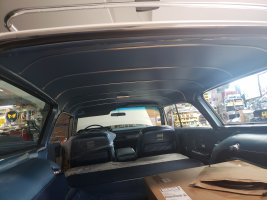
The headliner was removed and is ready to go to the upholstery shop. We were not able to source the exact material but will be ordering the closest we can source.
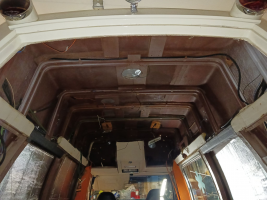
With the headliner removed, I will now have the opportunity to trace a few more wires and hopefully better troubleshoot a couple of electrical issues. I may also take this opportunity to apply some isolation / sound deadening material tothe roof.

With the headliner removed, I will now have the opportunity to trace a few more wires and hopefully better troubleshoot a couple of electrical issues. I may also take this opportunity to apply some isolation / sound deadening material tothe roof.
Daniel Scully
PCS Member
Can you post a magnified picture of the material that you need? I was able to source the correct material from one of the restoration companies when I had the headliner done for my 1969 Cadillac. Most materials are still available if you know where to look for them.
Jean-Marc Dugas
PCS Member
The material was ordered this morning. There is no turning back now.Can you post a magnified picture of the material that you need? I was able to source the correct material from one of the restoration companies when I had the headliner done for my 1969 Cadillac. Most materials are still available if you know where to look for them.
Jean-Marc Dugas
PCS Member
Today was an electrical type of a day. I figured with the headliner removed I would have greater access to the wiring.
My goals were simple, troubleshoot the issue with the door ajar circuit and figure out what was the purpose, if any, of two mystery wires located in the patient compartment.
I would definitely not have been able to trace all the wires if the headliner was still in place. For the door ajar circuit, all the wires from both rear side doors and the back door are spliced together near the D post of the car.
From there one of the wire goes to the fuse box where it is energized when the key is turned on and the other wire goes to a flasher relay located on the firewall in the engine compartment. Lastly, another wire comes out of the flasher relay back through the firewall and connects to the door ajar light located on the lower dash pad to the left of the steering wheel column.
This circuit has not been working ever since I got the car. It took me a while to figure it out but the issue ended up to be that the wires connecting to the flasher relay where connected backwards. I switched them around did the test and voila problem solved.
Next, for some reason the rear air conditioner blower wires caught my attention. It took me a while to trace all the wires from the source to the switch but I ended up finding out that one of the mystery wires was connected to this circuit. I do not understand why it is wired the way it is see the video attached.
I was able to trace the second mystery wire from the patient compartment as well as another mystery wires located within the Rat's Nest of wires behind the main overhead console. They both lead under the dash somewhere. At this time I'm not sure if these are just extra wires or if something that should be connected is not. We'll figure it out some other day.
Tim Prieur
PCS Member
J-M, that is one bad bowl of spaghetti that Superior laid out. Well done for tracing it all back. You will be able to write the book on these cars when you are done.
The only sure way to track down superiors wiring is to start at one end and haing on all the way to the other. Every one i got into was wired with the same white wire threw out.
Jean-Marc Dugas
PCS Member
Yep, and the wire colours in the wiring diagrams are only a suggestion.....The only sure way to track down superiors wiring is to start at one end and haing on all the way to the other. Every one i got into was wired with the same white wire threw out.
Jean-Marc Dugas
PCS Member
It is still very messy, but except for one wire, all wires are now accounted for and identified. I can't help but scratch my head with the configuration of some circuits. In some cases, I am not sure if the wiring is original or if it has been modified, but I think that there will be some improvements before the headliner goes back in in the spring.
The excess to me is the part i don't understand. In places it in the yard stick range. Lot of money there wasted.
Jean-Marc Dugas
PCS Member
I agree. A good example is that in my car, there is a common ground wire in the wire loom for the front, rear, and side red flashing lights for a total of maybe 30 feet. This ground wire is connected to one light and all of the other lights are grounded directly to the body. This is OEM as there are no splices in this common ground wire except for that one light.The excess to me is the part i don't understand. In places it in the yard stick range. Lot of money there wasted.
Jean-Marc Dugas
PCS Member
Last summer I acquired some rear bumper bits and pieces.
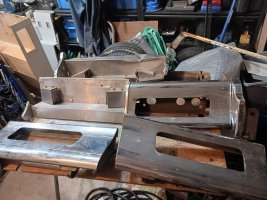
The two pieces where the tail lights are located are in better shape than the ones currently on the car, so I will swap them when I get back to the car's bumper.
Two center plates were Included in the package. One with some damage, but with the end caps, the other one with no damage, but only one end cap. One of the center plate is longer than the other. Looking at original photos of my car, the proper center plate is the narrowere one.
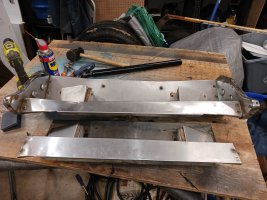
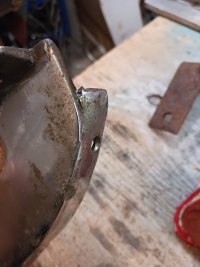
The end caps will have to be sent to be rechromed and one will have to be fixed.
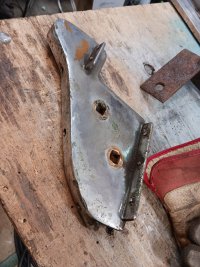

The two pieces where the tail lights are located are in better shape than the ones currently on the car, so I will swap them when I get back to the car's bumper.
Two center plates were Included in the package. One with some damage, but with the end caps, the other one with no damage, but only one end cap. One of the center plate is longer than the other. Looking at original photos of my car, the proper center plate is the narrowere one.

The end caps will have to be sent to be rechromed and one will have to be fixed.


Bill Leverett
PCS Member/Paramedic Supervisor
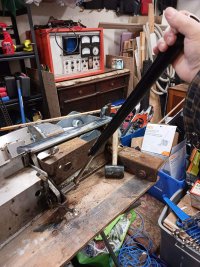
i see you have the important tools for any home garage mechanic...a can of WD40 and a big hammer. Love it!Last summer I acquired some rear bumper bits and pieces.
View attachment 49366
The two pieces where the tail lights are located are in better shape than the ones currently on the car, so I will swap them when I get back to the car's bumper.
Two center plates were Included in the package. One with some damage, but with the end caps, the other one with no damage, but only one end cap. One of the center plate is longer than the other. Looking at original photos of my car, the proper center plate is the narrowere one.
View attachment 49367
The end caps will have to be sent to be rechromed and one will have to be fixed.
View attachment 49369View attachment 49370
Bill Leverett
PCS Member/Paramedic Supervisor
Where do you get your chrome work done at? Are they reasonable? I'm paying $125/hr now at the place I use in Victoria. 1 hour minimum on any piece.
Jean-Marc Dugas
PCS Member
I do not know yet. There used to be s place in Halifax I used when I was restoring the 67, but I do not know if they are still open.Where do you get your chrome work done at? Are they reasonable? I'm paying $125/hr now at the place I use in Victoria. 1 hour minimum on any piece.
Jean-Marc Dugas
PCS Member
Once you start plating bumper parts, you might as well do all of them, because the newly plated parts will make the original look like trash. I learned that lesson about 55 years ago when working on my 1928 Buick. Some of the pieces were cleaned up nicely and the ones that weren't plated were. When I started putting everything together, I realized my mistake and brought the rest of the parts to the plater. A week later I put the entire bumper on the car, but the front bumper looked terrible by comparison. Back to the plater to have that one done, and then the grille shell. It was a never-ending process of restoration.
None of it is cheap. The place i use averages out to around 125 a piece. But but he doesn't do bumpers. So they got sent to a place in Mn that only does bumpers. I paid less for a whole car and drove it home. That was after i fixed the damage on the rear one and cut it down from the stock to CB.
Jean-Marc Dugas
PCS Member
I contacted what i believe is the only place east of Québec that does this work and they do not do bumpers either. They would have to be sent to Québec or Ontario. I will send them detailed pictures of what I want done and they will give me a quote.None of it is cheap. The place i use averages out to around 125 a piece. But but he doesn't do bumpers. So they got sent to a place in Mn that only does bumpers. I paid less for a whole car and drove it home. That was after i fixed the damage on the rear one and cut it down from the stock to CB.


