You are using an out of date browser. It may not display this or other websites correctly.
You should upgrade or use an alternative browser.
You should upgrade or use an alternative browser.
1976 Superior 54XL Restoration Log
- Thread starter Jean-Marc Dugas
- Start date
Superior never built one that good. You be careful you going to need MM badges on it.
Jean-Marc Dugas
PCS Member
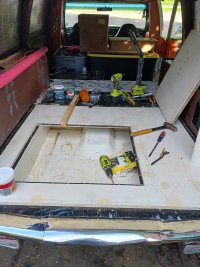
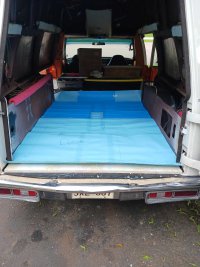
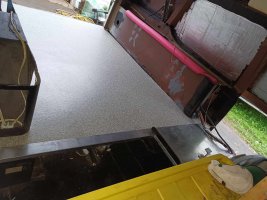
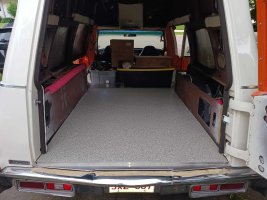
Today I cut out the flooring material using the template a made a few weeks back. I will not glue the floor or cut out the portion for the storage box just yet. A friend that works at a commercial flooring place may have some left over material that is a little closer to the original. I should know in a week or two, so if this works out I'll use this floor as a template and if not, I'll finish the job with this one.
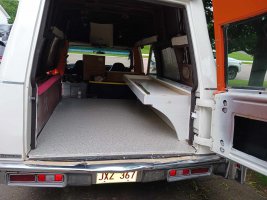


That will look good in there if the other is not a better pattern.
Jean-Marc Dugas
PCS Member
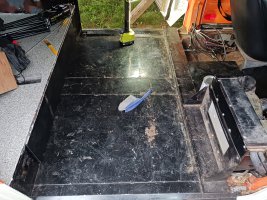
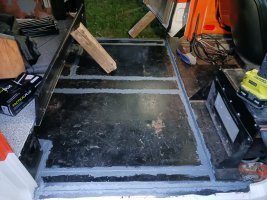
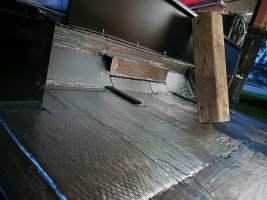
Today I am chasing water leaks. The right front floor is showing signs of water coming in.
After cleaning up and drying the area it is becoming obvious that the way this is put together is a total water trap. Any leaks from the A post, from the back of the hood and God knows from where else will end-up here.
The metal in there is still solid, but this will need to be addressed sooner than later. I will just do my best to keep it dry for now, but it will need some TLC before long.
I can not really reach in this area so I used compressed air and paper towels to remove as much wetness as possible.
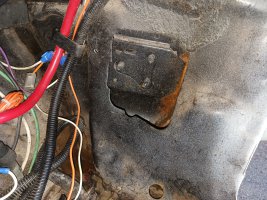
This corner was covered in a thick seam sealer. Once removed I could see that water is coming down the corner where the 2 panels connect. Not a whole lot, but enough to notice.
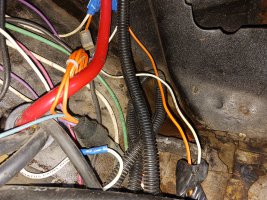
And yes, I'll have to do something with this rat nest of wires!
After cleaning up and drying the area it is becoming obvious that the way this is put together is a total water trap. Any leaks from the A post, from the back of the hood and God knows from where else will end-up here.
The metal in there is still solid, but this will need to be addressed sooner than later. I will just do my best to keep it dry for now, but it will need some TLC before long.

I can not really reach in this area so I used compressed air and paper towels to remove as much wetness as possible.

This corner was covered in a thick seam sealer. Once removed I could see that water is coming down the corner where the 2 panels connect. Not a whole lot, but enough to notice.

And yes, I'll have to do something with this rat nest of wires!
Make sure that the cowl is draining. Those with out the screen under the vents would pick up a lot to trash which ends up on either side trapping water in the void. It should be free running dumping out just in front of the rockers.
Jean-Marc Dugas
PCS Member
Thanks Ed. I'll check it out.Make sure that the cowl is draining. Those with out the screen under the vents would pick up a lot to trash which ends up on either side trapping water in the void. It should be free running dumping out just in front of the rockers.
Jean-Marc Dugas
PCS Member
The floor has now been glued for a couple of days, it is time to get to work on the storage box door.
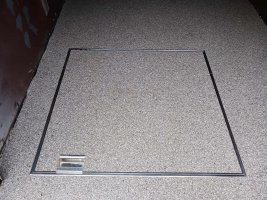
When I glued the floor I made sure to leave enough of a gap all around the storage box door so I could easily slide a sharp knife between it and the floor. That worked quite well, the only drawback is that this gave the glue an opportunity to infiltrate the void and required to be cleaned-up before installing the trim. I also made sure that all of the corners were nice and sharp.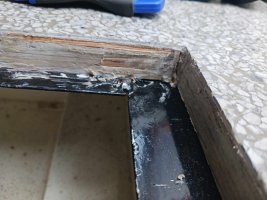
The trim I got is 1 inch wide which is wider than the flooring material and the plywood. I cut each piece of trim slightly longer than what I need and then trimmed the width so it would fit properly.
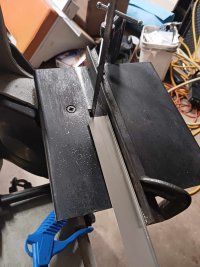
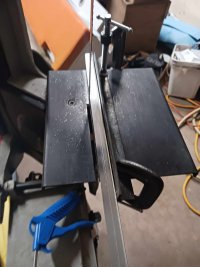
I purchased a small battery powered miter to help with cutting sharp corners (needed an excuse to buy another tool!) This actually paid off, each corners are nice and sharp.
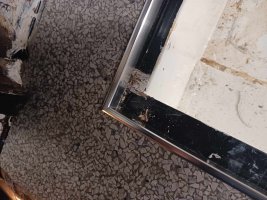
Once I am done I will be repainting the storage box and the frame the cover sits on.
At the end of the day the four pieces of trim have been cut, trimmed, screw holes beveled and installed. Tomorrow if the weather permits, I will tackle the storage box door.

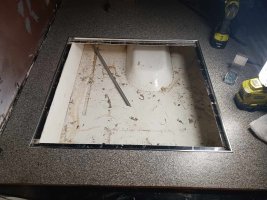
When I glued the floor I made sure to leave enough of a gap all around the storage box door so I could easily slide a sharp knife between it and the floor. That worked quite well, the only drawback is that this gave the glue an opportunity to infiltrate the void and required to be cleaned-up before installing the trim. I also made sure that all of the corners were nice and sharp.

The trim I got is 1 inch wide which is wider than the flooring material and the plywood. I cut each piece of trim slightly longer than what I need and then trimmed the width so it would fit properly.


I purchased a small battery powered miter to help with cutting sharp corners (needed an excuse to buy another tool!) This actually paid off, each corners are nice and sharp.

Once I am done I will be repainting the storage box and the frame the cover sits on.
At the end of the day the four pieces of trim have been cut, trimmed, screw holes beveled and installed. Tomorrow if the weather permits, I will tackle the storage box door.


Looking good. It was always strange to me that the flooring went first. I will cut a big cardboard box to cover it while getting the rest of the interior in place.
Jean-Marc Dugas
PCS Member
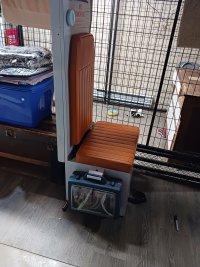
Because of the cabinets on the driver's side, and the way the passenger side rear facing attendant seat is built, the floor and the headliner must go in first, then the cabinets and the rear facing seats.
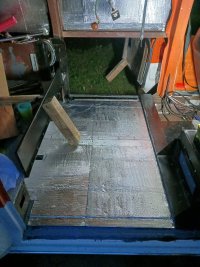
I will be installing some sort of ceiling insulation before the headliner goes in. Still have to decide what it will be.
I will be installing some sort of ceiling insulation before the headliner goes in. Still have to decide what it will be.
Yes everything is built on top of the flooring.
The peel and stick is not recommended for the roof. The foil both sides with a foam core worked will in in the 70. Easy to cut to shape and you can find it in wide rolls. Use the weld wood contack cement on it didn't have any trouble with it falling down
The peel and stick is not recommended for the roof. The foil both sides with a foam core worked will in in the 70. Easy to cut to shape and you can find it in wide rolls. Use the weld wood contack cement on it didn't have any trouble with it falling down
Jean-Marc Dugas
PCS Member
Getting there.
Jean-Marc Dugas
PCS Member
One piece at a time.Getting there.
Jean-Marc Dugas
PCS Member
Jean-Marc Dugas
PCS Member
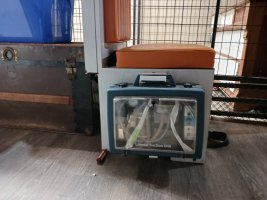
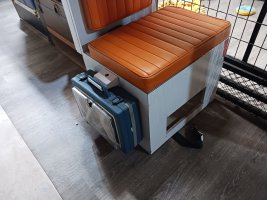
I got the idea to place the portable suction in that location based on the picture from Jesse Byrd JR's of the interior of the Byrd Ambulance Service 54XL.Testing the exact location for where the portable suction will go.
Jean-Marc Dugas
PCS Member
Jean-Marc Dugas
PCS Member
Jean-Marc Dugas
PCS Member
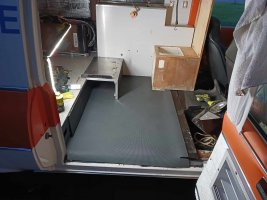
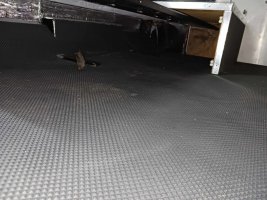
Rubber flooring cut and fit tested. It looks grey in the photos, but it is black!
The original rubber floor was glued in place, but I am debating if I should glue it in place or use heavy duty double sided tape. Once everything is in place, there are enough items either screwed or bolted in place that the material will not move.
The reality is that I am afraid to screw it up if I glue it in place. Contact cement is not forgiving if you make a mistake......



It is a onetime shot with the contack cement . But i would wonder about how long the tap will last. The rubber is heavy enough that it should stay with out anything.


