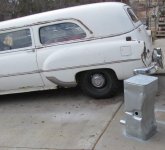
The Rim Reaper - 1953 Pontiac Hearse by Barnette

Thanx to both of you.

Paul, I do not insist on removing the oil filter, I feel it is a welcome addition.

Ed, Where my oil filter connects to my engine, I see in your pictures you have some sort of pump there, front end of engine, passenger side, bottom, you have a pump with steel lines coming out...
 
RE the valve patience is a virtue keep soaking with penatrent do the best you can to get it on the shaft of valve so it will run into valve guide. WAIT its been sitting 20 years it can sit a little longer. I should have three or four manifolds for the coach in stock yours looks weldable. Do not cut out heat risor take a hammer and close it so the base of the carburator does NOT receive heat bend the flap if you need to. You do not need heat on the carburator todays fuels are more heat vapor prone than yesterdays thus it will boil the fuel out of the carb when you stop and park hot making it hard to restart.
 
Yes Peter I agree, and it has been sitting more like 45 years I am sure, it was actually in my Grampa's yard my whole life I think, it was just 20 years ago when I told him I wanted it.

I am definitely being patient, the goal is definitely to drive it, and hopefully to.drive it in its 100th year, so I definitely want to take the time and resurrect it properly, even if it's not an overhaul or restoration, it still needs to be done right...

I am but a hopeful man with a huge lack in experience and knowledge, so I am relying on guys who have worked on and know the vehicle to guide me.

I will get that valve free as gently as possible, then it appears time to move on. Looking forward to my gasket kit, hopefully will arrive on Monday!

Also, good advice about the fuel vapor issue, will take that into consideration.
 
I have had the benefit and clarity of sleep on this. Ed is right, remove the spring keepers, and work the valve up and out. Then polish the shaft to get the rust off of it. If you try to push it down, you might pull the valve stem guide out of place, and that will be a bigger mess. Since the rust is keeping it from seating, the rust is above the guide, and the bottom of the stem appears rust free. Once the spring tension is off, then you should be able to turn the valve and get it loose and out. You will need a valve spring compressor, which you will need to ask one of your friends if they have one you can borrow. Chances are that once the valve is out, the clean up with some very fine crocus cloth and oil shouldn't take very long, so you will only need the valve compressor for a few hours. Once that is done, you can start reassembling the engine, and get it running. Don't worry about the cracked exhaust manifold until it is running, and then you can decide what to do about that. No sense in spending money to replace it, until you know everything else in the engine is good.
 
My experience with Pontiac strait 8s goes back long ago my first valve job when I was 16. I doubt with the valve stuck up you will be able to get the keepers off with a spring compressor as the spring is already compressed with the valve open . I stress keep soaking the open valve from the top. WAIT a couple of more days then try tapping with a fiber or plastic hammer remember the spring is already trying to pull the valve closed. You are going to find adjusting the valves is going to be a fun job. I can walk you through it when the time comes. You are having good luck this far keep up the good work.
 
Turns out valve spring compressors are 30% off this week at my local CHEAPO tool store, Princess Auto. Will cost me less than $40 tax in.

I bet I'll Se a bunch of other crap I want to get, better be frugal and make it an in and out (while quickly browsing) trip.
 
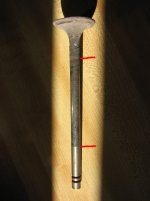
right you are. the spring may have a little more it could go but probably not enough to get the keepers off. so one is going to have to get a little play in it at least. there is a lot of tension on it so one has to be careful. you can try a wrap of leather around the edge of the valve and pliers to try to rock the valve in an small ark. don't try to make a big twist or a big jerk just a gentle rock back and forth even is it's only enough to just feel. your get any movement and apply some lube and each time you do that it will break down that ring of rust on the stem. the key with freeing up rusty stuff is to go easy small movement means progress. here is the one valve I saved out of mine. as you can see by the seat it got a burnt edge and would no longer seat. but what your dealing with is rust on the upper stem keeping it from sliding back int the guide. you can see on this one have much travels up and down the guide. this keeps the valve straight and seating. about 3/4 of the wear pattern is in the guide all the time. the two things you don't want to damage freeing up the valve is the guide and the valve itself. have patience and work it a little at a time.
 

Attachments

  • IMG_1256.jpg
    IMG_1256.jpg
    72 KB · Views: 122
I didn't go buy the compressor. I called my uncle over and we got the valve good and un - stuck!!!

We ended up moving it up and down about another 16th" each way every 10 minutes until it was free, then carried on with carb cleaner and penetrating oil to keep removing build - up and lubricating and back and forth and up and down and finally the valve moves probably 98% free. I will leave the other 2% to nature once I clean out as much carbon build - up as I can, and will be checking clearances once we warm it up.

I am anticipating my gasket set arrival, should be firing it up within a week!

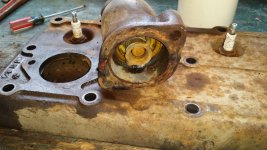
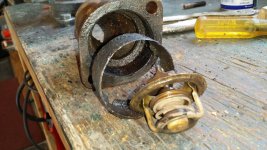
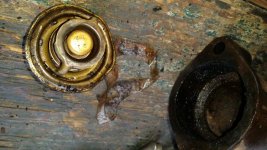
I spun the sheared bolt out of the block, and heated the thermostat housing in order to free it from the sheared bolts holding it in place, then spun them out and worked on removing the thermostat, what a hassle... It was so caked in with carbon that I had to torch it free as well.

The thermostat was 192 degree rated, are these easily accessible at parts stores?
 

Attachments

  • 20150329_162855.jpg
    20150329_162855.jpg
    100.8 KB · Views: 116
  • 20150329_165041.jpg
    20150329_165041.jpg
    101 KB · Views: 110
We also removed the floor plates to locate the brake reservoir. It is quite low on fluid and obviously that means so is the whole system. I will worry about that after the engine is running. I will likely just order new cylinders and keep the ones I have to re-build at a later date.

I am thinking the pump I see in your pictures Ed is your fuel pump, but am not sure. On the passenger side of your block near the front of the engine? Mine is not there, I will look deeper tomorrow.

I'm very much considering taking the rad to a shop for a thorough cleaning.
 
The thermostat is a Dole 190 degree thermostat, and that particular model, when it fails, it fails in the open mode. It has been changed from what was originally in there. I believe that the car calls for a 180 degree thermostat. If you buy a thermostat, get one exactly like the one you removed, or let me know, and I will try to dig one out for you from my NOS stash.
Save your money on the radiator cleaning, because if they boil it out, it might just fall apart. Leave the thermostat out when you put everything back together, and I will email you my secret method of radiator and block cleaning. It works well, as can be attested to by Jeremy Ledford and Dan Scully, and it costs less than $5.00 and is gentle on the radiator and block. To use the old advertising slogan, it cleans like a white tornado! :D
 
I look forward to cleaning it your way, one of my friends dad told me his secret, it would also cost about $5.00, but wouldn't require an email as it is a very easy method. My head has a lot of gunk in the water column, so I can only imagine what is in the lower portion in the block. The coolant I drained from the rad looked like a mixture of coolant and water, and was very clean, about a shot glass full of "shrapnel" in very clean fluid. There are a lot of changed out and different things on this car, it was either modified in early life or somebody was working on it before it got to Grampa's tow yard.
 

Attachments

  • 20150329_165009.jpg
    20150329_165009.jpg
    101.1 KB · Views: 130
don't loose that retainer. it necessary to keep the thermostat in place. they used two different styles and with that retainer it's a standard GM one. the gunk is mostly just dirt that settled around were the water doesn't circulate as well. the back cylinders will have that same problem.

if yours doesn't have the fuel pump in the right front corner them some one put a electric one on it. it should have a dual action fuel and vacuum pump.

when I wanted my radiator cleaned and repaired they just laughed at me. no one would touch it due to age. so Paul's method is the best. I had a small leak in mine I ended up doing the repair on it my self . it should only have a 4 lb cap so the system does not need to be all that strong. it is a different radiator then the chevy. as the heater hose returns to it not the block.

good news on the valve. here is hoping she seats.
 
Okay, my hose from the bottom of the rad goes to the defrost heater under the glove box, that must be the return and the hose from the heater to the head must be the in - flow. I believe it is a defrost heater, and there is no under seat heater...
 
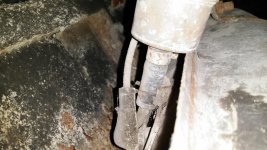
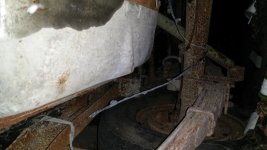
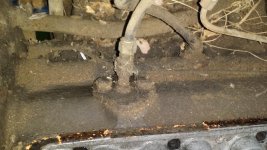
I am assuming the wire going into the tank that is half - as taped up and drooping everywhere could only mean an electric fuel pump was installed sometime in its later years. The wire has the same fabric wrap as all the rest, so it must have still been long ago.

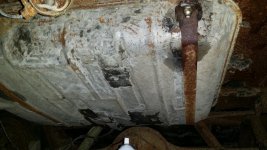
Do I just pull this plug so I can drop the fuel tank?
 

Attachments

  • 20150330_201113.jpg
    20150330_201113.jpg
    99.2 KB · Views: 98
  • 20150330_203605.jpg
    20150330_203605.jpg
    92.5 KB · Views: 95
you can drain the tank with that plug. take the straps looks to drop it out is necessary. the wire is most likely the sending unit. that can looks more like it's a in line filter but we can't see much of it. the fuel line runs along the inside of the left frame rail. that would be a more normal place to cut the line. the older 6 volt electric pumps were rather large and most were mounted with bolts. here is what the top of the tank looks like and there may be a few other pictures here that might help
http://www.dropshots.com/jer57747/albums/281056
 

Attachments

  • 53 tank.jpg
    53 tank.jpg
    65.1 KB · Views: 94
Bud,
What part of Calgary are you in. I'll be over there on April 8 for about 10 days.
Maybe Tim Prieur and I can grab a coffee with you?
 
That would be cool Doug, you can get a first hand glimpse of the progress. I am in the south end of the city, very easy to find if you know where Deerfoot trail is. I will send you a private message, we can discuss.
 
That is quite the photo bank Ed, a lot of good pics to look at and reference and compare.

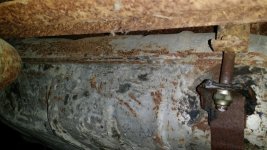
My gas tank looks like it takes up the whole spare tire spot, and there is no spare tire box there. I tracked the fuel line all the way from the engine to the tank without any sort of pump along the way. I will check again today, maybe I missed something, the fuel line literally takes the long route around the car to get to the tank, I assume to avoid heat issues from the exhaust pipe.
 

Attachments

  • 20150331_062846.jpg
    20150331_062846.jpg
    99.4 KB · Views: 82
  • 20150331_062906.jpg
    20150331_062906.jpg
    99.4 KB · Views: 81
Have you checked the engine to see where the fuel pump mounted, and if there is a block off plate, or it might just be missing, or broke off.
 
Back
Top