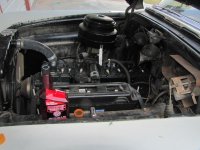
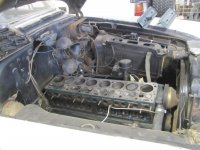
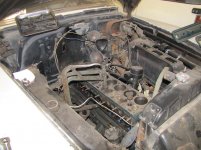
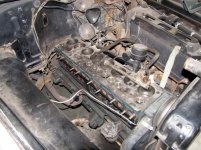
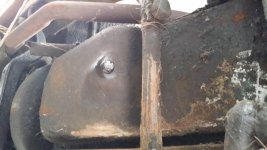
I would pull that head, and clean up the rust. Also, if the engine has been sitting for all that time, and was never turned over, there is a strong possibility that the engine valve springs are going to need to be replaced, since the springs are suffering from metal fatigue. Might as well repair it in your garage, then having to take it apart on the side of the road. Also, the rings might also need to be looked at to see if they have gotten stuck in the ring groove, another common problem when an engine sits for a long time, and wasn't put away properly.
You are using an out of date browser. It may not display this or other websites correctly.
You should upgrade or use an alternative browser.
You should upgrade or use an alternative browser.
The Rim Reaper - 1953 Pontiac Hearse by Barnette
- Thread starter Bud Weishaar
- Start date
Thanx Paul, the engine has been started twice in the last 25 years, and driven 1 mile on the first occasion and very briefly the second time.
I have just drained out the Rotella T6 that I put in, it looks to have soaked up some dirty oil from the insides. I am once rend that pulling the head off will result in having to replace the gasket, as the old one will likely crumble. Am I correct?
Another note, I don't have a garage to do this in, but my driveway is still better than the side of the highway...
I suppose it would be best to replace the gaskets anyways, as the pressure of driving will likely cause these old gaskets to fail anyways. I haven't researched whether I can get the gaskets easily here in Calgary, I suppose the VERY slow way is going to be the way to go though, as I don't want to damage the engine just to drive it once, LoL.
Once I pull the head to clean the rust, how do I get to the valve springs? (Again, not really mechanically inclined at all...)
I will go attempt to pull off the top now, will post a pic in approximately 36-48 bolts...
Head gaskets might be available from a local auto parts store. The valves and springs will require some mechanical ability to get off, but it isn't insurmountable. I would start by finding a Cadillac service manual, and start learning from there. If you need technical help with how to remove the heads, I and a few others here can help you with the process. The most important step right now, is to start soaking all the nuts and bolts with Kroil or PBblaster, while you are doing your research.
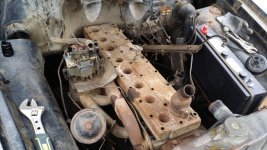
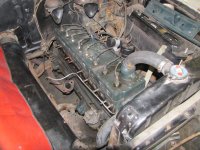
Okay, still trying to remove the top cover on the engine...
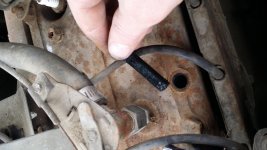
I first removed the oil filter, that was quite straightforward. Then I removed the spark plug wires and took of the neat little bracket that looks meant to keep the organized. I had to disconnect from the alternator to get the assembly out of the way.
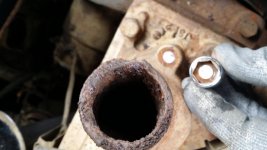
On attempting to remove the mount for the radiator tube, one bolt sheered, not sure if I can remove the cover without getting this off? As well, there is quite a bit of rust inside, hopefully that is not too horrible a sign...
As well, one if the bolts sheered off inside the head, I hope the other 30 or more will hold it together, LoL.
Attachments
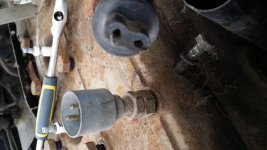
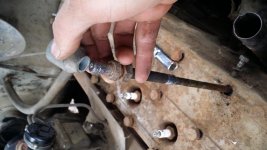
This car is equipped with what I can assume is a block heater, it has a standard 110v plug end running to a 2 needle prong plug On TOP OF A BOLT ON THE BLOCK.
My issue here is that I can spin both nuts on this bolt, neither is a fixed nut for the ability to spin off the bolt...
I just researched the name stamp on the connection, James B Carter, who patented a block heater configuration, so I am now sure it is a block heater, if the house cord plug end wasn't enough of a giveaway.
Attachments
Turns out I couldn't wait for the answer.
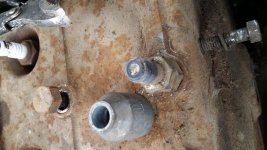
It also turns out that this type of block heater doesn't turn out, it either slides in and out or doesn't at all, not sure which.
I went ahead and spun the top connector off the bolt with a channel lock plyers, and ruined the electrical connection inside. Then I spun out the bolt with the same channel locks and the rest of the stem came out with it.
I finished disconnecting everything else from the engine and it was time to work on prying apart the engine block...
Attachments
I had a friend there to help, as I assumed there would be prying involved due to rusting on the outside of the motor.
As I was putting aside the parts that weren't still connected to the vehicle, my friend wiggled the cover gently and noticed there would be no force necessary, it would lift right off.
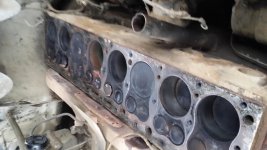
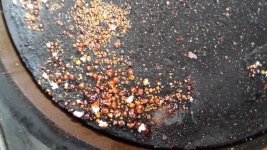
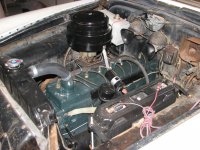
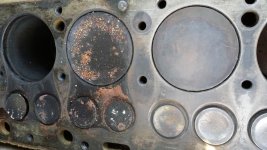
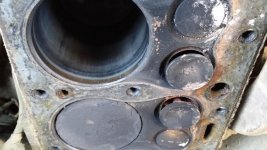
We pulled it off and we saw what I expected, clean almost everywhere but cylinder 5, which does have some very light rust around the cylinder wall and more of that weird rusty bubble growth on the top of the cylinder, though that is not where my real problem lies. On cylinder 7 and 8 at the back, each one has one carb - side lifter that is not moving.
I have posted a video to YouTube, note the second and third small lifter from the back are both stuck in the open position.
[ame]http://www.youtube.com/watch?v=Y3YAi28k3Po&feature=youtube[/ame]
I will include more photos tomorrow.
Attachments
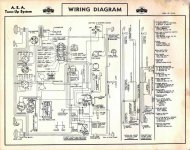
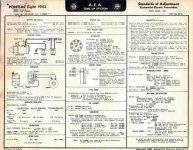
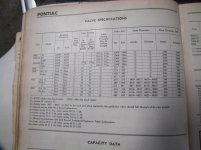
my guess is it's not rust but a combination of water and oil crystallized into a amber. but with out taking a compression test first before removing the head you have no idea what you had first. there dosent appear to be a lot of carbon buildup on the valves. thew were bad for that. I had to replace all the exhaust valves in mine. the oil filter on that one is a aftermarket. some people just could not stand to see teh engine without one. there is a firm belief that putting it in line as it is dropped the oil pressure and caused premature engine failure. it did not have a filter from GM. the carburetor is a carter WD. in order to set the lash on the valves the engine has to be warm. but you have to pull the intake and exhaust manifold combination to pull the valve cover. one of GMs better ideas. the correct green for the engine can be bought at http://www.hirschauto.com/ the best place to fidn any parts i have found are here http://www.pontiacparts.net/ i will tell you be carefull not to over tighten the spark plugs as the head is vary thin there and they can be easily striped out. the straight 8 was not a fast winding engine but it would hold speed all day. here are a few more pictures you might find helpful. that heater you pulled is called a head bolt heater.
Attachments
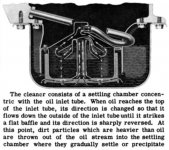
Thank you, I have seen all of those pictures and it is great to have them here for resource. Except I haven't seen the diagram of the debris removal system, that is a nice one. I also didn't know how to get to the valves, thanx for that one. Do you mean to say you need to take the manifold off while it's warm to do the adjustments? Do you know of a resource for dummies on how to do that?
Do you know if the head bolt heater slides in or is meant to remain inside the bolt? By the look of everything to me it should slide in and out as it doesn't have threads on the inside of the connector.
I apologize about my terminology, I am nowhere near being a mechanic, but I am willing to do as much as I can to my own rides.
I haven't messed with anything inside yet, just figured I should clean what I can before I fire it up. The head gasket appears to be steel or aluminum, I haven't even pulled it off the engine but it looks okay. Should I throw the top back on and fire it up the way wild willy's tutorial says to get that old tractor running or should I try to get rid of some carbon and rust while it is open?
My real concern right now is what to do about the 2 valves, or if it is okay to see if they free up when I fire it up?
Also, the car is blocked up with about 6" of clearance, is that enough room to drop the oil pan?
Edit Edit Edit for more questions, LoL...
Is that a reservoir for the oil bath I see in that photo? I have seen clear round ones as well in pictures, if I get an oil bath will I need the reservoir as well? (I think I just figured it out as a washer fluid res.)?
Are there any more modern air filters that will actually fit this carb?
Should I get rid of the inline oil filter?
If the valve lifter is stuck in the bore (hole), and the valve is open, you can spray some penetrating oil under the valve head, and it will run down to the lifter. This might free up the lifter. You don't want to start that engine, until you know that everything is freely moving, otherwise, you will bend push rods, and do other damage.
If I can make a suggestion. You might want to consider getting a 1949- 1954 Pontiac Shop manual. You can find them on ebay and a few other sources. It will be one of the best investments you can make. Much of your vehicle is started out as a standard 1953 Pontiac and then was converted, by Barnette, to the hearse configuration. The manual will cover a lot from the cab forward as well as the rear end and braking system.
The, some where between $25 - $50, investment will save a lot of headaches and will also make for interesting reading.
I got two for my 1951 Chevy National. One for the shop and one to keep in the rig.
The, some where between $25 - $50, investment will save a lot of headaches and will also make for interesting reading.
I got two for my 1951 Chevy National. One for the shop and one to keep in the rig.
i was kind of worn out last night when I looked at the video. are you saying that you have a couple valves stuck open? Paules fix is as good a attempt as any to free them up as it normally the set that was open. and it's just oil that has has hardened as it exposed. one more thing you can try is the marvel mystery oil. it will do a nice job of freeing up stuck things. works good in air tools also. as long as you have the head off a ring of it around the pistons from the top will loosen up any stuck rings also. I would not attempt to tear it down any farther at this point it was a running engine. so blow out the loose stuff lub the rings and turn it over with the head off enough to work the oil into where it needs to go. get the other valves as they open to. if the valves free up put the head back on. not a good idea to reuse a head gasket but i have seen a number of things done that were not a good idea. I would not do that one major problem is the potential for water leaks and why tear it down again. the head bolt heater passes threw the head threw the block in to the water jacket. toss it your not going to have to relay on this car being your only on in the dead of winter. just replace the head bolt with a new one. here are a few pictures of my engine when the man Not me replaced the exhaust valves and dressed the intake ones. I should be able to find you a original air cleaner here but one of the aftermarket paper ones will work. till then they are a standard GM oil bath used a lot of years. to answer your question on setting the valves. you set them cold as close as you can. then put the engine together and run it till it's normal operating temp and pull the side covers and make final adjustments when the engine is warm. it is also a good idea to use a small gas tank to start the car to know your not having and problems with contamination. but most of us dump in 5 gl and see if it runs. you can see the small tank coming and going in some of my pictures.
and yes I'm looking for taillights for mine tarn near bought a whole rig out of washington just to get a set.
and yes I'm looking for taillights for mine tarn near bought a whole rig out of washington just to get a set.
Attachments
still can't tell in the video if you have some not opening or not closing. way too many to watch.
I called over a couple friends to help yesterday, one wants to run the the other wants to tear apart and replace everything, LoL, seems the status quo in these kinds of vehicles. If I want it to last 50 more years the ideal thing would be a complete rebuild, but in my opinion that can happen when it is needed.
As it sits there doesn't appear to be any scarring on the piston walls, but the valves aren't in the best shape and may infact need replacement. 14 of them move freely and are itching to fire, 2 of them are not moving, and I have done a lot of reading that says the attempt to free them without tearing the engine down any further. I would however still feel it is beneficial to remove the valve covers and see about cleaning up any sludge in there, and take a look at how everything moves not only for my understanding but also just to see if it all moves properly. Will I cause damage if I clear up what rust I can via seafoam or MMO and get the valves functioning again?
I will continue to scrape away all the filth underneath and attempt to drop the oil pan, it appears it should be done with the engine out, but looks like I might be able to get at it without pulling the block.
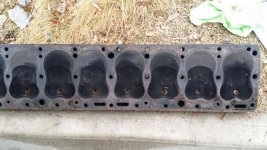
Image 1 : cylinder 4 after cleaning and cylinder 5 which was the worst of them all.
Image 2 : cylinder 7 & 8 both have a valve stuck open
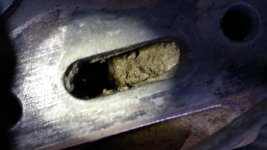
Image 3 : A look inside the head at the radiator fluid cavity
Attachments
you need to think about your goal. are you attempting to at this time get a engine that you can start and drive around vary little. or one you going to be running cross country in. do you have the necessary tools to do anything with the valve train? pull the intake and exhaust and may be the only way to free up the down ones. these old flathead inline engines were hard on valves due to the way the gases went thru the engine. carbon was a big problem. that was my problem. all we did was a valve job on it. what I see on tip of the pistons is setting stuff it would have passed threw if you had fire it up. but with valve problems in half of them you most likely would not have gotten it running. before you tear it down father do some checking. does anyone have a valve spring tool for the flat head engine around that you can get? do you have a shop that could overhaul the engine for you and how much money they talking about. trust me if your going that rot the more complete the engine is when they get it the less you will pay.
now me right now looking at what you got I would get a valve spring compressor pull the offending valves one at a time. wire brush the stems polish with a little emery and put them back in. if you don't move the adjusters everything should be the same. tehn when all the valves are moving up and down put it back together and see if it runs.
it may work good enough for what you want it may need a complete overhaul.
you will not know if you don't try. if it shows it needs a compleat you haven't waste a lot of money just time. but if you can't get the right tool to do the job don't start it. you may be able to get the penetrant oil on the down valves by pulling intake and going threw the ports.
there are a few of the old motores manuals and shop books on e-bay. at this point one of them is your best friend.
Even better than buying a manual, I signed up to Pontiac Registry and they have all the manuals I think I could need, for members only of course.
I do not have the tools for the job, but can get what is needed if necessary, although as you say, having a shop do a full overhaul would be better if needed, I only have a driveway, LoL.
I will just open the valve cover and see what kind of gunk is in there and if I can free up the 2 stuck valves, all others move nicely, but if it is easy enough to take them out and shine up the stems I will likely try that and not worry about the fine tuning unless it has problems running.
Progress will slow momentarily as we seem to have some snow coming in. My uncle returns to town this weekend as well, whenever I have car problems he is the guy that guides me through repairs. I can only assume he will be interested in taking a look inside with me.
Will be scraping as much crap as I can from the underside until I get a clean path to all the oil pan bolts.
Attachments
From the looks of the bottom of the engine, you are going to need to drop the center drag link to be able to remove the engine pan. It doesn't look like there is enough room to get past it.
Right now the air cleaner is somewhere in storage. I just moved back to Kansas within the past couple weeks. It is similar to the one in the picture that Ed posted above. It needs cleaned up and painted but it is still presentable with the oil servicing instructions still on top and legible.
That is great Pat, let me know when you find it and what your price is and we can discuss. I would like to have the original setup even if I do find a paper style filter.
Yes Paul, looking at the manual it appears I need to remove the drag link, remove bolts from mount and lift the engine just to give enough room to pull the pan. That book lays it out so easily that you are 100% right, it will be my best friend!
Yes Paul, looking at the manual it appears I need to remove the drag link, remove bolts from mount and lift the engine just to give enough room to pull the pan. That book lays it out so easily that you are 100% right, it will be my best friend!


