Getting ready for Hudson

It's going to be a tight one, but things are progressing, albeit slower than I would like. Here are a few pics I have to share so far....

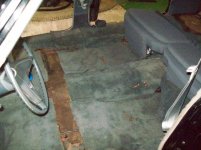
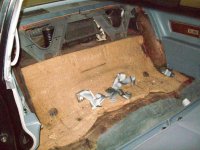
1 & 2. Seats out of the car and off to the upholsterer, to be re-done in their original Decordo gray cloth (not the hideous blue velvety stuff they were presently wearing). Headliner and windlacing to follow. If you have ever taken the front seat out of a Fleetwood 75, you know that they are VERY heavy, and that they do NOT go out through the front doors.

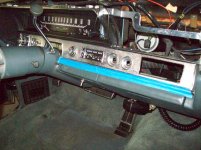
3. Old wood applique off of the dash (there was hardly any wood left on it), and the dash all cleaned up ready for the new wood. Thank you Ed Renstrom for advice on the adhesive, it worked great!

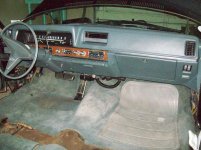
4. New wood applique applied and dash put back together with newly converted quartz clock and newly re-worked original radio (both done by Forsythe Restoration, Jeremy Ledford's relative. The guy does NICE work, and is very pleasant to work with--I highly recommend him).
 

Attachments

  • 005.jpg
    005.jpg
    95.6 KB · Views: 811
  • 004.jpg
    004.jpg
    96.7 KB · Views: 803
  • 001.jpg
    001.jpg
    96.7 KB · Views: 811
  • 012.jpg
    012.jpg
    96.6 KB · Views: 822
Thanks Josh. I'm just glad I remembered where all the wires went! With any bit of luck, it might make it! I am not even going to go into what under the hood looks like right now....
 
Last edited:
Great job on the dash... can I commission you to work on my 1969 Cadillac ambulance? :pat:
 
Great job on the dash... can I commission you to work on my 1969 Cadillac ambulance? :pat:

Sure Paul, what do you need done? I would much rather do stuff like that than motor work any day. Speaking of which, had my mechanic (retired Cadillac technician) come over yesterday and we may have found out what my motor noise is from. All of the rocker assemblies looked like brand new except for two rocker assemblies on the passenger side head looked at one time that they didn't get any oil. He took out the pushrods and they were clear, checked them for straightness while he had them out and they were okay. So, I can only guess that if there was a blockage somewhere, the Seafoam that I used cleared it out, but the damage had already been done. Ordered new rockers and supports, so we will see if that was the source of the noise.

Thanks for all of the encouragement guys, I appreciate it!
 
Making progress

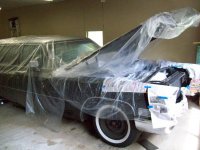
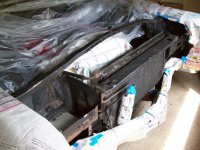
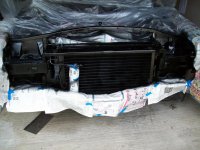
Nice weather today for a change, so I finally got some painting done. It only took four plastic drop cloths to cover the car.....some before and after shots.
 

Attachments

  • 013.jpg
    013.jpg
    94.7 KB · Views: 598
  • 010.jpg
    010.jpg
    95.4 KB · Views: 602
  • 014.jpg
    014.jpg
    95.8 KB · Views: 498
Shawn...

In the future, I suggest that you don't use newspaper to mask off areas that you don't want paint damage on. Newspaper is porous, and the thinners in the paint can and will eat into the painted areas below the newspaper. I learned this lesson the hard way many years ago. A roll of painters paper will last you a lifetime, and it isn't that expensive.
Your painting looks great.. When do we get to see it unmasked???

Interesting, I did not know that. From now on I will not use newspaper, who knew--guess we learn something new everyday. I am going to let it cure overnight, then unmask in the morning. MUCH more painting to do, inner fenders, valve covers, intake manifold, air cleaner, etc., the list goes on and on.....thanks for the info!
 
When painting items that have an oil residue on them, I usually wash them with dish washing liquid and warm water to get the residue off. Then I will wipe them down with a cloth that has been dampened with enamel reducer. Sand and give one more wipe with enamel reducer, and paint. Whenever possible, I take them off the car and paint them. Check out this thread from last year. Ed's last comment was truer than he thought. I was coming down to the wire, and was working on getting the Chevy read for Albany at the same time. One problem that I ran into was that I had forgotten how some of the brackets went together. Should have taken more pictures, but in the end, I figured it out by trial and error method...
 
they are making the paper so thin today it about as bad. a double layer is a good Ida if your using news papers. hate to say how many I did with them. but getting rid of the rust really makes the difference in the appearance of the car. just a hint if I were you I would look under that carpet when I had the seat out. a little red lead now night make all the difference later and who wants to take the seat out again. you never get to do just one thing on the car it's one thing leads to another.
 
Just a hint if I were you I would look under that carpet when I had the seat out. a little red lead now night make all the difference later and who wants to take the seat out again. you never get to do just one thing on the car it's one thing leads to another.

Thanks for the advice. I have looked under the carpet in the front and the back, everything looks very good. Very little if any rust to be seen. I don't think the car was really ever driven in the winter time. The car lived most of it's life in Delaware, Maryland until about 1995 when it came to PA. Since that time, it has never sat outside and has always been in a garage with a cement floor. This, coupled with the excellent care given by it's former owner would account for the floors and the undercarriage being so good. You are right, I DON'T want to take that seat out ever again! And yes, one thing leads to another, and another, etc. I was actually thinking of you today, Ed, when I was painting---"I wonder if Ed is painting something on Brendan's car right now?"
 
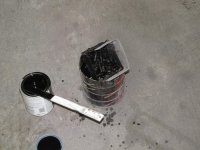
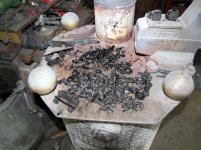
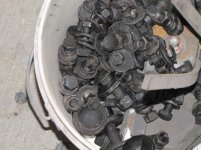
will yes I was, coated the nuts and bolts. something about painting everything then putting it back together with rusty bolts makes no since so I have been experimenting on how to do them easily. with out investing in a lot of stuff.
using a rust remover and clean them that way then made a screen basket and thinned the paint out till it would just stick and cover. then baked them dry. so far it working better then just painting the heads.
 

Attachments

  • IMG_9068a.jpg
    IMG_9068a.jpg
    92.6 KB · Views: 193
  • IMG_9094a.jpg
    IMG_9094a.jpg
    67.4 KB · Views: 196
  • IMG_9095a.jpg
    IMG_9095a.jpg
    59 KB · Views: 198
Your car is looking great, Shawn! Ed's method w/ painting fasteners looks good, too! I actually have had my limo ('83) out this weekend for the first time in a while. Moved it to put a boat in its spot, so I took it out on some errands after giving it a much needed bath. The air and heat have always worked well in this car, but now it's blowing hot air despite the temp settings - I knew that early electronic control panel would be trouble eventually! I'm looking forward w/ all the others to seeing your '68 in Ohio.
 
Car looks outstanding Shawn. I think you're becoming an Ed.Jr. When you get ready to do body work and want a test ambulance, give me a call.

As stated by all, "Can't wait to see it in Hudson".xmass
 
Thanks everyone. It's been a long time since I have done work like this on a car, and I was wondering if I was still able to do it. It certainly won't be a professional Ed Renstrom job, but it will be the best I can do with the limited knowledge and tools that I have. So, I thank everyone for their advice and know how so far, it certainly is appreciated, and keeps me going. :thankyou2: Just another reason why this club is the best as far as I am concerned.
 
Shawn it looks like you are doing a great job on your car. I look forward to your next progress report with pictures. All this Fleetwood 75 stuff is making me think about bringing mine this year. I got it out and the first thing I did to it was remove the window tint on the five rear windows.... What a nice difference that makes.
 
Shawn it looks like you are doing a great job on your car. I look forward to your next progress report with pictures. All this Fleetwood 75 stuff is making me think about bringing mine this year. I got it out and the first thing I did to it was remove the window tint on the five rear windows.... What a nice difference that makes.

Thanks, it seems like it is taking forever and time is running out! :( It is funny that you removed your window tint, as I am going to have the five rear windows in mine tinted--spent too much money on new upholstery to have the sun fade and rot it out again (the reason it needed replaced). Speaking of which, got my seats back last week and they are beautiful. I don't have them in the car yet, as I took the lower front seat side garnish moldings to the paint shop to have them painted. Still waiting on my headliner....and a few other things that had better get here soon!
 
Back
Top