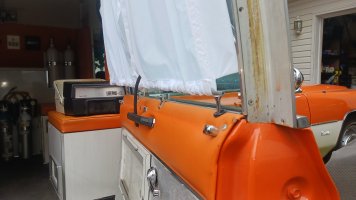
The best ida i saw was the raised floor with the back boards slid in a slot between them. MM top box was a good ida unless you were a short person.
You are using an out of date browser. It may not display this or other websites correctly.
You should upgrade or use an alternative browser.
You should upgrade or use an alternative browser.
1976 Superior 54XL Restoration Log
- Thread starter Jean-Marc Dugas
- Start date
Jean-Marc Dugas
PCS Member
I had issues with water pooling inside the car mostly in the driver side foot area where the pedals and a little on the passenger side.
So, yesterday I targeted specific areas with water to find out where it was coming from. It seems that it us leaking from the areas below the windshield where the Superior Sheet metal meets the Cadillac sheet metal.
The areas are covered with think sealant, but the sealant is all dried out and cracked.
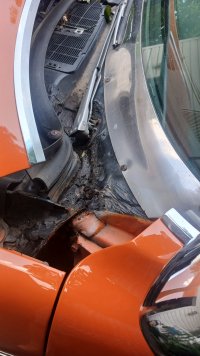
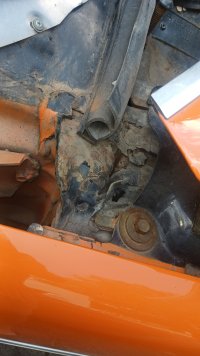
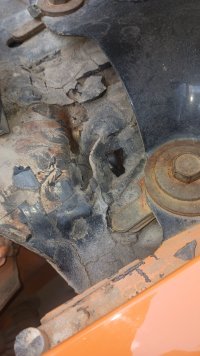
When I pulled the sealant material off there was definitively wetness under it.
When running water in there areas again water was definitively coming in.
I cleaned the areas well and soaked them with rust converter. I used a syringe and needle to get into the tight areas with the rust converter and let it sit overnight.
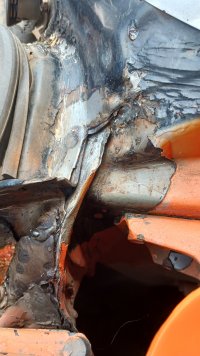
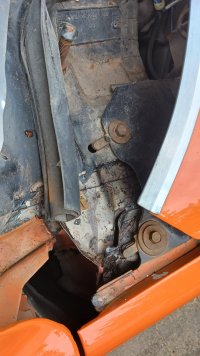
This morning I applied brushable sealer to the areas. Will let that sit until tomorrow and then prime and paint the area.
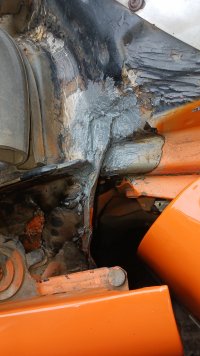
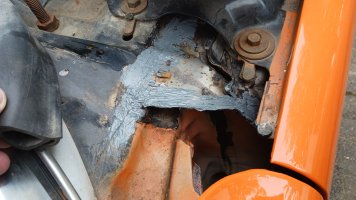
So, yesterday I targeted specific areas with water to find out where it was coming from. It seems that it us leaking from the areas below the windshield where the Superior Sheet metal meets the Cadillac sheet metal.
The areas are covered with think sealant, but the sealant is all dried out and cracked.


When I pulled the sealant material off there was definitively wetness under it.
When running water in there areas again water was definitively coming in.
I cleaned the areas well and soaked them with rust converter. I used a syringe and needle to get into the tight areas with the rust converter and let it sit overnight.


This morning I applied brushable sealer to the areas. Will let that sit until tomorrow and then prime and paint the area.


That is all GM on the cowl. They used a oil base sealer on it over bar metal. Hit it with some air if you can to be sure you have got all the loose stuff off. or a pressure washer. With the converter you need to wash it off all the surfaces that are not rust as your next step. If you have any bar metal showing brush some primer on it. Then when it sets up. Use the paintable water clean up exterior grade sealent. The 25 year stuff is what i normaly pick up at the hardware store. Put a big gob of it in the center were you can easily get to it. Then using a pant brush dipped in water paint it in. Keep dipping the brush as you work to thin the sealer down so it will run into all the seams. If that doesn't seal things up. The problem is in the air box. Under were you working. You might first see if you can feel in there. A mouse nest will give you a rust spot the will drip water. Always on you foot. And be sure your drains on both sides are open. Or water will fill up and come in under the kick panels.
If all your work fails, have the nose of the car removed, and fix it correctly otherwise you will be living with it every time it rains. I had to do this to one of my cars, and in the end, it was worth the work to correct it correctly and then keep chasing the water leaks.
Jean-Marc Dugas
PCS Member
Well, the car was outside last night and we had a good rainstorm. The driver side is dry as a bone and there are only a few drops on the passenger side. This is a huge win!.
Jean-Marc Dugas
PCS Member
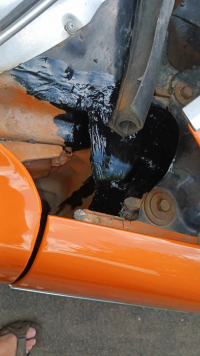
This was "a little of this, a little of that" king of weekend. Most of the work was in the engine compartment, first chasing water leaks. Ads per the post above, good progress was made.
Passenger side repairs.
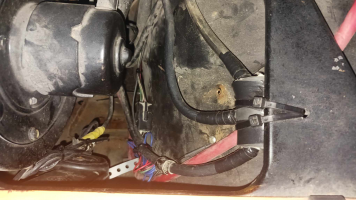
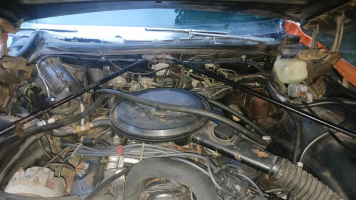
From there I moved to a little cable management, re-routing some of the wiring, replacing and adding clamps, cleaning connections and taping up some exposed wires.
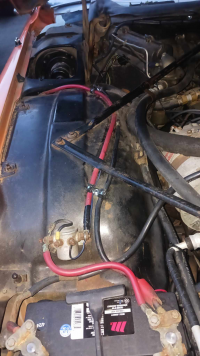
Finally I cleaned-up the driver side frame which was painted white when the car was in the paint shop. I applied a coat of primer and hopefully will apply a coat or two of black paint today.
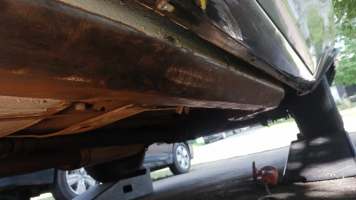
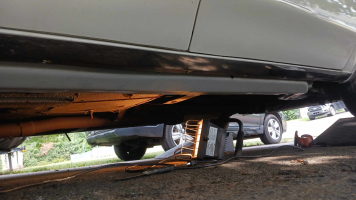
Passenger side repairs.

From there I moved to a little cable management, re-routing some of the wiring, replacing and adding clamps, cleaning connections and taping up some exposed wires.


Finally I cleaned-up the driver side frame which was painted white when the car was in the paint shop. I applied a coat of primer and hopefully will apply a coat or two of black paint today.


Jean-Marc Dugas
PCS Member
The big disappointment, I got the curtains back from the lady that was doing that job for me and here are the results:
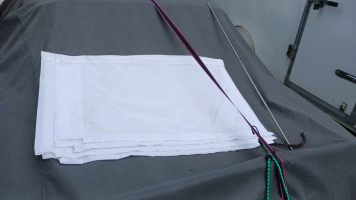
None of them are the same size. She had the originals to work from. Extremely disappointed. Lesson learned, go with the more expensive professional seamstress instead the the friend of a friend that is really good at sewing.

None of them are the same size. She had the originals to work from. Extremely disappointed. Lesson learned, go with the more expensive professional seamstress instead the the friend of a friend that is really good at sewing.
My bets is on her following the originals to close. But once they are in place you won't notice the slight differences. The thing I discovered doing the interior on a superior is that left and right are not the same.
Tim Prieur
PCS Member
J-M, I agree with Ed. I would hang them, and leave it for a week to see what you think. If after that they are still not right, make the change.
Jean-Marc Dugas
PCS Member
I can fit one pair, but the second pair is not wide enough for the narrowest window.My bets is on her following the originals to close. But once they are in place you won't notice the slight differences. The thing I discovered doing the interior on a superior is that left and right are not the same.
Put one narrow one and one wide on on each window. The only person that will know they don't match is you.
Jean-Marc Dugas
PCS Member
Tim Prieur
PCS Member
Rats! 
Your missing a few things. The flap should have a row of snaps that hold it to the window frame on the edge. Then the holders for the bottom rod pull them tight. But of course what comes to mind looking at them is they are not the right ones. It looks like they are rear door for a low top. Most of the square door frames didn't fasten on the sides. only the rear and the angled one did on superiors.
Get you rods in place there is a center hook also. Measure top to bottom of the rods and side to side. Cut your side measur ment in half and you have you measurements for the hole you want to will. She can add for the loop top and bottom and the edge seam. Then see if you have 3 sets for the rear door.
Get you rods in place there is a center hook also. Measure top to bottom of the rods and side to side. Cut your side measur ment in half and you have you measurements for the hole you want to will. She can add for the loop top and bottom and the edge seam. Then see if you have 3 sets for the rear door.
All right it helps to look at the picture more carefully. The shape is right the length is off. The snaps are on the frame so the flap should end at the bottom of the glass. The tail goes down to the rod. looks like your pattern as shrunk up a bit.
Jean-Marc Dugas
PCS Member
What I have found through the process of restoring this car is that it is very hard to find someone who takes pride in what they do and are willing to stand behind their work.All right it helps to look at the picture more carefully. The shape is right the length is off. The snaps are on the frame so the flap should end at the bottom of the glass. The tail goes down to the rod. looks like your pattern as shrunk up a bit.
Mistakes happen, no question, but in this case same as in a few other instances there is a litany of excuses and no corrective measures. I do not want curtains that are not the right height, or not the right length, I want and paid for curtains that are made to specification. Maybe I expect too much, maybe I need to learn how to sew.....
If they measure them or were given the correct measurements there is no excuse.
Jean-Marc Dugas
PCS Member
They had the original.If they measure them or were given the correct measurements there is no excuse.
Terry Lange
PCS Member
I had exactly the same thing happen when I had a seamstress make new curtains for my '59 Comet Oldsmobile funeral coach. They were too short all the way around, and she had the originals to work from. Fortunately, I had purchased way too much material, so she was able to redo the complete order, and was embarrassed about her error. I suspect the problem was that she forgot that the top and bottom edge loop over for the curtain rods to go through. Even the second set was a little too tight, so it was difficult to open the curtains as much as I would have liked.They had the original.
But did The origional one fit?


