Laminate for my 54XL

I just ordered two 5x12 sheets of Gloss White Ash from Formica. They should be here in 2 to 6 weeks. I'll now get cheap laminate and practice the cutting and application process on whatever I can put my hands on.
 
I thought i was doing good getting this 70 togather. Discovered CB didn't pay any attention to grain on one door. I swair i took it apart 4 times rotating it around before i could get all 3 hinged panels to open and close with out dragging.
 
Laminator training has started. Binge watches a whole bunch of YouTube videos, went to Home Depot to buy a few tid bits, ordered a couple of laminate specific tools off Amazon, the weekend warrior is ready!

With what I have on hand I laminated a small piece of wood from the scrap pile. Not bad for a start, learning lots.
Training 04.jpg


Next I will laminate my scent detection training box. This box has many of the same issues as the wood I will need to work with on the car, so why not!

I started with the bottom of the box which was relatively intact.
Training 03.jpg

I'll take the box apart today and tackle it piece by piece.

Training 02.jpg
Training 01.jpg
 
How are you going to deal with the chamfered holes?
First I have to deal with the imperfections on that piece. I smoothed it out with the belt sander and filled some of the dents and broken corners with Bondo. I will belt sand it again tomorrow and may have to work on the prep some more so that it glues really good.

Once the laminate is glued solid, it "should" just be a matter of punching through each holes and the running a chamfer bit with the router. 20230326_210225.jpg20230326_210252.jpg20230326_210304.jpg
 
How are you going to deal with the chamfered holes?
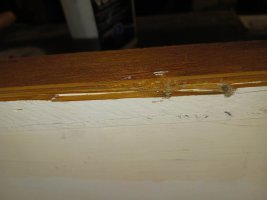
After the top sheet was glued in place I used the router to clean the edges of the box and marked roughly where the centre of each hole was. I used a screwdriver to punch a hole in the middle of each hole large enough to insert the flush mount rotor bit and made a first pass. This removed the laminate flush with the inner part of the hole. Once all of the holes were done, I switched to the beveled router bit and worked all of the holes again. This worked really well.

Training 08.jpgTraining 06.jpgTraining 07.jpg

Training 05.jpg
I still need to chamfer the edges of the box so that there are no edges that stick oit and get caught and rip off as well as give it a good clean-up before I put it back together.

This is definitively not a museum piece, the box has been in use for training for several years and was made our of left over plywood so the edges are not squares and is overall a little beat-up, so it was hard to get sharp edges with the laminate. However I learned enough to know that I definitively need to do at least one other practice run before I tackle the ambulance.
 
There is now no turning back now!

I decided to go with a heat gun to remove the laminate instead of soaking it with paint thinner. Worked well on these three items.

I did not really thought about this until today, but since all of the laminate pieces are coming off relatively intact, they will be the perfect template for the replacement parts.

Laminate - Restoration 01.jpgLaminate - Restoration 02.jpg
 
Using paint thinner and a scrapper to remove the excess glue and then sanding the rest to get to the wood. I'll have to fill in the spots where the wood is chipped with Bondo and make sure that all of the corners are sharps. Laminate - Restoration 03.jpgLaminate - Restoration 05.jpgLaminate - Restoration 09.jpg
The bottom front of the cabinet is damaged because the extruded aluminum sliders were screwed too close to the edge. I'll have to make sure to screw the sliders through the back slide instead of the front.

Laminate - Restoration 07.jpgLaminate - Restoration 08.jpg
 

Attachments

  • Laminate - Restoration 06.jpg
    Laminate - Restoration 06.jpg
    165.1 KB · Views: 0
I did a little testing with Acetone, Paint Thinner and Robert's 5505 to see what would work better and the Robert's product won the race hands down.

Laminate - Restoration 10.jpg

I will still have to sand the surface once the solvent dries out, but this Robert stuff works excellent!! The second photo is after 2 applications of 5505 which I leave in place for about 30 minutes before using a small scrapper to remove the glue and then a go over with steel wool.

Laminate - Restoration 11.jpgLaminate - Restoration 12.jpg
 
I applied Bondo to the 3 pieces I was working on to fill the cracks and some of the corner and edges.

I never worked with Bondo before and until I figure it out it is a PIA! Too much hardner, not enough hardner Grrrrrrr!

Anyhow, I think that these are almost done, ready for the laminate.

20230411_161527.jpg20230411_161519.jpg
 
Back
Top