

You are using an out of date browser. It may not display this or other websites correctly.
You should upgrade or use an alternative browser.
You should upgrade or use an alternative browser.
Rocky has a new coach?????
- Thread starter Rocky Fluegge
- Start date
the billy stuff works good. I get the seat out of this one we can compare floors. loos to me like your floor is a lot longer then the eureka.
 glad that's getting taken care of
Rocky Fluegge
PCS Member
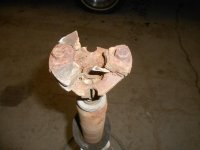
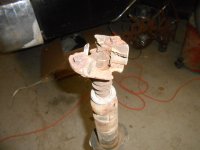
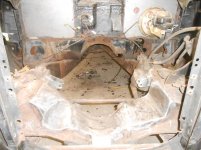
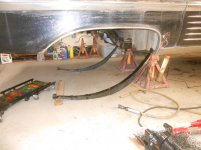
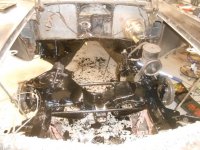
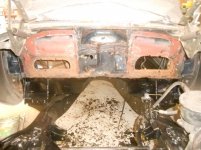
Tonight was a good night. I pulled my mock block out for the last time. all the fab work is done on the motor end. Now its time to paint up frame and fire wall and the motor and get the trans mounted up and painted to install.
Attachments
Rocky Fluegge
PCS Member
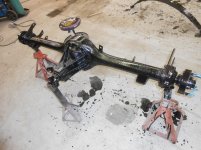
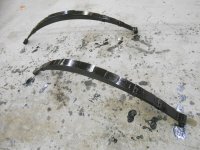
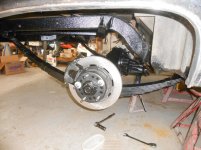
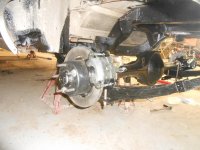
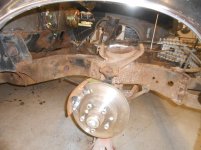
I also painted up the rear end and put some paint on the rear springs. I ordered up some new shackles and spring pads so when they come in this week I can work on getting that back under the car. and get the disc brake set up back on the rear. I love when stuff starts to go on for the last time.
Attachments
Darren Bedford
PCS Member
That modification sure was a lot of work but looks great and will look like it is stock to the average guy once you paint it.
You have 6 more months until MN ! Get it together bro !
We wanna see it on the road and in MN this summer !!!
Darren
:thumbsup:
You have 6 more months until MN ! Get it together bro !
We wanna see it on the road and in MN this summer !!!
Darren
:thumbsup:
Rocky Fluegge
PCS Member
That modification sure was a lot of work but looks great and will look like it is stock to the average guy once you paint it.
You have 6 more months until MN ! Get it together bro !
We wanna see it on the road and in MN this summer !!!
Darren
:thumbsup:
Im trying all I can to get this girl to be driving to MN, a lot of things to do and a ways to go to have it ready. But im sure going to give it one heck of a try!!
Rocky Fluegge
PCS Member
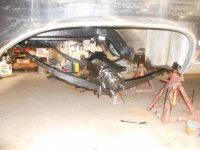
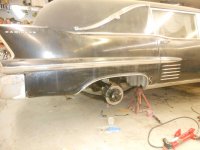
Just figured I would post up a pic of the rear back under the car. Love the fact of putting stuff back on the car and also gaining more shop space. Im not having to walk around this stuff on the floor.
It is all new springs, bushings, shackels, spring pads, and front bolt. So happy that I was able to source all that stuff.
It is all new springs, bushings, shackels, spring pads, and front bolt. So happy that I was able to source all that stuff.
Attachments
John Royark JR
PCS Member
The places that sell leaf springs, do they have some way of testing to see if the springs are still good and do what they are suppose to? My springs are OG, but being they are almost 70 years old I'm wondering if they are still safe? Thanks
If they are not severely corroded, sagging or broken they should be just as safe as they were when new. My 49 is still running the original springs and I put at least a few thousand interstate and town miles on it every year with no worries. keep in mind my coach has not seen salt (if it has it was not much because the undercarriage and springs look like very close to how it did in 1949).
Rocky Fluegge
PCS Member
herb, I agree with john, if they are not cracked or sagging you will be just fine. My leafs were all broken up bad they needed to be replaced.
so strange to see this one begin that much a different body. you would not this it would have been.
all you got to do is hose them off. if what looks like fresh rust creeps out of the wrap there rusty. but normally the wrapped ones were covered in grease. the wrap was to keep the grease in. the grease was to lube and keep the springs quit. air up the tires and measure from the bottom of the wheel opening on either side. Mauser dead center of the axle if it with in a 1/4 inch they are good. stand back and look from the side. if the tail is not dragging there not bad. of course the car should be empty at this time. one leaf broken and it will throw the car way off. but them one bad up front will read off in the rear also
Rocky Fluegge
PCS Member
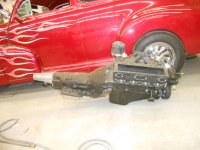
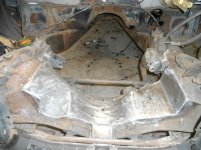
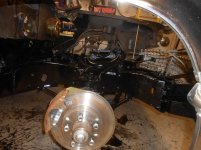
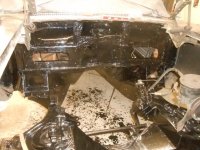
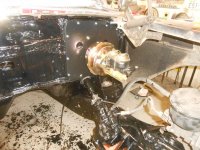
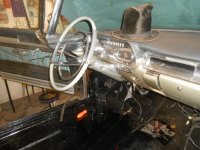
its been awhile since I have given a update to the progress on the 58. Well I have the front half of the frame all painted, and also painted the fire wall.
Attachments
Rocky Fluegge
PCS Member
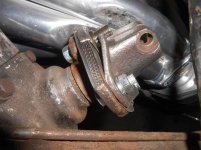
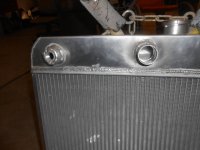
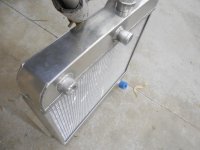
I also ended fixing my radiator I had made. The water outlet ended up being where my alternator was. So we moved the neck to the center to where it needs to be and capped of the old one for a plug or sensor.
Then I got the fire wall plates all cut and modified and had them and the brake pedal assembly powder coated. So it was wonderful to bolt stuff up for I hope the last time. woohoo
Then I got the fire wall plates all cut and modified and had them and the brake pedal assembly powder coated. So it was wonderful to bolt stuff up for I hope the last time. woohoo
Attachments

John Burchfield
PCS Life Member
Man Rocky, this is gonna be one rockin' '58!! This has been a real treat to see how you've modernized yet preserved this beautiful car. Can't wait to see it in person someday.
Rick Franklin
PCS Member
Man Rocky, this is gonna be one rockin' '58!! This has been a real treat to see how you've modernized yet preserved this beautiful car. Can't wait to see it in person someday.
John, ya shoulda joined us on the side trip to Rocky's shop while in Milwaukee. Its even more awesome in person.
John Burchfield
PCS Life Member
John, ya shoulda joined us on the side trip to Rocky's shop while in Milwaukee. Its even more awesome in person.
I know, but I was splitting my car time w/ my Milwaukee cousins so couldn't do everything. It all made for a great trip!
Wayne Krakowski
PCS Member
Ditto what Rick said,I was lucky enough to get in on the Rocky trip,you do have see it in person,and such a relaxing spot,