Rhinecliff updates

Nicholas Studer

PCS Elected Director 2022-2025
Fun progress on the Rhinecliff FD Rescue Squad 1963 Pinner-Chrysler ambulance.

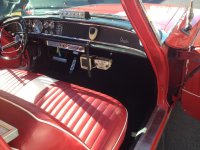
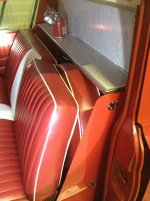
1. New carpet's in place. Some may know the carpet had gotten wet from a chronic water leak, and Paul had cut it up a bit in the process. Unfortunately, the RockAuto standard stuff wasn't a good fit. We wanted to save the original heel pad too - which required a trip to the upholestery shop - who hooked us up for the privilege of working on the Pinner family's craftsmanship. We're very happy - looks just as good - if not better than new.

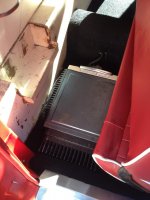
2. Motrac is back! Research coupled with annoying trial and error underneath the dash determined where the mounting brackets had been for the speaker and control head. Cable for the antenna was still there - the holes for the Low-Band Motrac itself were still present. With enough deduction and some time on eBay - all the major components were found. More importantly - the local Motorola dealer (in business since the 1950s) had folks experience with the Motracs and thrilled to work on it. Believe it or not - our Motrac is in fully functional order right now. They were even able to salvage a damaged pre-1965 metal connector cable so we're not tarnishing the vehicle with an inaccurate newer plastic cable. We had them disconnect the main tube in it so it does not draw a massive current draw - no reason for that when all we really want is for the red light to glow if mic is depressed. Otherwise - same as when first in service - November 1963. Well, besides the newer mic that we will replace shortly. And yes, we'll be replacing the damaged/near-gone water-slide decals on the dash that show the radio call sign and station ID as soon as we find suitable near-exact replacements.

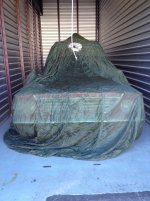
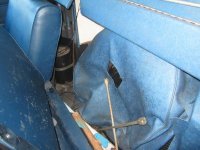
3. A dusty environment in the pseudo-desert (regardless of indoor storage) - requires a blanket. A T-10D parachute canopy works well and seems rather fitting. :)

Thanks and kudos again to Paul Steinberg for fixing all of the mechanical nightmares few others would've been able to tackle. I surely wouldn't be able to worry about these minor details on what is a solid car above all. Next stop - full stocking of the ambulance with equipment as described in recently discovered documents from when it was placed into service! Hopefully in time for the meet in June...
 

Attachments

  • 2015-03-05 16.39.11.jpg
    2015-03-05 16.39.11.jpg
    93.9 KB · Views: 2,873
  • 2015-03-05 16.39.29.jpg
    2015-03-05 16.39.29.jpg
    87.6 KB · Views: 2,818
  • 2015-03-05 17.00.49.jpg
    2015-03-05 17.00.49.jpg
    96.2 KB · Views: 2,798
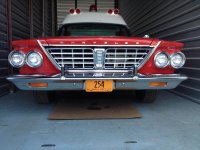
New license plate I lucked out and found for the front. Have it's antique tag on the back of course - thank goodness for a state that only requires a rear one. Now all I need to find is a bolt-on 63 number update cheap.
 

Attachments

  • 2015-03-15 14.59.02.jpg
    2015-03-15 14.59.02.jpg
    92.5 KB · Views: 2,688
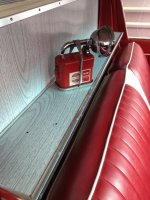
Besides siren angst described at http://www.professionalcarsociety.org/forums/showthread.php?t=17283 , the mystery of what the four holes on the passenger side shelf of the ambulance have been solved. This was asked about here: http://www.professionalcarsociety.org/forums/showpost.php?p=841893313&postcount=5

They correspond to Big Beam Model 266 or 211 floodlights with mounting bracket... How I figured this out was from pure serendipity indeed. I knew from a previous news story that the ambulance carried two "hand lanterns." Someone I was talking to recently about the car mentioned off hand that when he ran a midwestern county ambulance service in the 1970s, hand lights and flares were normally kept up front in all their cars. At the same time as this conversation, an auction for a Big Beam with bracket came up on eBay for $15, and on a whim I bought it. Turns out to be the right thing after all. Now the problem is I need a second bracket at least and they're near-unobtainium and I lucked out big time finding just one. The company just discontinued making the lights, and says they haven't made brackets since the 1970s. Anyone got a lead?

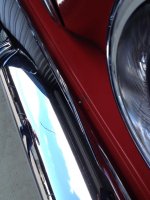
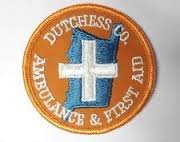
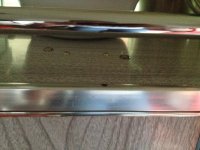
I previously didn't notice this hole up front behind the bumper until spending quality time polishing... What did it correspond to? My contact at RCFD told me it corresponded to a yellow Dutchess County Ambulance Association sign on some kind of pedestal mount that he could only vaguely remember. That would make sense since the Association helped fund equipment for it when the ambulance was put in service. Searching that organization name turned up a patch that sold on eBay in the past - and I surely lucked out again. It's the same design. Now to just figure out what kind of mount it was and maybe a bit more on the sign to have it remade. I've frankly had little luck thus far.

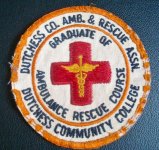
Wish I could find another patch too - I ended up finding one of the later patches from the Ambulance Rescue Course (pictured as well)
 

Attachments

  • 2015-03-22 15.09.52.jpg
    2015-03-22 15.09.52.jpg
    94.2 KB · Views: 2,458
  • 2015-03-22 13.15.57.jpg
    2015-03-22 13.15.57.jpg
    88.7 KB · Views: 2,463
  • Dutchess County Ambulance.jpg
    Dutchess County Ambulance.jpg
    5.2 KB · Views: 2,350
  • Ambulance Rescue Course Patch.jpg
    Ambulance Rescue Course Patch.jpg
    98.5 KB · Views: 2,459
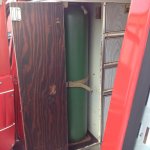
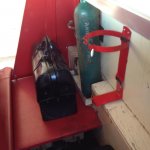
Very unusual for 1963 - this ambulance was equipped with "stationary oxygen supplies." For its later life at least - it carried an E cylinder propped up on an assortment of cut 2x4" pieces. Obviously not what it had been designed for. I was unsure what was original - as the size is not the usual M cylinder many later ambulances carried up until today. A photo of the pre-Emergency! era LACoFD rescue squads held the answer - a Q cylinder! "Q's" are rather uncommon these days - but a welding supply store happened to have a nice steel one of 1983 vintage. Hopefully no one will hold the stamp in the side against me. :)

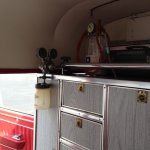
This is probably the most inconvenient oxygen cylinder I've ever changed. Steel's heavy as hell, and not easy angling it to get in the door, then into the cabinet. Tight fit indeed. One small wood block was different from the others, and was necessary to get proper height of the valve. Photo below of the cylinder in place and National Gas Company oxygen regulator (with humidifier!). Looks nice!

1" thick yellow foam was present in the back of the cabinet, and was too thick for the door to close with cylinder in place. It probably was installed by the Fire Department for the E cylinder - but maybe was original (sure hope not) - door refused to close no matter what I did. The "cut-out" in the door is for the buckle on the strap, but still no-go... Maybe that was one of the reasons they stopped using the Q cylinders and went to E's. The transport time was short there, however. I was able to remove it in one sheet, and will replace with 0.5" thick otherwise identical sheet this week. With foam in place - I hope that will move the tank and regulator forward so it's not so close to the cabinet.
 

Attachments

  • 2015-05-09 16.15.34.jpg
    2015-05-09 16.15.34.jpg
    84.6 KB · Views: 2,487
  • 2015-05-09 16.21.13.jpg
    2015-05-09 16.21.13.jpg
    88.3 KB · Views: 2,393
For most old medics a ready supply of bandages was a must,changing one of the large oxygen cylinders usually resulted in many pinches, scrapes and knucklebusters,and was always done away from earshot of the public for the inevitable cussing that went with doing this task.
 
So that's what goes in there...

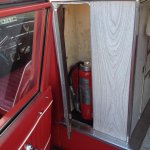
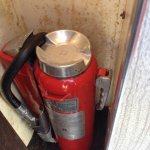
In all seriousness - tried a water can and no joy. Just WAY too tight a fit. Mid-size ANSUL dry chem cartridge extinguisher fits OK and is period correct. Will add bolt cutters, axe, pry bar, and cable cutters in there too after rotating ANSUL lengthwise. Worst case some of that will go under the bench with the Porto-Power Rescue Set, Robinson Orthopedic Stretcher, and one day the Reeves stretcher.

Really no good data on extinguishers carried outside of the fact it carried three per news article. Compartment on the passenger side obviously carried two more large extinguishers. Next burning question is hand-pump or soda-acid water extinguisher along with the CO2 that surely had to be there?
 

Attachments

  • 2015-05-30 08.14.59.jpg
    2015-05-30 08.14.59.jpg
    89.3 KB · Views: 2,230
  • 2015-05-30 08.15.07.jpg
    2015-05-30 08.15.07.jpg
    85.2 KB · Views: 2,212
There is no way that they would carry a soda acid extinguisher in the vehicle. They were almost always used inside of buildings, where there was little to no chance of it freezing. Besides, it is much to bulky to be on an ambulance. I still believe that a lot of what was printed in the news article was more for "effect", than actual fact. It was an ambulance, not a fully equipped rescue truck, besides, they had an abundance of other trucks that could and would respond if necessary.
 
There is no way that they would carry a soda acid extinguisher in the vehicle. They were almost always used inside of buildings, where there was little to no chance of it freezing. Besides, it is much to bulky to be on an ambulance. I still believe that a lot of what was printed in the news article was more for "effect", than actual fact. It was an ambulance, not a fully equipped rescue truck, besides, they had an abundance of other trucks that could and would respond if necessary.

SAFD carried soda acid and folks here suggested that for water as hand-pump was the other common option in 1963. The usual pressurized water cans seen today were just coming available at that time. Howevever, obviously low risk of freezing down here...

Per Dr. Steve Levy, who worked on it from 1972-1976, the vehicle was still carrying most of the rescue stuff listed in the original news article. Possible exception of the water rescue gear by then. At the time the vehicle was first placed in service, the engine was the only other apparatus. Further, rather than being listed as an ambulance with Dutchess County radio system - it was listed as Rhinecliff Rescue 1. Lastly, design specs on the cabinetry were changed by the Ambulance Committee in order to accommodate more equipment stowage according to the meeting minutes of the department. The cabinetry appear very similar to what would later be billed as the "Rescue Cabinet" option by Superior. The preponderance of evidence points towards its use as a Rescue.

Everything fits fairly well actually as I get it in there. I'm surprised...
 
Last edited:
Vintage EMS and Rescue Equipment

I emailed and got a reply from WS Darley today attmpting to obtain copies of their equipment catalog in .pdf format. This would have provided a neat reference for equipment of this vintage. Darley sells mostly firefighting equipment, but also EMS and rescue. They said they still have a printed copy of catalogs for 1963 and 1968 (for year of my ambulance) but the are so fragile they don't let anyone touch them. That's a shame. If anyone can obtain a printed copy, I could scan to .pdf and share here. No cost. This should be an open source of information for anyone interested. Would hate to see someone trying to make a buck off this. Their current catalog is 80 megs in .pdf. The catalogs in the '60's should be much less. So.... if anyone has Darley or any other equipment catalog, I'll scan it and share with everyone.
 
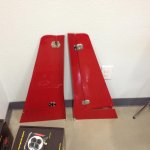
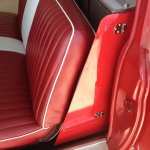
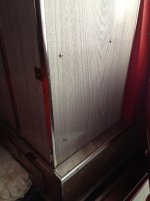
Lot O' work this past weekend. There was a small panel-door on each side of the bench seat in the cab - unfortunately the driver's side went missing at some point, believed to be with the first owner after the Fire Dept. We had it duplicated and the panel's color-matched. Turned out great, almost too nice for the car...

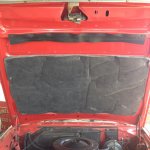
Hood pad had disintegrated and the clips rusted when he got the car. We installed a replacement.

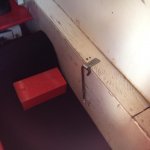
Hook's in for the spare tire (probably not going to be here in time) and shelf's in for a jump bag (or something?) over the Motrac radio. Fire extinguisher bracket installed too.

Very interesting how all of this is coming together.
 

Attachments

  • 2015-06-05 13.44.22.jpg
    2015-06-05 13.44.22.jpg
    86.7 KB · Views: 758
  • 2015-06-07 16.15.37.jpg
    2015-06-07 16.15.37.jpg
    82.3 KB · Views: 746
  • 2015-06-07 15.28.28.jpg
    2015-06-07 15.28.28.jpg
    87.1 KB · Views: 764
  • 2015-06-07 16.15.02.jpg
    2015-06-07 16.15.02.jpg
    84.4 KB · Views: 751
  • 2015-06-07 16.15.24.jpg
    2015-06-07 16.15.24.jpg
    77.5 KB · Views: 743
A little delayed with this post, some of these things were seen by those who attended the meet in Houston.

1. Thanks to the generosity of a PCS Member - we horsetraded for a Robinson Orthopedic Stretcher. Underneath the bench now and we're very happy.

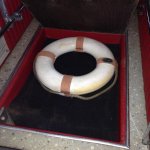
2. A number of news articles about Rescue Squads in Dutchess County discuss water rescue and associated equipment. One of the first articles about the Rhinecliff Rescue Squad after its creation as a separate entity from the VFD was about using your car's spare tire as a flotation aid if one were to come across a person in the water. Thus, Rhinecliff Rescue 1 carried rope and ring along with three life vests. The life vests seem to fit in an odd and otherwise semi-useless and inconvenient compartment on the passenger side underneath the cabinet. However, the life ring seems to best fit in the underfloor compartment - which is otherwise too small for a folding stretcher it seems. It won't fit in the cabinet - too big. And - it's a 20" ring, near the smallest they get made. Ever look for a VINTAGE life ring that's in good shape - boy, was that hard... I suppose it could've been bigger and placed behind the driver's seat or under the floor on the driver's side with the folding cot - but this at least temporarily satisfies the curiosity of "what went under the cot." as otherwise it's a pretty useless compartment. Now to find some old rope... (Who buys that kind of thing besides a weirdo like me???)

3. We're very excited - the second set of holes here behind the seat apparently corresponded to a simple clip to hold a bumper jack. Clip's being fabricated this week. Curtain rods for the rear door, plus a replacement metal plate for the homemade cot-hold down device are also being made.

4. We got the clip that holds the wires that are part of the bench seat side-rail assembly's release mechanism fixed. Weld snapped at some point in the past. Fairly ingenious design to try to make an even tug on both sides. :)

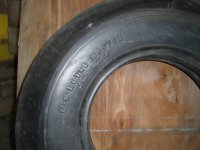
5. Another oddball "Who buys that?" moment when I bought an NOS 8.00x15 tire for the spare... I was able to get a very nice Police Enforcer wheel from a Mopar parts dealer. Now to get it mounted and in the car. We'll be getting the cover made up for it locally.
 

Attachments

  • 2015-06-11 19.28.11.jpg
    2015-06-11 19.28.11.jpg
    92.3 KB · Views: 654
  • 2015-06-18 13.42.38.jpg
    2015-06-18 13.42.38.jpg
    91.3 KB · Views: 655
  • 2015-06-05 15.21.13.jpg
    2015-06-05 15.21.13.jpg
    79.8 KB · Views: 656
  • SpareTire1.jpg
    SpareTire1.jpg
    95.8 KB · Views: 649
check that life preserver out my bet it's nylon rope around it. 1/2 inch three strand should be available and any boat shop. but can an army guy learn to put the eyelet in one end and the back splice in the other???:D
 
More fun small projects.

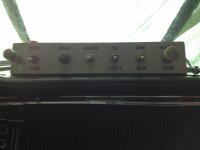
1. The black paint used to fill-in the stamped lettering on the control box had worn away and looked rather poor. Filled it in with black Rustoleum, a steady hand and small brush, and wiping away the excess. Turned out well! I also learned for sure that this panel was made by hand and was not standard - you could see where on the first switch the man with the stamp had been a little unsteady and had to redo it...

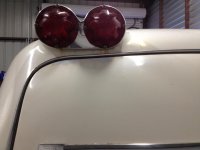
2. I thought it rather silly - but someone at the PCS Meet in Houston said it looked "unfinished" to have the holes in the cabinetry where a radio had been. Sometime in the 1970s/1980s, a VHF Hi-Band radio of unknown manufacturer (Sounds like GE - but no one there is sure and the options I've presented have all been shot down. Supposedly, it was a 6 push-button type radio similar to Micor) was installed in the cabinetry and an antenna jack installed on the roof behind the Beacon Ray. Around this time, the Fire Department had transitioned "Rescue 1" from the crash wagon/rescue vehicle/ambulance to solely ambulance work due to the purchase of additional apparatus. Most of the rescue gear was removed, and the radio itself went in the main fire extinguisher cabinet and the control head on top. As I have said in the past - it's restore not only as WHAT but when and a 1970s/1980s radio does not fit with October 1963. It was suggested I fill in the holes with screws - and I did so. I used some short machine screws with finishing washers like the rest of the car has. Looks reasonable.

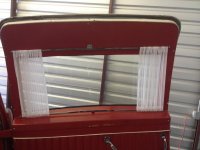
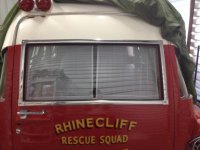
3. Sometime in the 1970s as well - the rear window curtain rods were removed. No one knows why - but I am guessing something broke and they didn't bother to replace. Well - I did and it was surely a pain to do so. Some of the hardware was missing - Paul found the bottom clip under the bench seat but the top was gone and had to be remade (still annoying to me is they used wider metal than the bottom - but who would notice if I didn't point itout). Had to order new Model T cinch fasteners for both sides. There's a curve in the window that required compensation. Even had the rods we had made rechromed. The Mrs. made new curtains using original spec material. I think it turned out pretty well.

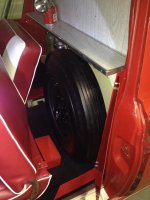
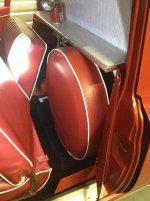
4. Spare tire bracket installed - 15" "Police" wheel obtained and then the hard part of finding an old 8.00x15 bias ply tire. Well, all came together including finding a tire shop that finally figured out how to mount it. The cover was missing - so our local upholstery shop matched our material and made one. Turned out very nice - perhaps TOO nice. Because Jack and Tom insist there was no hole in the center like Superior did - the tire cover should be a little loose and just slip over the top. Our shop made it a little tighter than I really wanted in order to make it looks nice. Real pain to install due to the tight cover and absolute tight fit underneath the shelf - but we got it in with much sweat and effort. This victory was mildly impugned by the fact it pushes forward on the seatback when the seat is all the way back against the passenger-side shelf. Very odd - as this is surely the correct size tire and so forth. Original screw/nut fit well even with jack stand in front. The seat is already pushed forward a bit because of the seat - good thing I'm not the tallest/widest person out there but seems like less than the optimal setup...

Still no clue what went above it on the shelf... Next step cleaning up a little of the missing white paint and rust with temporary coverage.
 

Attachments

  • 2015-07-10 18.16.06.jpg
    2015-07-10 18.16.06.jpg
    87.6 KB · Views: 558
  • 2015-07-10 19.21.28.jpg
    2015-07-10 19.21.28.jpg
    98.7 KB · Views: 559
  • 2015-07-10 19.22.16.jpg
    2015-07-10 19.22.16.jpg
    90.9 KB · Views: 560
  • 2015-07-19 12.29.05.jpg
    2015-07-19 12.29.05.jpg
    91 KB · Views: 553
  • 2015-07-19 19.41.17.jpg
    2015-07-19 19.41.17.jpg
    92.5 KB · Views: 565
  • 2015-07-21 20.24.31.jpg
    2015-07-21 20.24.31.jpg
    93.4 KB · Views: 561
  • 2015-07-21 21.16.04.jpg
    2015-07-21 21.16.04.jpg
    94.9 KB · Views: 553
  • 2015-07-21 21.23.59.jpg
    2015-07-21 21.23.59.jpg
    95.3 KB · Views: 553
this would be the only car I have seen with a cover. over the spare tire. but then again the first time it got used things like that would get lost fast.
 
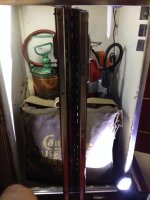
I've failed to show the inside of the main firefighting cabinet! Note large hand pump water can and 15 lb CO2. What you see to the left of the water can are two collapsible fire buckets. Period-correct fire blanket in front right now, but I believe Stephenson resuscitators may store there and blanket will go on top or elsewhere. Not fully sure at this time - both cases are being repaired at a cabinet shop right now. Coming down from the top right is the antenna cable for the plug on the roof used with the VHF radio that mounted inside.

The car has some areas of surface rust from some environment exposure prior to making it to Texas. While far from a permanent solution, it was also suggested at the Houston 2015 meet to hit it with some paint for protection's sake at least. Not unreasonable. I coated those areas with rust converter and it got an amateur touch-up job with Gloss White Rustoleum. Hard to tell at a distance - but at least I'm not worrying about spread while the car awaits full takedown and paint in a few years. Check out top left corner of the door - I think I could've done a worse job for my first time at it.
 

Attachments

  • 2015-07-26 20.42.35.jpg
    2015-07-26 20.42.35.jpg
    92.9 KB · Views: 522
  • 2015-07-30 20.06.56.jpg
    2015-07-30 20.06.56.jpg
    93.6 KB · Views: 462
Back
Top