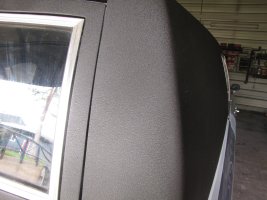
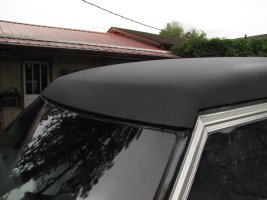
More stuff

Went to look at a convertible yesterday. It was rougher than what I wanted to trade in. So we passed. Thought I was doing well on the back side, but as soon as I hit it with primer, a crack showed up in the old filler, so we'll work that out when things set up.


IMG_0308.jpgIMG_0309.jpgIMG_0310.jpgIMG_0311.jpg
 
We hit the point where a decision needed to be made. Makes no difference which color we paint first. We are ready to paint the wrinkle, so let's get it done.. Blocked and re-primed the rear panel yesterday, so we sanded the top today and taped things off, then shot the black. Ran out of daylight as the evening storm blew up. It needs the ultraviolet light to wrinkle, so we'll see tomorrow. The doe drops in for her afternoon nap in the shade. She doesn't run unless Jack charges her. Then she just trots away.

IMG_0312.jpgIMG_0313.jpgIMG_0317.jpgIMG_0318.jpgIMG_0319.jpg
 
Last edited by a moderator:
Didn't come out to bad. We were trying for a little heavier texture but it is what it is as they say. Its even. I'm wondering if we should have fill all the holes and just drilled new ones for the molding but there is a million of them in the car now. I was able to cut a slot in the upper windsheld clip and get them back over the screw heads. So once we get the wrinkles out of the molding lip maybe we can get the trim back on. Paint is on its way we can keep putting stuff back on till it gets here.
 

Attachments

  • IMG_0320.jpg
    IMG_0320.jpg
    690.6 KB · Views: 14
  • IMG_0321.jpg
    IMG_0321.jpg
    454.9 KB · Views: 12
  • IMG_0322.jpg
    IMG_0322.jpg
    519.1 KB · Views: 11
I don't know when I have worked so long putting 3 piece of trim around one of glass. When they put the top on they knocked the pegs off for the clips. Most likely had the windsheld pulled then. The screws the clips back on to the roof threw the top. It did hold the top in place,I'll give them that. But with no replacement glass cutting the glass back out replaced with urethain was not a good ida. So how to get them back over the heads of the screws. Split the bottom of each clip just enough to do it and with the tool could tap them over the screw catching the clip in the center. Good but discovered the replacements they used were to tall and the mold now was setting up not flush with the top off. So back off redid a new set beat them back on and tryed again. The side trim are held on with a #4 screw just long enough to go a layer of sheet steel to keep from hitting the edge of the glass. But only one broke off taking them out and one going back in. But they are on there now. Thats what counts. Spent the afternoon on three moldings. There are days like this. Drip rails next.


IMG_0329.jpgIMG_0330.jpgIMG_0331.jpg
 
Nice try on the upper windshield molding. The clips would not stay on the screws. So I used some 3M molding and emblem adhesive on them, letting it set up now. The glue will flow around the screw head and keep them in place. Seal that screw up also. Straightened and painted the drip rails semi-gloss flat, just doesn't hold up, and the crinkle chips. Blocked off the door and the quarters and re-primed them. Then went searching for where UPS hid my paint. It looks like a decent match.


IMG_0335.jpgIMG_0332.jpgIMG_0333.jpgIMG_0336.jpg
 
Ate myself out of things, so we were forced into a big city run, but first. Let's get some paint on the rear of this thing. The number one step, though, is to run 1000 grit over the door to remove the dry spray and unnecessary bumps. That will let any trapped solvents escape. Then we can tape off the rear. We do the top of the fin last so we can pull that paper and apply a flash spray of super-thinned paint to the edge, which helps with the transition. I love working with lacquer paint, haven't done it in at least 30 years, but it's like riding a bicycle; it comes right back to you. The nice part is that it dries fast enough; you don't have to worry about the cotton flying around this time of year. Glad I kept that old gun, these new fine spray ones would never handle it.


IMG_0341.jpgIMG_0342.jpgIMG_0343.jpgIMG_0344.jpgIMG_0345.jpgIMG_0346.jpgIMG_0347.jpg
 
Time to get some stuff back together. First, we'll sand this end and let it sit overnight to dry out, then we can buff out the door. The color is about as close as you can get for a panel paint. The door edge guard will prevent it from breaking. We have an edge up top where the fast-drying time is before the paint can penetrate the original color. But it doesn't show in the sun. Bet is only will in a street light. Metallics are funny that way. We get the backside buffed today. The last picture I saved all the big pieces of packing foam I got. It works well as a moisture barrier, soundproofing, and insulation on the doors. Beats trying to get that factory plastic back on.IMG_0348.jpgIMG_0349.jpgIMG_0352.jpgIMG_0353.jpgIMG_0354.jpg
 
Time is to finish rubbing the rear. As long as we have the compound out and the 3-inch buffer, let's do the back glass. One thing I've found about glass is that if you're buffing the outside, you can't remove the marks from the inside. But funny how if the glass is clean, the car is clean. The rear will be rubbed out. I did not try to machine the top of the quarters, just a light pass. The right angles are easy to cut through, but some tasks require manual intervention. We get the car back together, then we'll buff the rest of it. I did have two thin spots, one on each door, on a corner. It can be easily touched up. The fresh paint is still soft. So one has to be careful with the buffer.


IMG_0356.jpgIMG_0357.jpgIMG_0358.jpgIMG_0359.jpg
 
Had one of those days yesterday. We needed to finish up a little yard work. I'm glad that when we got the house, I knew I would grow older and keep those places small. I had another visitor today. Don't know where she came from. She popped up and went to check out the cat, who was looking at a bird. I grabbed my camera, and this was all I got as she left. I got the trim back on the rear door. It takes you 10 times longer to put it on than to take it off. Mainly clean up. However, I noticed that the plant boys did not center the center bracket for the Curtin rod. Or the didn't get the trim screw centered—one or the other. Then we came up short on one of the rod buttons. Duh, I put stuff in the can as I took them off. Looked all over for it, but couldn't find it. So, I hit my CB/MM stash and found an MM that will hold it in place until the other shows up—cleaned the back of the car out, but no find. I'll shake the car cover out today. The only thing I didn't do.


IMG_0362.jpgIMG_0363.jpgIMG_0364.jpgIMG_0365.jpgIMG_0366.jpgIMG_0367.jpgIMG_0368.jpgIMG_0369.jpgIMG_0370.jpgIMG_0371.jpg
 
Last edited by a moderator:
We had a Colombo moment yesterday. You know, just one more thing. The skirts have always bugged me. Painted them with enamel when i had the rust repaired out in RI when i swapped cars with Brendan. The green agents the blue in the sunlight. The lower panels I painted with the same paint we broke at the body line and you don't notice it. But the skirts stick out like a sore thumb. So as long as i need to put more paint in the gun lets shoot them also. My cut-through spots will spot in easily enough, knock on wood, but as normal, we have some lifting on the enamel. I used the catalyst to. It was at least 10 years ago! There are Oldsmobile skirts. CB split the front leg and pinched them together. To allow you to jack the car up with the larger tires. So they have a longer molding than the Olds ones. I did get one of the divider moldings in place, using these clips and the pop rivet studs. We'll need to trim the side moldings, as they were designed for a long-wheelbase car. I was lucky enough to find them on a rusted-out hearse that had been parted out.IMG_0372.jpgIMG_0373.jpgIMG_0374.jpgIMG_0377.jpgIMG_0378.jpgIMG_0379.jpgIMG_0381.jpgIMG_0382.jpg
 
Revisited an old lesson yesterday. Don't get in a hurry, it will cost you. Got the divider moldings on. Normal operation struggled with the first, and the second one went right on. With the amount of lead on the sides of this one, getting the pop rivet pegs to grip in the old holes was a 50-50 thing. Then, when the aftermarket top went on, they were free to wander a little. The aluminium strips were easily bent. The sides are lower than the rear door, which made getting the rigid Stainless steel molding a little rough to put on. But we only ended up moving one peg and still stayed in the lines. Should have attached the molding first. It would have been easier. Got the thin spots covered. And the skirts were painted for the second time. I'm blaming my high blood pressure for getting in a hurry and not stripping the skirts when the primer lifted the enamel. We will get to do this the third time. The worst thing is I'm out of paint! Dumbshit. Got to work the lions tent at the arts and craft show this weekend give me time to lick my wounds.IMG_0383.jpgIMG_0384.jpgIMG_0385.jpgIMG_0386.jpgIMG_0387.jpgIMG_0388.jpg
 
It was monday so back to work. Got the panels we spotted buffed out and the skirts striped the dent i was going to ignore on the lip. Then primed the. Made the rust repair in the right front wheel will and some bed liner in there to seal things up. We had coated things with the rust killer the last day we worked. Got the seals for the skirts ordered.the picture shows one problem with Lacquer paint. It melts it dosent chip off.
 

Attachments

  • IMG_0389.JPG
    IMG_0389.JPG
    1.7 MB · Views: 0
  • IMG_0390.JPG
    IMG_0390.JPG
    1.3 MB · Views: 0
  • IMG_0391.JPG
    IMG_0391.JPG
    1.3 MB · Views: 0
  • IMG_0392.JPG
    IMG_0392.JPG
    1.1 MB · Views: 0
  • IMG_0393.JPG
    IMG_0393.JPG
    1.5 MB · Views: 0
  • IMG_0394.JPG
    IMG_0394.JPG
    1.2 MB · Views: 0
  • IMG_0395.JPG
    IMG_0395.JPG
    1.5 MB · Views: 0
Back
Top