You are using an out of date browser. It may not display this or other websites correctly.
You should upgrade or use an alternative browser.
You should upgrade or use an alternative browser.
Fuel pump replacement question
- Thread starter Jean-Marc Dugas
- Start date
Daniel Scully
PCS Member
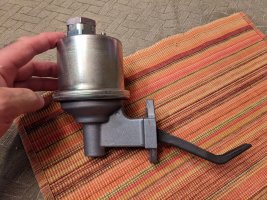
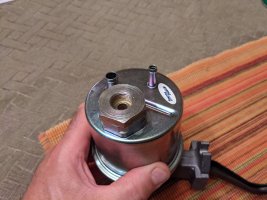
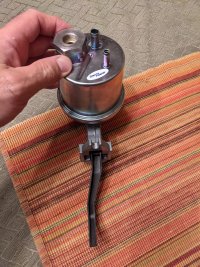
That is the style that sometimes has the fuel filter below the nut . Chk it , if it has one remove the one from the carb . The one in the pump is much easier to get to.
Jean-Marc Dugas
PCS Member
Thanks Dan. The fuel filter is at the other end of the high-pressure hose in the carburetor. That was the first thing I changed when I ran into fuel delivery issues.That is the style that sometimes has the fuel filter below the nut . Chk it , if it has one remove the one from the carb . The one in the pump is much easier to get to.
Jean-Marc Dugas
PCS Member
As I post about where I am with the car, I just want to say that this car is solid and works well. The previous owner had it for over 10 years and looked after it very well. We have to remember that this is a 45-year-old car and as I lift panels, shake wires and dig into corners I am bound to uncover things here and there.
This is my 2nd ambulance and for me, digging into these details is 1/2 the fun of owning these old cars. It forces me to learn new things about mechanics, electrical, and much more.
This is my first Cadilac, so at this point, I do not know what I do not know about the Cadillac side of the car, but as far as the Superior side, overall it is not that different from the 67 I owned. The wiring is, well, all of you who had to deal with Superior wiring knows what I mean. Some of the interior moldings are the same as in the 67 and even some of the switches and switch panels could be interchanges.
I will also try to post as much as I can about the journey so that others can learn from my experience.
Finally, do not hesitate to ask questions, offer suggestions and ideas as for me this is all about learning new things and make this car the best it can be.
Yes you will find that superior construction never changed. Me i Love taking them apart to see also. That is the same style pump that was on the 75 pon i had. The line was stuct in the nut. Ended uo ripping the bottin of the pumt off taking it apart.
Jean-Marc Dugas
PCS Member
Calling the experts!!!!!
This being the first fuel pump I replace myself, I have a couple of questions.
The Cadillac shop manual says that "Crank engine until fuel pump eccentric is at low point of contact with fuel pump arm".
1. Can one usually see the eccentric through the fuel pump opening to determine if it is at the low point?
2. If not, how will I know if the excentric is in the correct position
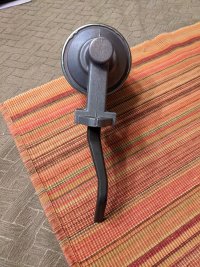
3. Does the fuel pump arm go above or below the eccentric (see attached picture)? My guess is below, Figure #1 in the attached high-quality drawing lol....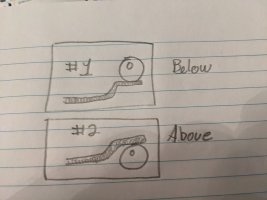

It's a guess. The arm goes below. So if you can't start the bolts roll the engine over by hand till you can. If your on the high spot tour working against the spring. In the pump so you might not get a shorter bolt started. The big thing is glue the gasket on one surface or the other first so your not fighting that.
Jean-Marc Dugas
PCS Member
Thanks John. I hope to get to it this weekend.
Jean-Marc Dugas
PCS Member
Jean-Marc Dugas
PCS Member
Success yesterday with the replacement of the car's fuel pump. Do not be fooled by the amount of space under the hood of these cars. I could have used an extra joint between my wrist and elbow to reach the two bolts that hold the pump to the block.
Notwithstanding the above statement, the process went very smoothly. Once the bolts were removed the pump came out easily. I thoroughly cleaned the area and test fitted the new pump which went in easily. I guess that the eccentric was at the correct place in its rotation since there was no need to fight the pump's spring to line up the holes.
Once everything was back in place it took me two attempts before the car started.
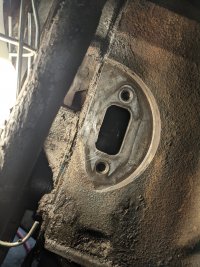
Attached are two pictures of the pump location before and after cleaning up the area.
Next important step is to get the car to an inspection station so that I can get on the road.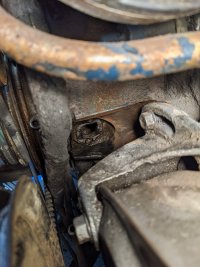


Tim Prieur
PCS Member
Great news Jean-Marc. I was a bit worried it had become addicted to Rocky Mountain air, and refused to breathe the humid maritime stuff. Hopefully many enjoyable cruising hours ahead.
Happy for you that you got it installed without too much effort. A couple suggestions for the future. Always start with a clean engine, by spraying the engine with a degreasing agent, such as Oil Eater Cleaner and Degreaser ($9.99 at Tractor Supply or Simple Green, Gunk, etc.) and a pressure washer. A clean engine is a lot easier to work on than a greasy engine, and it will help you to determine where the oil that you have removed is coming from. Most likely, looking at your engine, your valve covers are leaking, and need to have the gaskets replaced.
The second suggestion is that if you cut the heads off of 2 spare bolts that are the same thread as the bolts, and finger tightly screw them into the block, you can then slide the fuel pump over them, and put a nut onto one of the studs to hold the pump. Then remove the other stud, and replace it with the original bolt and tighten it slightly. Then remove the remaining stud, the one with the nut on it, and replace that one with the second original bolt. Tighten both bolts evenly to the proper torque, and you have now successfully installed your new fuel pump with ease.
When installing fuel pumps, I like to start the fuel line to the carburetor in the pump prior to installing the pump, since it lessens the chances of cross threading the fitting. Once I have the pump secured loosely on the studs, I then install the other end of the steel fuel line to the carburetor, being very careful not to cross thread that fitting. The large nut that the fuel line threads into on the carburetor is threaded into the carburetor with very fine threads (40 threads per inch approximately), and you have to be very careful replacing that when you service the filter that is in the carburetor. Many times those nuts have been cross threaded, and that will ruin your day when you can't stop the leak at that fitting. I know of instances, where the entire carburetor becomes worthless as a result of that fitting being cross threaded.


