
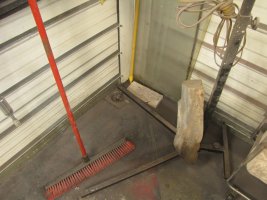
We'll get the chewed up under side of the front pan. Now that the bumpers are off it will be easy enough. The engine bay is in good shape all original still so I'm not messing with it. As soon as i get the top done and the new floor in the back the car will go back up on the jack stands so we can access the under things that need some work . I did get the rust converter on things the sub frames could stand a coat of pant . Especially in the front. Not sure how will i can get things with out a lift but we can get it up enough to get a good look and touch up any bad places. The right side had a couple holes under the cabinet that i got when we did the patches. But haven't crawled under the whole car yet.

You are using an out of date browser. It may not display this or other websites correctly.
You should upgrade or use an alternative browser.
You should upgrade or use an alternative browser.
63 Pinner Hightop
- Thread starter John ED Renstrom
- Start date
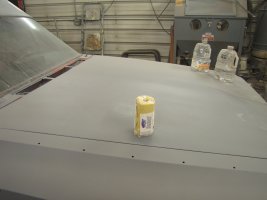
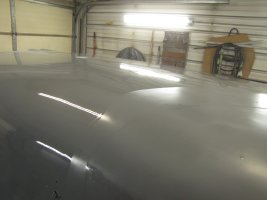
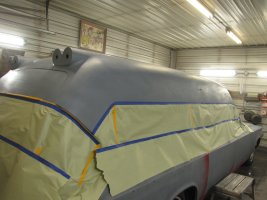
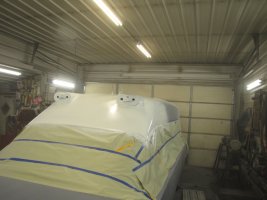
the curse of living in a small town. I ran out of 400 paper this weekend so stopped in Monday to get so the parts store didn't have any ordered it. it came in today so now we have a gray and white car. next is to let it cure and then 600 it and shoot the clear coat on. then get it back together so we don't have to crawl over the fresh red to do that. the top is defiantly bigger than it looks we used up 3 gt. of paint on it.
Attachments
-
 IMG_1560.JPG833 KB · Views: 17
 -
 IMG_1561.JPG889 KB · Views: 15
 -
 IMG_1562.JPG947.1 KB · Views: 12
 -
 IMG_1563.JPG911.6 KB · Views: 11
 -
 IMG_1564.JPG1,010.8 KB · Views: 11
 -
 IMG_1565.JPG857.9 KB · Views: 12
 -
 IMG_1567.JPG810.9 KB · Views: 11
 -
 IMG_1568.JPG976.6 KB · Views: 11
 -
 IMG_1569.JPG992 KB · Views: 14
first task it to get it cleaned up the car and the shop. I might not have water in the building, but I do have a drain. we can at least hose thing out.
Attachments
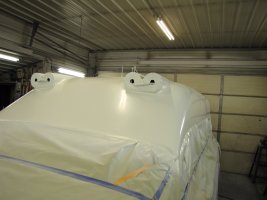
tis that time of the year to forget what you're doing. but we were able to get back on the car. while we let it cure for a bit, we can get the trim rings cleaned out for the top lights. they have a lot of paint on them and a little rust. hand made from looks like shelf edging. they were assembled on the car under the reflector and since I'm clear coating not rubbing the topcoat out, I would like to polish and clear them with the top. hope they will stay shiny longer. since they are handmade, I marked them for location as each is just a little different. it's clean up test fit each one Nick will be glad I don't charge by the hr. but hoping to be able to seal them up this way and keep them from rusting out. 


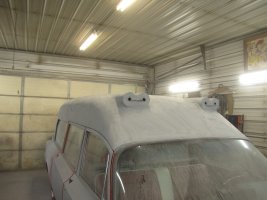
Christmas and things happening really slow thing down. got to get some work done today. polished the last of the light rings. we have been pop riveting them in place. the only thing constituent is that they all don't fit in the middle. we have been screwing them down with the holes for the lights first then redrilling and putting in a 3/32 rivet. then test fitting the reflector to be Shur we will not have any problem after they are cleared. worked good till the last one. the buffer grabbed it and I now have two holes in my wrist and nose. the nose was worse but any emergency that doesn't require a trip to the ER is not worth noting. I have no problem with blood unless it mine. but it did slow thing up a bit. got it the right shape and in. started sanding with 600 so we can get the clear on and get this top done. the trick is to just remove enough paint, so you don't see and shiny streaks in the light. you are looking at the shrink from drying. and a little fall back on top from having the shop closed up. if we were buffing, we would be doing the same thing. with lacquer it's 2 coats to cover, one to sand and one to buff off. with the clear we are skipping the buff.


the last of the pictures. I have been looking at this hole in the lead since I took the molding off. I probed it and it bottoms out. but still bugs me. today was the day. I filled it with seam sealer
 . it just looks better
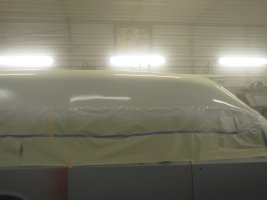
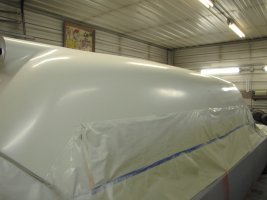
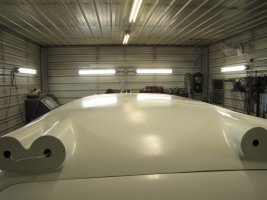
. it just looks bettera little windy but nice enough so today was the day finished 600 the top and got it cleaned off hopefully


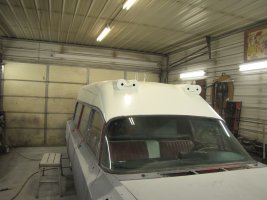
 it will like is wet when dry and taped. it is now shiny
it will like is wet when dry and taped. it is now shinyPhilip Scanio
PCS Member / Super Site Supporter
Shines like a diamond ring!
today we start the reassembly. it takes twice as long to put it back together then take it apart. one has to clean up and repair first. we did get the samples of the flooring in today. they are a nice reproduction of the original. the color and pattern look right, I would guess there is a clear coat then goes on top, but you can't get any better match. found all the tiny screws for the reflectors, dug out the parts out for the modal 17 and the side lights. let the cleanup commence. super glue with stick the gromets back together for the side lights I don't think I have ever seen any like these. so, no chance to get new ones. we have the screws soaking in the rust remover. they are plated but the holes they went into were not. I take advantage that there is not a woman in the house and run the marker lens threw the dishwasher. 


Those are pretty standard marker lights from the period. They should have rubber base gaskets. The lenses were available in a myriad of colors. Amblewagon used them for interior lighting in their conversions.
The base grommets have split in the corners. The super glue put them back togather.
and the excitement continues. the lenses cleaned up nicely. polish the reflectors time and get the lenses in place firs we need a gasket of some Sorte just looking to keep dirt out and shed the water. this packing foam will work well if we can get it to stick. don't want to fill the reflectors with stuff so a drop of weather strip adhesive on the flats will do it. as long as we are doing one let's do 8. I'm going to use a small amount of seam sealer around on the teeth we don't want to squish it out, but I do want to seal up the hole that goes into the body let's keep the water outside if we can. found a cut in the isolation of the side light so a round of tape will take care of that. the twisted wire and tape only lasted 60 some years, so guess it can't be that bad. we put the light back that way. you can get them off without cutting the wires if the need arises. the only thing I did not think of was the lenes have been trimmed the fit the handmade surround. I didn't mark them. got lucky with the first light it took me 6 lenses to get the second one. but the good news is I know now were 4 of them go. that will speed thing up tomorrow. just never thought they would trim the lenses to fit the surround. can you spill hand built? 


more fun than a man can stand today. got the corner lights in, a little surprise on the last one, it was put together different. the little screws did not go threw the reflector plate my bet is on it was Pinners first and they changed for the other 3. the boss let me know I had that side marker on upside down. he was wrong it was Pinner that but it on upside down. so, we flipped it to do as they did. took a good hard look at the samples of flooring I honestly can't tell any difference. not enough female in me, I guess. then got a start on the beacon. as long as we are putting it back on figured we might as will level it. it is tilted forward just a little. marked it off and trimmed the skirt. we'll need to drop it down about a half inch to take up the slack. that will give us a little squish 


 on the grommet.
on the grommet.got the skit figured out we need a 1/4-inch drop. so marked then and got the top plate moved down. cleaning off the bugs transporting it up here was something, but that little 3-inch air polisher did it will. kicked them one to test them. I have one that has a poor ground we will take care of that after Ch


View attachment MVI_1636.MOV
ristmas.
View attachment MVI_1636.MOV
ristmas.
time to get geared up for the next step. but first we had to get that one light to work. first check was we do have power. then made a attempt to solder the housing to the reflector. that was a no go. it has to be chrome. tested the bulb it worked so we did the gob of solder on the contact tip trick, it now lights up. my sone and his wife bought them a 3D printer for Christmas. we are going to try to print out the molding clips we need but can't find. In looking through the ones I salvaged I discovered there are two different sizes. so had to play around and see what went were. the big ones are the rocker molding. I need 24 of them and I have 23. we can get but one short. the small ones are belt line and hood I need 48. we have 22. we will need some of them. granted both quarters and the right center door had push in spring clips from other repairs. but if we are going to make some let's make all the holes watertight. bard of the rust problem was water getting in that can't get out. then we brought in the original bumper off the car. I thought it was a step bumper it's not it was a factory bumper that has 2 extra holes in it were they hung the support for the platform necessary for a fire station rig from. never understood why the fire station need the dance floor either in the front of the rear of everything. 


The rear bumper came off a 1963 Chrysler New Yorker that I bought locally and sent to Minnesota, along with the front bumper, to be rechromed. There were no extra holes in it when I installed it on the car. The front and rear bumpers are identical, except that the rear has a provision for attaching the license plate lights. The rear bumper had a slight twist in it when I sent it out, and off the car, it seems OK, but I had to fight to get it appropriately aligned using a pointed pry bar in one of the bolt holes, and once it was on the car, I installed the last bumper bolt. You will notice that I didn't use stainless-steel capped bumper bolts, but rather the more expensive chromed bumper bolts.
Yes Nick had the man that you got the car send him the original one the fire service had a back porch made of angle and wire mesh. That is missing. The bumper came up with the car wrapped up and so we hit the time to get a look at it see what it would take to.put it on. The only modification is the large holes on either end. It fairly rusty. Nick wants to move the car as close to in service appearance as we can. I have only see a picture of the back side in service. But cutting the holes in the better bumper would be the way to go.
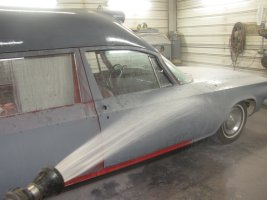
another day in the teens. yesterday we messed around with the top time will tell if we can buff the sides back out or we will need to respray some clear, but that sag by the center light was bugging me. as was that problem under the right top light. we let it air out some before we try again to buff. nipped it with 1000 then 1200 then 1500, can't get much finer than that. it felt hard and shrunk up. we have one spot on top of the rear door that keeps chipping the paint. got to be when it's closing it slides in and catches. so, we made sure it clears now.


