63 Pinner Hightop

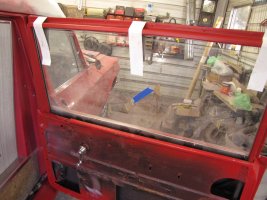
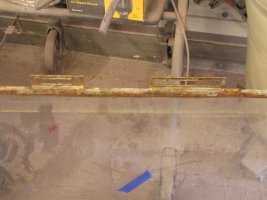
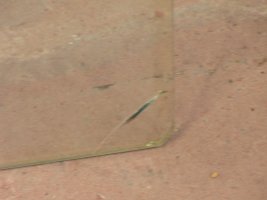
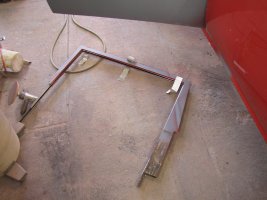
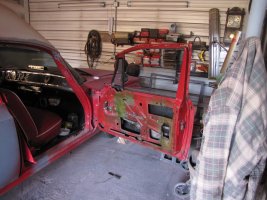
ok, I'm going to attempt to get things done on this new computer. my adaptor to upload pictures threw the kindle is gone south and I having trouble finding another one. So here we go, got the jams painted and the inside of the top frame on the center door. ground down a wad of lead on that right upper door that was causing the door to rub when it was closed. I've been waiting for a few parts to arrive so we can get things back on track. They got her yesterday. took a friend out to lunch in the big city yesterday and looked for that adaptor. Funny, I remember when everything was closed on Veterans Day. Not, it's just another sales day.


IMG_1351.JPGIMG_1352.JPGIMG_1353.JPGIMG_1354.JPGIMG_1355.JPG
 
had one of those days, "Mother said." They will happen, so we chalk it up to experience. I did finally get the 64 pinner started and moved to it winter home. Messing with the car covers will wear you out. Got the top put together and in place. I carefully considered the way the glass had to go and then put it in backwards. But that's what tomorrows are for, practice today, put in it tomorrow. Additionally, we didn't install the latch first, so we need to attend to that task. It's a lot easier to do with the sash out of the way.


IMG_1360.JPG
 
will we did it. got the glass back out in the dark. big power outage today still haven't heard the correct story on it but to went out around noon and back at 6. that assumably is heavy. this time I put a piece of blue tape on the outside. but some time struggling to get it back in and losing the frame on the third try we cracked the corner setting it down to pick the frame up. so, we need a new glass. that old stuff gets brittle. put the rest of the guts into the door shell and started to strip the front door. we need to run to Rapid to get another one cut. so do that tomorrow. miss jack on those short runs. the cat just won't get in the truck. dark a 4:00 now so went in a lit the lamp to wait out the light.
 

Attachments

  • IMG_1361.JPG
    IMG_1361.JPG
    1 MB · Views: 32
  • IMG_1362.JPG
    IMG_1362.JPG
    957.8 KB · Views: 26
  • IMG_1363.JPG
    IMG_1363.JPG
    819.2 KB · Views: 23
  • IMG_1364.JPG
    IMG_1364.JPG
    1 MB · Views: 21
  • IMG_1365.JPG
    IMG_1365.JPG
    923.3 KB · Views: 21
  • IMG_1366.JPG
    IMG_1366.JPG
    1.2 MB · Views: 17
  • IMG_1368.JPG
    IMG_1368.JPG
    874.9 KB · Views: 25
Got the glass up to the glass shop, it will be ready Monday. so, we took the front door apart and got it off. hoping the weather will hold long enough for us to get it sandblasted tomorrow; they are talking Sunday, Monday might get some snow. it's past due; we need to get the bugs killed off. but the trip to the glass shop was not a total bust. I found a piece of plywood at the restore shop for 2 bucks. now we can get the sill for the rear door back on. this has got to be the door in the wreck. The tab holding the skin to the frame is broken, and the inside flange is tipped way in. we'll see when we get to stripping the door.


IMG_1369.JPGIMG_1370.JPGIMG_1371.JPGIMG_1372.JPG
 
The weather held today, so we got the jams sandblasted. I had just enough material to do. We have used up 3 bags on this car for the doors. stripped the outer panel as long as we were outside. Then, I primed the jam. found one of the drain holes plugged with undercoating, so cleaned it out. and retreated back to the shop as the sun went down. brazed the rust holes shut inside and out of the corner. Hopefully, we melted out enough of the undercoating for it to breathe now. picked up a few door dings, as long as we slapped filler on things and primed the door. Let the fog out before we close up to go in. If it's nice enough tomorrow, we'll get it ready to hang, jammed, when we clean up the opening.


IMG_1373.JPGIMG_1374.JPGIMG_1375.JPGIMG_1376.JPGIMG_1377.JPGIMG_1381.JPGIMG_1382.JPGIMG_1387.JPGIMG_1388.JPGIMG_1389.JPG
 
It's Sunday and we had some extra guests for breakfast. They were after green stuff. momma has booted them out while the rut is on. one of them is a late one a lot smaller than the others. We'll see what rolls in tomorrow, but the way the critters are packing it in there suggests a change is coming.
Got the front door jamb done first off, while it was decent outside. Then, I worked on the inside one. But as long as we had time and a door we could get around, I ran the board file over it with 80-grit to ensure we got everything we needed. We have a lot more lead on this one, so we will have a few spots to fill after it's hung. But worked myself out to the shop for a while. So I brought the door back in and closed.


IMG_1391.JPGIMG_1392.JPGIMG_1393.JPGIMG_1394.JPGIMG_1395.JPGIMG_1396.JPG


IMG_1394.JPGIMG_1391.JPGIMG_1392.JPG
 
It was intended to keep the small kids next door from falling over the wall, but they are all big now. So, take your pick.
We did get rain today went north to pick up the glass. It was widespread. got down to 35 on the way back; white stuff might fall overnight, but it's coming up from the south, which usually brings warm air. got back in time to get the glass in place. That was an expensive mistake. It's a big piece of class. But now it goes up and down like it should. Now to get the front door back together


IMG_1397.JPGIMG_1398.JPGIMG_1399.JPG
 
Finally, we have all the doors back on. finished up the center, got the weather strip on, and the latch in place, it will close. We still have some repair work on the front one. But rather than wrestle with it, I decided to hang it in place to keep it stable. a lot of lead in this door. around the handle and above the molding. Needless to say, we damaged it by stripping the door. The soft lead and the 36-grit disk on a compound curve are not a good choice. So, a thin layer of filler is much better than a thick layer of primer. We can pick up the scratches and hollow spots. welded the broken strap and straightened the lip. Then, I worked at getting the door back together, the latch in, and the glass regulator back in place. Man, these front doors on this car have the most complicated system I have ever seen. I marvel that Pinner was able to modify the works and get them to function. It's something to get back together.


IMG_1400.JPGIMG_1402.JPGIMG_1403.JPGIMG_1408.JPGIMG_1412.JPGIMG_1413.JPGIMG_1414.JPGIMG_1415.JPGIMG_1416.JPG
 
spent the afternoon working on the door and repriming. The trick is to find something the right size for your curve. The caulk tube is it. I got the glass back in and the glass stop in place. minor problem with the rubber around the vent window. It's been pulled out of the top of the frame for some time now. noticed it when we took it out. forgot about it till I got it back in. I don't want to pull it again unless I have to. We coated it with a little WD-40 and still couldn't get it to pop in place. Hopefully, by tomorrow, it will have softened up enough to do it. WD works good but takes a while. With the weight back in the door, the body lines line up nicely.


IMG_1417.JPGIMG_1418.JPGIMG_1419.JPGIMG_1421.JPGIMG_1423.JPG
 
We finished up the door, put the striker in place, made the final adjustment on the window, put the top piece of sash in place to keep the whistling down the road, and sealed the vent window back in place. The WD did its trick overnight, and we were able to get the rubber to slide into the groove. Then we installed the weather seal. The door shut nicely when we finished. But I hate messing with the glue on stuff. You get it all over by the time you're done. So now we have 5 doors that work, close, and seal, and are repaired. We are gaining. went to put the garnish molding back on the windshield, found it had scratches, so we repainted it. Next up, the rear door sill. Rather than buy a 4x8 sheet, we will laminate our own. get to use this jigsaw I bought in '71 when we moved back home after the service. I don't know of another tool you could buy today that would last this long. Now to get things marked out and cut.


IMG_1424.JPGIMG_1425.JPGIMG_1426.JPGIMG_1428.JPGIMG_1429.JPG
 
made a mistake today, thought I would save my adopted daughter some money and put the spark plugs in her V6 Impala for her. Never do that again took 30 minutes for the first 3 on the outside and 3 hr for the inside ones. Broke 2 wires doing them. Now I know why they wanted to change wires and plugs. There's something to get those long boots off when they have been on for a few years. But it started when I got done. I'll never do that again. We did get the filler board cut, glued, and screwed in place. But that's all we got done on the Pinner. Don't forget to nip off those sheet rock screws; they are sharp. The molding and trim adhesive works well on wood. We can trim it to fit and add some filler, and paint it tomorrow.


IMG_1430.JPGIMG_1431.JPGIMG_1432.JPG
 
Just when I had a light day planned, I found trouble. Better now than later. Drilled holes in the shelf board and performed a test fit. It only needed a slight trim on one side. So now it's fill the rough spots and get it primed. Discover the last fix I did to get the glass to go up. Smother did more harm than good. so spent a little time fixing that. The glass pitch control needed to go the other way. There's a lot of room to work on things that have been moved, where Chrysler put them. But we were able to extend the slide hole a little more to get the lower front raised up a bit to close the gap. Now the glass rolls up like the driver's side, but it seals. started stripping the roof. They are calling for snow this weekend. We will see if they are right. In the meantime, when we get done making dust, I will be happy.IMG_1433.JPGIMG_1434.JPG The whole side of the top from the roll down is leaded. I'm only trying to remove the two layers of white on the top. The primer spots are low spots in the lead. filled in with and blocked smoothly. We are using the 8-inch disk and holding it as flat as possible with 40-grit paper. it's the fastest way to strip I know of. We'll follow up with 80 grit on the board file to take out any waves we might have put in. The white pebble finish on the top wouldn't show much.
 
The top is trying to strip itself, but it's doing it slowly. So we are helping it along. tried a few ways to get the light pods; they are something else to do. The needle scaler gets the paint off fast, but it's a little hard on the lead. So that's out. The 8-inch disk is way too fast and tends to cut in or make flat spots on the sharp curves, so that's out. We tried to start the paper on the day that seemed the easiest. The paper lasts long enough to get something done without cutting in, and the day is slow enough not to cut into the lead, but at a $1.50 a sheet, one still hates to get up a new one. But you've got to do what works. I see someone thought that spot puddy was the way to go in the center. It's not. The first thing we did was block the side with the board file to remove the 40-grit scratches from the lead. Can you tell where I stopped? We did not try to remove the old primer, just feathered it out.


IMG_1445.JPGIMG_1446.JPGIMG_1447.JPGIMG_1448.JPGIMG_1449.JPGIMG_1451.JPGIMG_1452.JPG
 
Here we are surrounded by 10 grand of power equipment, and the only way we can get to the bottom is by hand. welcome to the body shop. we have 3/4 of the roof stripped now should be done tomorrow. the seam in the roof is dead center is as the rest of the top all lead. not well done, but it amounts to a case of restore or over-restore. we'll leave some of the manufacturer's defects rather than remove every ripple. working the lead is hard work; it's like sanding a sponge. it grabs the paper and wants to stick we the steel it just slips across. you have to be careful if you cut threw it to the base metal, as to continue, you will hollow out the lead where you broke threw, if you keep going, leaving a high spot of steel. so when you're sanding with the long board, you're looking for the different color, so you know when to stop. if you see steel on both sides and still white paint in the center, you know you have a low spot you can't sand out. the big spot here is on the right. with the side lights in the shop we could see them before we started. the hope is that we have toned them down, working as much of the lead as we did. the problem was working the lead with a disk to start with. time will tell


IMG_1454.JPGIMG_1455.JPGIMG_1456.JPGIMG_1458.JPGIMG_1459.JPG
 
Well enough of that, we did get the white stuff off and onto the floor. That was a plus. If you have ever wondered what 2 layers of white paint on the floor would look like, it's about a #10 scoop. We got the trough leveled out. A check reveals the seam is a little low. We did remove the lumps, but can't build it up any. Since we won't be doing anything tomorrow, I went ahead and shot some primer on the rough places. Friday, we can hit them with a little paper and fill in the heavy scratches and OR pits. The main one is the light tubes I cleaned off with the scaler. We won't do that again on lead.


IMG_1460.JPGIMG_1461.JPGIMG_1462.JPGIMG_1464.JPGIMG_1465.JPGIMG_1466.JPGIMG_1467.JPG
 
Is that a base for an antenna right behind the beacon? I vaguely remember that there was a CB hookup in the car at one time, or so I was told when I brought the car back to the Rhinecliff Fire Department the weekend of the big car show in Rhinecliff. Gee, that seems like it was in the previous century.
 
Back
Top