
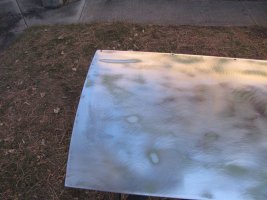
I couldn't figure out what was going on with that mirror, so I just replaced it with a new one. I couldn't ever figure out why there was so much filler on the top of the fender. I think I still have the right-hand mirror I purchased, but never got around to installing. I will have to look for it.

You are using an out of date browser. It may not display this or other websites correctly.
You should upgrade or use an alternative browser.
You should upgrade or use an alternative browser.
63 Pinner Hightop
- Thread starter John ED Renstrom
- Start date
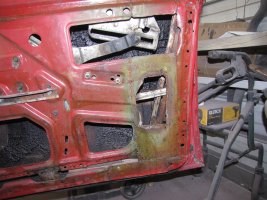
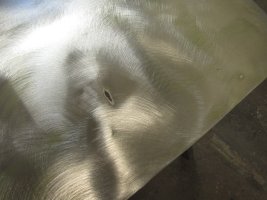
There is either a thick plate there or a repair i don't
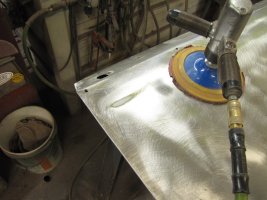
plan on removing the filler unless we have to. It was all filler as you can tell from the slots i sawed around it after grinding out with a stone it now a thick layer of steel but i got the knob threw the hole and its the same size as the hole in the base gasket now.
plan on removing the filler unless we have to. It was all filler as you can tell from the slots i sawed around it after grinding out with a stone it now a thick layer of steel but i got the knob threw the hole and its the same size as the hole in the base gasket now.
That hole must have shrunk since I installed the new remote control mirror. 
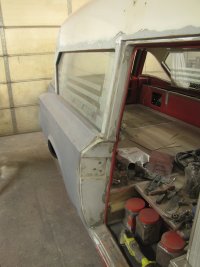
I'm wondering if they didn't enclose it for some reason when they were making adjustments for you. It's the only reason for it, you could not have gotten it in any more than I could get it out. I had one of those days where things ate up a lot of time. But did manage to clean up the hinges and the upper door trim pieces. Got those hinges primed and painted. That was more than Chrysler did. They added a hint of color, or if it was there, it was so thin that you couldn't find a trace of it. You can see where Pinner extended the upper door trim for their approximately 6-inch longer front door.


We started out with good intentions. My son came down and we made arrangements to place his mother up in the family plot. We were married for 25 years, and dead is dead. Finally got to get something done on the Pinner. We began reassembling the door. It is a strange one, as everything is on a slant as far as the glass goes. Took forever to get the inside remote hooked up. It's intertwined with the glass riser, requiring a precise press in the keeper, so that things need to be lined up just so to get it in. Finally got things starched out just right and locked in place after about a dozen tries. Went to slide the glass in place and discovered it was falling off the riser. Two late to get anything to lock it on the glass tonight. So tomorrow we can get it back together. Found the filling the trough with urethane works till you have to remove it.
One thing you may not realize is just how challenging it was to stretch this door 6 inches. They had. To add that much to every horizontal part of the door. In the case of the glass riser, it's 3 inches on each end. To keep it centered.


One thing you may not realize is just how challenging it was to stretch this door 6 inches. They had. To add that much to every horizontal part of the door. In the case of the glass riser, it's 3 inches on each end. To keep it centered.
Ed, that is the same window that I had a problem with the day that I delivered the car to the shipping company to take it to Texas. The glass had cracked when it came loose from the track, and Nick had a local glass company replace it. The glass is set in a special setting tape that you push the glass into it after you fold it into the track. Once it is set in the track, you spray it with an oil, such as WD-40, and the setting tape expands, holding the glass tightly in the channel. My guess is that the tape has dried out from the Texas heat, and it has lost its grip on the glass. Clean the glass and gently push it back into the channel. Spray it with oil, and the next day, clean the glass again. I wouldn't recommend using any other type of product, as it would make cleaning the channel difficult if the glass were to get damaged again. Do it correctly the first time. If you need new setting tape, your local glass supplier should be able to supply you with a strip at a minimal cost.
That's a new one on me. Used a number of different products to set the. The rubber covered cork is standard along with the older friction tape. Still have a set of tools to tap them into place. The first shop i worked in cut flat glass so did a lot of them before i was old enough to vote. Funny how things returned to stuff you did when this car was new.
Got the door together finally. Still fighting a problem rolling up the glass. It slides out of the track and binds. Found the rear mount for the track had broken free. We were able to get it tight with the torch. But there is a step in the rear guide. The other side has one welded on top of the other for a smooth decline. This one gets about halfway up and falls out of the track at the upper rear corner, binding. Messed with it too long; I'm missing something. I hope to find it tomorrow. No adjustment is needed for this door glass; the pitch is fixed. Hopefully, a fresh start tomorrow will help. down to the weather strip and final adjustment, and on to the other side.


Last edited by a moderator:
Is the other side still together the way you received the car? What ever is on the other side and is working will tell you what the problem is with the left side.
Yes it is and it worked smoother then the drivers side when i was playing with it before we started the tear down. The difference sticks out.
Decided to add a piece to the driver's door. To match the passenger's side. It would help keep the glass from kicking back. Looked threw everything, I don't have a piece of stock left and lying around anywhere. So found a stick of square stock and made me one. I laid it in the door first, and it is a straight shot in the rear. So that is not a problem. I had to redo the bolt for the front as the jam nut was stripped, and you could not tighten it. Now the glass doesn't tip and try to slide out of the track. So that is an improvement, but it still binds up or down in the dead center with the arms. I have something upside down, so we are not getting the proper leverage at that point above and below; it's good. A lot of moving parts in the riser with odd angles. We will try to figure it out tomorrow. Not too easy to see in there when it's working. But at least we are gaining on it.
Attachments
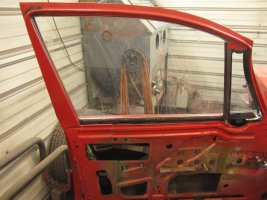
Started out with a clear head after thinking about things, and we discovered that if I removed the glass from the riser, it would slide up and down with ease. I centered the riser on the glass, but for whatever reason, it needs to be a hair more forward. Used the rat tail file to make the slot bigger, and it works smoothly now. Only need a 1/8 of an inch. The nice part of painting with liqueur is the ease of spotting it in this spot, as we burned fixing the riser with back red in now. First, let's take a little primer on it. While it is setting up, we can start on the other center door. Knowing how to take it apart makes things go a lot faster. We can sand, paint, and blend our spot in. Tomorrow, we can install the weather seal. And this door is done. On the inside, at least.


We're having trouble loading pictures tonight, so we might have to do without them. Got the rest of the things back in the car. Notice that we have everything for the jack except the main part, which is missing the post. Got the weather strip on the front door, and it even closed, so we started stripping the right center door. Got about half of that when it was time to come in.
Found that if I hold the adaptor, I can get the broken wire to make contact so here are those pictures weather stripping in place so let it set up, and we started on the right center door stripped the flooring off the hatch and got it boxed up to sent of to a shop the Nick found that can redo the old patterns in small batches.


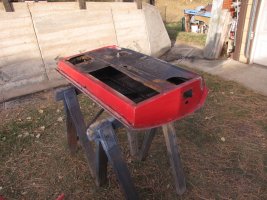
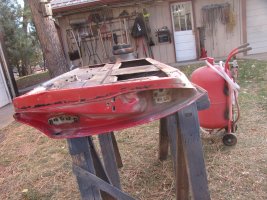
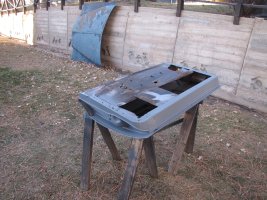
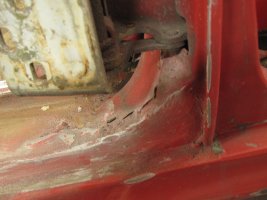
So what did we do today! Talking of a turn in the weather so we too the afternoon to get the door off and out side to sand blast the inside edges and then finished striping it out side. This door is a lot ruffer then the left. A lot of small dents like it got banged into a lot. Pried the big one up and ground it down. Filled them in and got it primed. While things we setting up we got a start on the jam.
Attachments
-
 IMG_1322.jpg737.7 KB · Views: 9
 -
 IMG_1323.jpg733.3 KB · Views: 9
 -
 IMG_1326.jpg848.5 KB · Views: 12
 -
 IMG_1324.jpg658.2 KB · Views: 11
 -
 IMG_1325.jpg600.4 KB · Views: 11
 -
 IMG_1327.jpg622.1 KB · Views: 11
 -
 IMG_1328.jpg490.6 KB · Views: 11
 -
 IMG_1329.jpg443.4 KB · Views: 11
 -
 IMG_1330.jpg417.8 KB · Views: 11
 -
 IMG_1331.jpg360.7 KB · Views: 13
Rick Franklin
PCS Member
Im just in awe of your skill, knowledge and craftmanship.
thanks Rick that from a guy that can keep his cool loading a wrecked car in 6 lanes of moving traffic. I have been doing this kind of work for a long time now and i enjoy doing it. That being said today was one of those days. Used the 72 Seville to take the ex up to the family plot so my son could lower his mother in the family plot next to his brother. Things went will. One nice day before winter hits. Spent the rest of the afternoon shuffling cars off from in front of the house to the back yard. But in the effort to get this one back home remember do at least one thing positive a day so we sanded off the pillar and went in. That's less to do tomarrow.
Attachments
So with other chores done, we had time to make some progress. Never planes on working any lead but this b pillar just is rought. So worked a little on the base of it. No one will know I did it but me, but I'm happy. We'll do this side just as we did the other, and paint both sides of the B pillar this time. Then, we'll blend it in when we do the front door. As long as we are doing red, let's get the door shell jams along with the screws and bolts. Then tomorrow we can get it hung and the top cleaned up and primed. This building gets small when you can't open the door. It's in the 30s outside today. But no snow and above O, so count your blessings.


So with other chores done, we had time to make some progress. Never planes on working any lead but this b pillar just is rought. So worked a little on the base of it. No one will know i did it but me buy I'm happy. We'll do this side just as we did the other, and paint both sides of the B pillar this time. Then, we'll blend it in when we do the front door. As long as we are doing red, let's get the door shell jams along with the screws and bolts. Then tomorrow we can get it hung and the top cleaned up and primed. This building gets small when you can't open the door. It's in the 30s outside today. But no snow and above O so count your blessings.
I don't know how we came up with the last narrative. But it happened. See the big boss was in inspecting again while i was visiting Kandy. Had to work at mounting the door back on. Cleaned the heads off, but forgot to do the threads; they were a little rusty. Had to get the big ratchet to get them back in place. They are clean now. Used some black paint to see where the front door is still touching on the upper front corner. Just a little too much lead covering the joint. The 3-inch sander, with its smaller backing pad, toned it down until it stopped leaving black marks. Right now, it's just chewed up the weather stripping, which has it off. Got the run channel off the glass frame so we can clean off the old paint. Getting close to going, we painted some rust converter on the lower and poured the remaining into the corner of the front door where it's pin-holed. Let it work on the rust hiding in there.


