
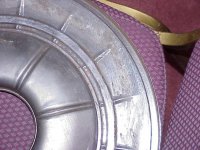
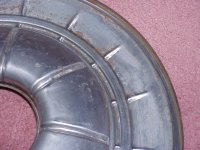
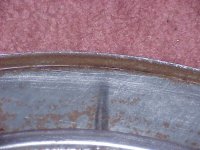
I will start by saying that the hardest part to detail on the engine is the air cleaner bottom. The reason that it is so hard to do, is that it was barely painted at the factory, and by the nature of how it sits, it collects water and will rust badly. I have seen some where the bottom sealing lip is totally rusted away. In the first picture, I have already removed the bottom sealing rubber gasket using a flat bladed screwdriver to determine how badly this one was going to be. After removing the gasket, I did some preliminary rust scale removal with a wire brush. Then I brought it inside for decreasing and further cleaning. Keep in mind, that the inside of the bottom is only seen when you change the filter element, and the bottom is not visible on the car, so the only area that you have to be concerned with is the 1/2" lip that shows on both the outside of the lip and inside above the gasket.

You are using an out of date browser. It may not display this or other websites correctly.
You should upgrade or use an alternative browser.
You should upgrade or use an alternative browser.
Detailing the air cleaner Part 1
- Thread starter Paul Steinberg
- Start date
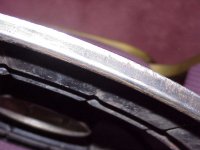
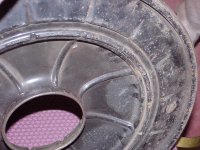
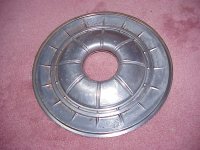
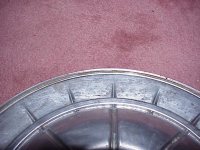
After using a Brillo pad, and Greased Lightning, my degreaser of choice, I then took it outside and further cleaned the inside edge with some 40 grit sandpaper. I also took a file to the top of the edge to remove any sharp edges that have formed as a result of rust removing some of the metal. In pictures 2 & 3, you can see that one half of the edge is in perfect condition, but 180 degrees on the other side, it is deeply pitted with rust, even after much wire brushing and cleaning with sandpaper. I will either use some rust converter on these spots, or put it into my bead blaster and glass bead the metal till I am down to shinny metal. This is one time that you can't gamble on the paint covering the defects, since it will be so prominent in the engine compartment. Besides, the top half of the air cleaner will come out perfect if you put the effort into it, and if the bottom has flaws, it will show even more.
Attachments

Engine Pics
A few out of my 64.


A few out of my 64.
I know what that air clean indicates... ")
[ame]http://www.youtube.com/watch?v=yil9wlfa0yo[/ame]
[ame]http://www.youtube.com/watch?v=yil9wlfa0yo[/ame]

the hardest part is getting the colors right. Dans magnum is flat black Paul's new yorker is semi-flt and GM used a gloss on the air cleaner. anything you do to clean is up is good but if the colores are off it just does not look right.
Dan's engine is Blue, and mine is Turquoise, and to make matters worse, they also used Hemi Orange on some. I have found some parts of the engine are gloss black, some are semi gloss black, and some are flat black. The only consistent thing about this car is the inconsistencies. I removed the carburetor spring and soaked it in Evapo Rust. When I took it out and rinsed it off, I noticed some flecks on a few of the coils. I took it out in the bright sunlight, and found that the spring had been painted lilac color at the factory. I went looking for lilac paint and found some in a spray can. Sandy commented... "$5.00 for a can of paint to paint one spring. What are you going to do with the rest of the can?"
I look at every 1963 Chrysler for sale on eBay and save all the pictures of the original unrestored engine compartments to use as an additional guide.
I look at every 1963 Chrysler for sale on eBay and save all the pictures of the original unrestored engine compartments to use as an additional guide.